Entering records: Difference between revisions
| Line 133: | Line 133: | ||
</td></tr></table> | </td></tr></table> | ||
</center> | </center> | ||
<br/> | |||
<br/> | |||
==Additional information== | |||
===Comments=== | |||
===Details=== | |||
===Atlas code=== | |||
===Hidden record=== | |||
===Picture=== | |||
===Mortality/injuries=== | |||
Revision as of 22:44, 15 November 2022
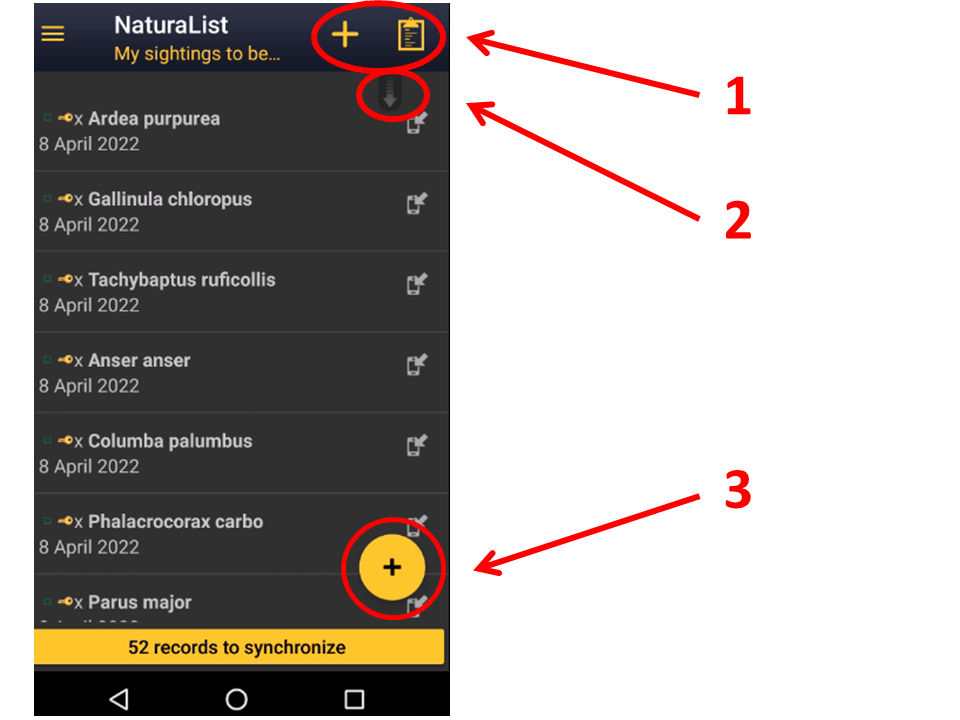
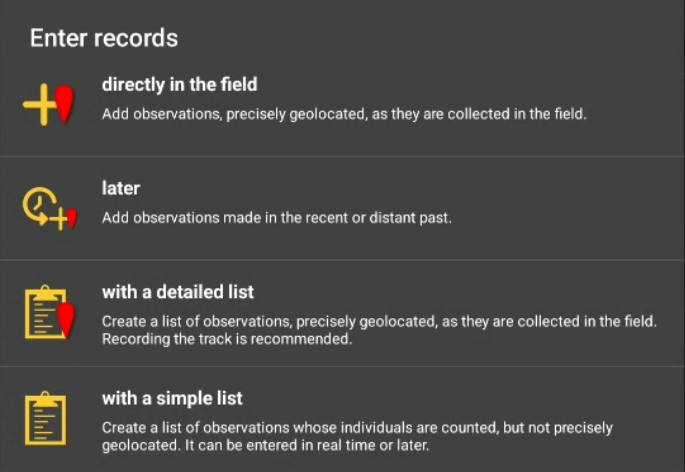
To share your observations, click on the + sign at the bottom left corner (see image Submitting records). A menu will open with all possible options to enter your records (see image Different options to submit records). Use the shortcuts on the top right corner for a direct access to directly in the field and with list in the field. Scroll down the refresh arrow to refresh records. It is especially useful when browsing records near me.


|
If you are not yet familiarised with the application, enter records as directly in the field. This is the easier option. As you familiarise with the application, move to other options. Lists are the more useful way to enter data for conservation purposes. |
Directly in the field (+)
Use this option to enter discreet casual observations in real time. You can access it from the main menu or from the shortcut the top right corner of the screen (see image Directly in the field).

Place
|
Smiley = Observer's position Red marker = Data position |
Indicate the position of the observed individual by moving the map to match the red marker. To know how to navigate the map, see wiki section Mobile interface > Navigating the map. Use tha "aim" icon to activate the GPS and wait for the yellow smiley before continuing. When done, click on Next.
Use the "list" icon on the left to see a list of all your previous records (see image below).

Species
There are two different ways to enter the species according to your preferences. Set your preferences by going to Menu > Preferences > Personalisation > Display of species (see image Display of species).
- Choose by search: Choose the taxonomic group from the top horizontal panel and start typing the species name. A list will appear underneath from which to choose the correct species. See image Display of species by species.
- Choose by group, family, species: Start by selecting the taxonomic group, then the family and finally the species. See image Display of species by group, family, species.
Note the species' names will show in the language you selected in Preferences. To change it, go to Menu> Preferences > Species > Language of the species.
Number of individuals
Enter the number of individuals first and choose the accuracy of the count. Choose between Not counted, approximate number, exact number or minimum number (see image Entering number of individuals). If you did not count the individuals, for example for very common species, there is no need to introduce any number.

|
|
If you need to add new individuals as you count them, click on Start a counter and keep adding or subtracting individuals (see image Start a counter) until all are counted or you need to move to another species. Click Close to end the count and continue entering the observation.

|
|