Rook: Difference between revisions
No edit summary |
|||
| Line 20: | Line 20: | ||
<div class="toc" style="width:350px;"> <!-- La llargada s'ha de canviar aquí --> | <div class="toc" style="width:350px;"> <!-- La llargada s'ha de canviar aquí --> | ||
<div class="mw-collapsible mw-collapsed" data-expandtext="Show" data-collapsetext="Hide" style="width:300px;margin-bottom:0px;margin-top:0px;background-color:#f7f7f7;"> | <div class="mw-collapsible mw-collapsed" data-expandtext="Show" data-collapsetext="Hide" style="width:300px;margin-bottom:0px;margin-top:0px;background-color:#f7f7f7;"> | ||
''' | '''Rook''' | ||
<div class="mw-collapsible-content" style="width:350px;background-color:#f7f7f7;"> <!-- I també cal canviar la llargada aquí --> | <div class="mw-collapsible-content" style="width:350px;background-color:#f7f7f7;"> <!-- I també cal canviar la llargada aquí --> | ||
<ol> | <ol> | ||
1 [[Rook#Preparation_and_data|Preparation and data]] <br /> | |||
<ol> | <ol>1.1 [[Rook#Add_observations|Add observations]]<br/> | ||
<ol> | <ol>1.1.1 [[Rook#Starting_the_protocol|Starting the protocol]]<br/> | ||
1.1.2 [[Rook#Entering_observations|Entering observations]]<br/> | |||
1.1.3 [[Rook#Ending_the_protocol|Ending the protocol]]<br/></ol></ol></ol> | |||
<ol><ol> | <ol><ol>1.3 [[Rook#Display_on_map|Display on map]]<br/> | ||
1.4 [[Rook#Modify_the_protocol|Modify the protocol]]<br/> | |||
1.5 [[Rook#Census_results|Census results]]<br/> | |||
1.6 [[Rook#Download_map|Download map]]</ol></ol> | |||
<ol> | <ol> 2 [[Rook#Check_data|Check data]]<br/> | ||
3 [[Rook#Map|Map]]<br/> </ol> | |||
</div> | </div> | ||
</div> | </div> | ||
| Line 60: | Line 60: | ||
<div class="toc" style="width:350px;"> <!-- La llargada s'ha de canviar aquí --> | <div class="toc" style="width:350px;"> <!-- La llargada s'ha de canviar aquí --> | ||
<div class="mw-collapsible mw-collapsed" data-expandtext="Show" data-collapsetext="Hide" style="width:300px;margin-bottom:0px;margin-top:0px;background-color:#f7f7f7;"> | <div class="mw-collapsible mw-collapsed" data-expandtext="Show" data-collapsetext="Hide" style="width:300px;margin-bottom:0px;margin-top:0px;background-color:#f7f7f7;"> | ||
''' | '''1 Preparation and data''' | ||
<div class="mw-collapsible-content" style="width:350px;background-color:#f7f7f7;"> <!-- I també cal canviar la llargada aquí --> | <div class="mw-collapsible-content" style="width:350px;background-color:#f7f7f7;"> <!-- I també cal canviar la llargada aquí --> | ||
<ol> | <ol> | ||
1.1 [[Rook#Add_observations|Add observations]]<br/> | |||
<ol> | <ol>1.1.1 [[Rook#Starting_the_protocol|Starting the protocol]]<br/> | ||
1.1.2 [[Rook#Entering_observations|Entering observations]]<br/> | |||
1.1.3 [[Rook#Ending_the_protocol|Ending the protocol]]<br/></ol></ol> | |||
<ol> | <ol>1.2 [[Rook#Results|Results]]<br/> | ||
1.3 [[Rook#Display_on_map|Display on map]]<br/> | |||
1.4 [[Rook#Modify_the_protocol|Modify the protocol]]<br/> | |||
1.5 [[Rook#Census_results|Census results]]<br/> | |||
1.6 [[Rook#Download_map|Download map]]</ol> | |||
</div> | </div> | ||
</div> | </div> | ||
Revision as of 13:58, 23 October 2025
CORVUS
Access your protocol from Menu > Take part > All my protocol > Rook.
For other options, visit wiki section Web interface > Local portal > Protocols > Accessing protocols.

Rook. Menu.
Rook
-
1 Preparation and data
- 1.1 Add observations
- 1.1.1 Starting the protocol
1.1.2 Entering observations
1.1.3 Ending the protocol
- 1.3 Display on map
1.4 Modify the protocol
1.5 Census results
1.6 Download map
- 2 Check data
3 Map
CORVUS Preparation and data

Rook. Preparation and data.
Lists all sites available to the current profile and allows entering observations, downloading printable maps and seeing results.
1 Preparation and data
-
1.1 Add observations
- 1.1.1 Starting the protocol
1.1.2 Entering observations
1.1.3 Ending the protocol
- 1.2 Results
1.3 Display on map
1.4 Modify the protocol
1.5 Census results
1.6 Download map
CORVUS Add observations
Click on Add observations (see image below) in the site you need to enter data to.

Rook. Add observations.
CORVUS Starting the protocol
Before entering observations, it is required to enter general parameters regarding the protocol. Parameters are protocol specific. Fields marked with an asterisk are mandatory.
See wiki section Web interface > Protocols > Preparation and data > Add observations > Starting the protocol for details.
When done,
Click NEXT to start entering observations.
Click NO ROOK SEEN to end protocol if your survey did not provide any data.
CORVUS Entering observations
To enter observations:
1. Click on the map to indicate its position (see image below as an example). Each sighting is indicated with a different point colour. The active one is highlighted in blue and can be reposition by clicking and dragging.
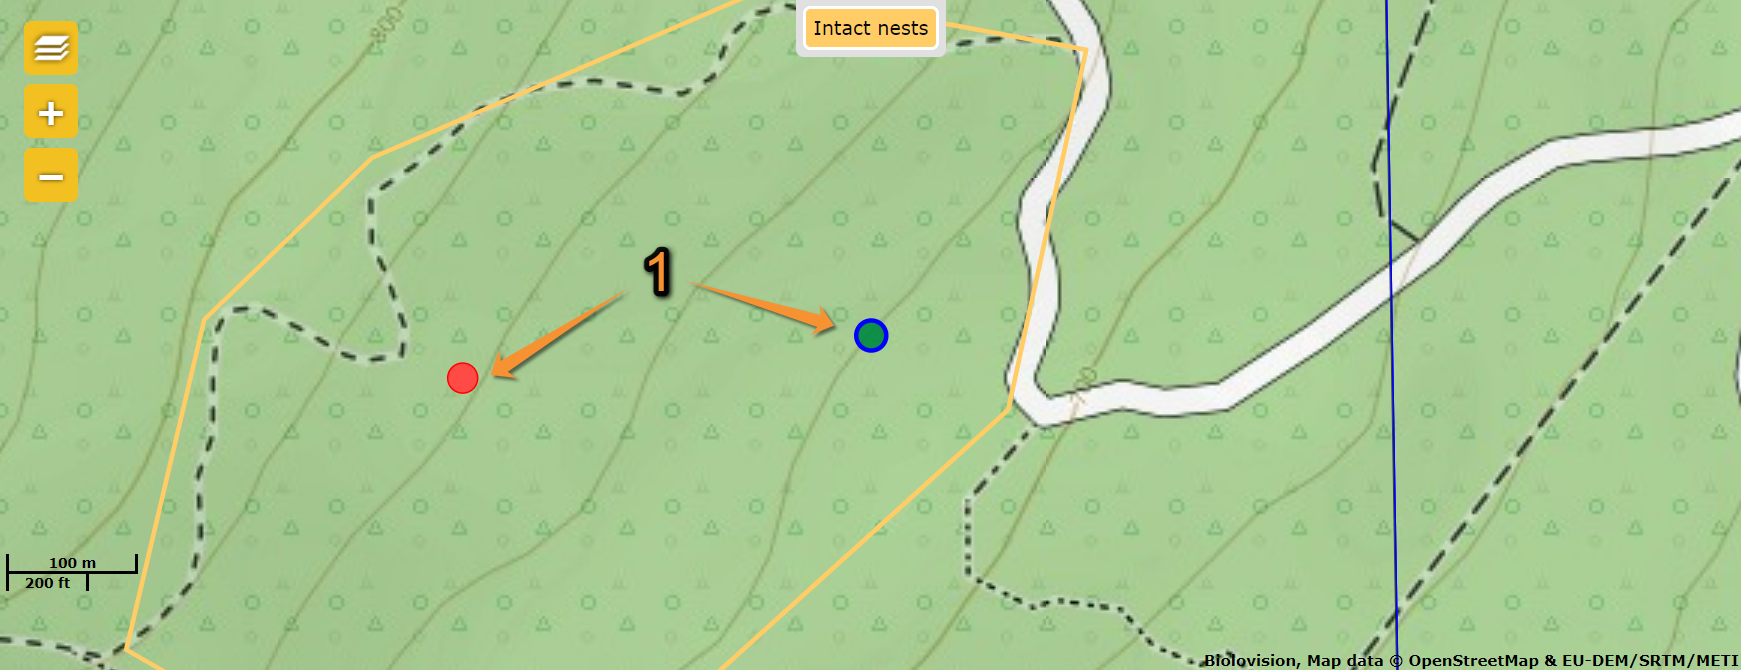
Rook. Add observations. Position.
1. Position: Click at sighting's position.
2. Scroll down to modify data or enter details (see image below). Note dot colours match those in the map above.

Rook. Add observations. Details.
2. Position: Allows correspondence between entry and the position indicated on the map above.
3. Nest information: Type number of nests in each class. In this example, Intact nest and Occupied nests.
4. Altitude: Altitude of observation. Automatically determined.
5. Atlas code: Choose from the expandable menu the corresponding atlas code.
6. Delete: Use bin to delete the entry.
3. Open panel to enter additional information.
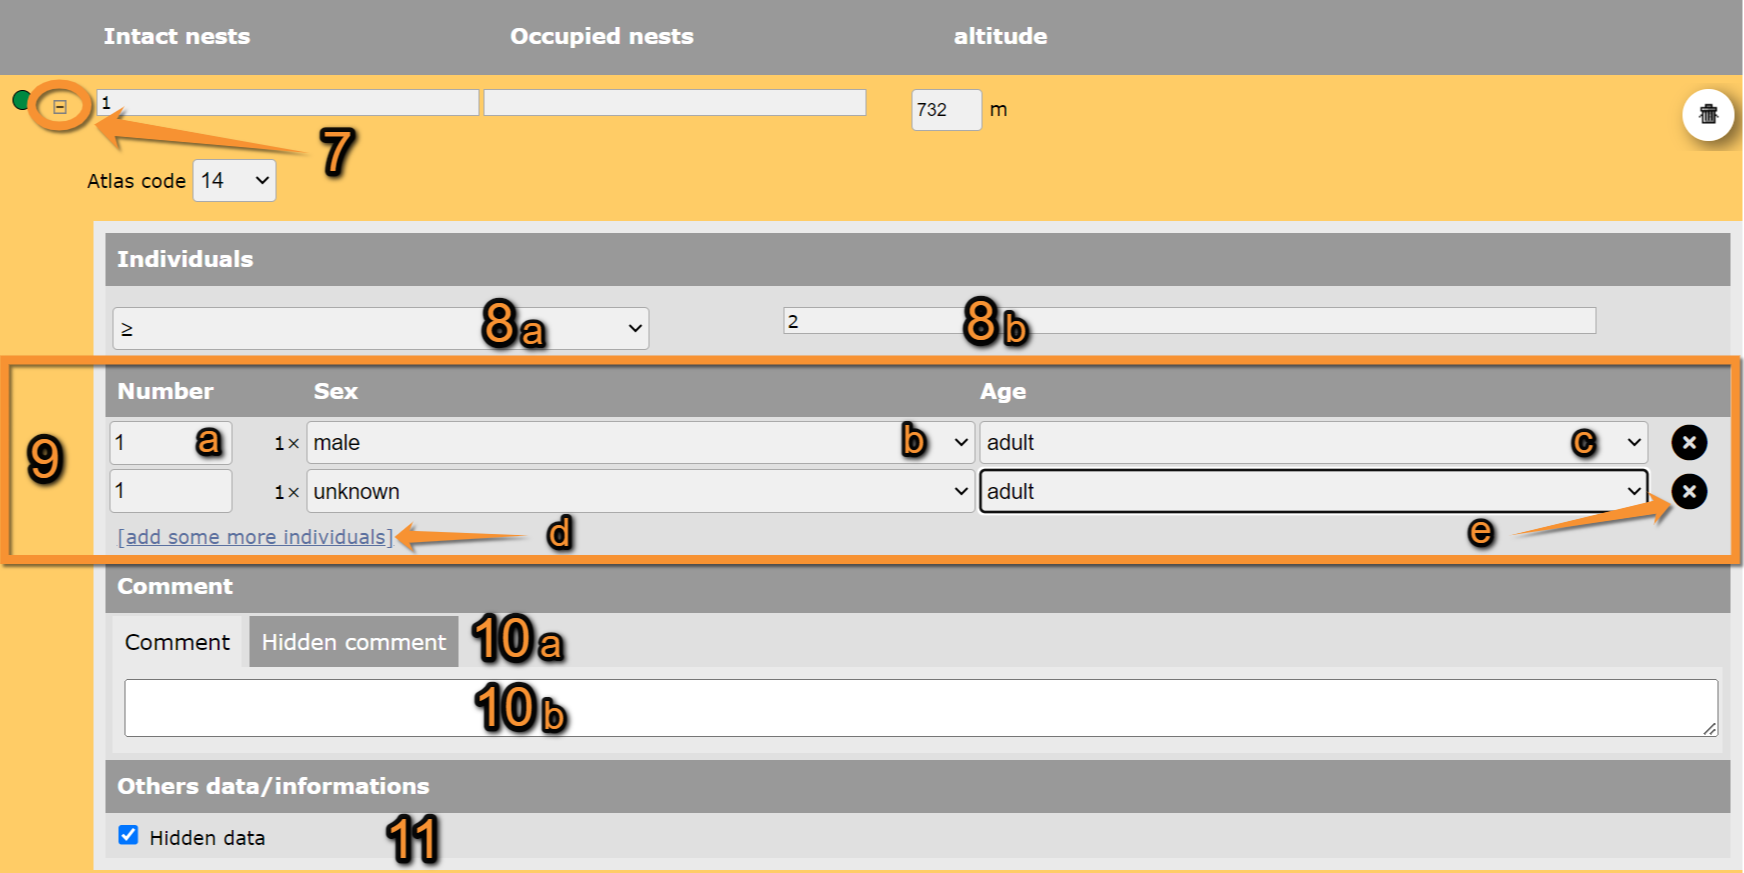
Rook. Add observations. Additional information.
7. Additional details panel: Open/close additional details panel.
8. Individuals: Type number of individuals for this observation (8b) and choose precision count from the expandable menu (8a).
9. Number of individuals per each sex/age class: Choose from the expandable menu sex and age (9b and 9c respectively) and type number of individuals belonging to this class (9a). Add a new sex/age class (9d) or delete a sex/age class (9e) if necessary.
10. Comments: Choose type of comment from the tabs (10a) and type test (10b).
11. Other data/information: Check to hide your records from the public. Remember administrators will still see them.
CORVUS Ending the protocol
Click on I RECORDED ALL SPECIES OF THE PROGRAME to end the count.
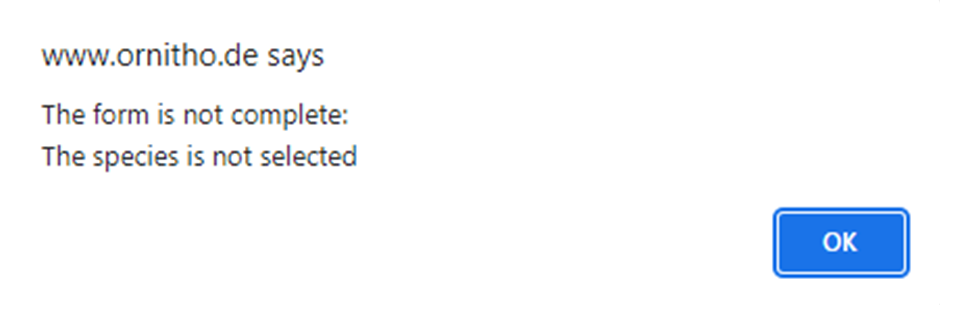
A green badge at the top will indicate your data has been saved. If there is some problem with your data, an error message will prevent you from continuing.
See wiki section Web interface > Protocols > Preparation and data > Add observations > Ending the protocol for more information.
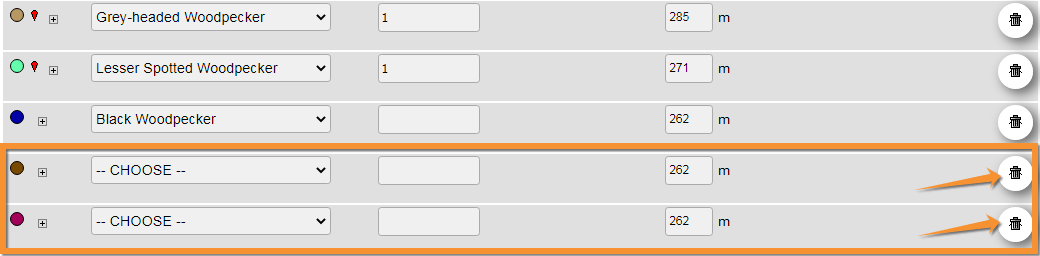
In order to submit your data properly, delete all empty entries in the list. Otherwise, you will see an error message preventing you to continue.
CORVUS Results

Rook. Results.
See some statistics about your surveys results.
Visit wiki section Web interface > Protocols > Preparation and data > Results for details.
CORVUS Display on map
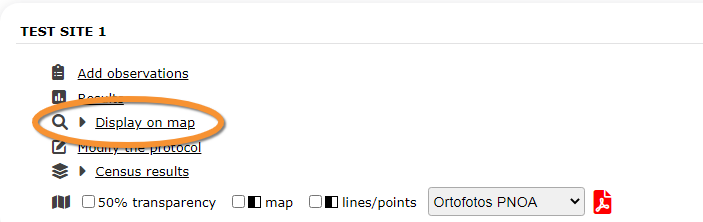
Rook. Display on map.
For the selected site, see the area to survey on a map. To know how to navigate the map, refer to wiki section Web interface > Navigating the map.
Visit wiki section Web interface > Protocols > Preparation and data > Display on map for details.
CORVUS Modify the protocol

Rook. Modify the protocol.
Modify the site to survey.
Visit wiki section Web interface > Protocols > Preparation and data > Modify the protocol for details.
CORVUS Census results

Rook. Census results.
Click on Census results to see all available years with data for this site (see image Protocol. Selecting year to visualise). Select the one to visualise.
Visit wiki section Web interface > Protocols > Preparation and data > Census protocol for details.
CORVUS Download map

Rook. Download map.
Download maps ready to print.
Visit wiki section Web interface > Protocols > Preparation and data > Download map for details.
CORVUS Check data

Rook. Check data.
Calendar showing visits to different sites and number of species detected.
Visit wiki section Web interface > Protocols > Preparation and data > Check data for details.
CORVUS Map
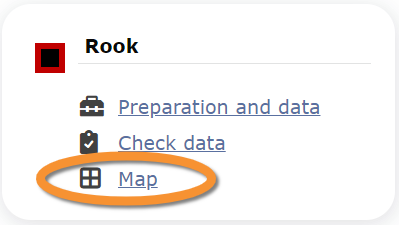
Rook. Map.
Map and statistics for site.
Visit wiki section Web interface > Protocols > Preparation and data > Map for details.