Create an object: Difference between revisions
| Line 411: | Line 411: | ||
<center> | <center> | ||
<div class="toc" style="border-radius:5px;background-color:#ffffff;padding-left:8px;padding-right:8px;width:600px;"> | <div class="toc" style="border-radius:5px;background-color:#ffffff;padding-left:8px;padding-right:8px;width:600px;"> | ||
[[File:Object_associated_to_an_obs.png|600px]] | [[File:Object_associated_to_an_obs.png|600px|link=https://help.biolovision.net/images/1/11/Object_associated_to_an_obs.png]] | ||
<div class="toc" style="border-radius:5px;padding-left:15px;text-align:left; font-size:12px;width:585px;"> | <div class="toc" style="border-radius:5px;padding-left:15px;text-align:left; font-size:12px;width:585px;"> | ||
'''Browsing object in the local portal.''' | '''Browsing object in the local portal.''' | ||
Revision as of 18:35, 24 March 2025
Describe elements found in nature, such as nests, birdhouses or tracking devices. This function is only available to users with special rights.
Objects can be associated to observations, both before and after synchronisation.
Objects can be associated in groups and groups can be shared among users. It is useful when, for example, same nests are monitored by several users. All information about any of the nests will be shared among all users in the group. One object can belong to more than one group.
Create object
- Only users with special rights can create objects.
- Your species list must match that of the local portal that granted you the right.
Access it as if entering data, and click Create object (see image below).

Create an object. Main menu.
Place
Place the pointer at the object position as explained in wiki section Mobile interface > Entering records > Directly in the field > Step 1: Place and click Create object (see image below).
Notice that when you are in the creating object mode, the pointer has a purple blue-circled dot.
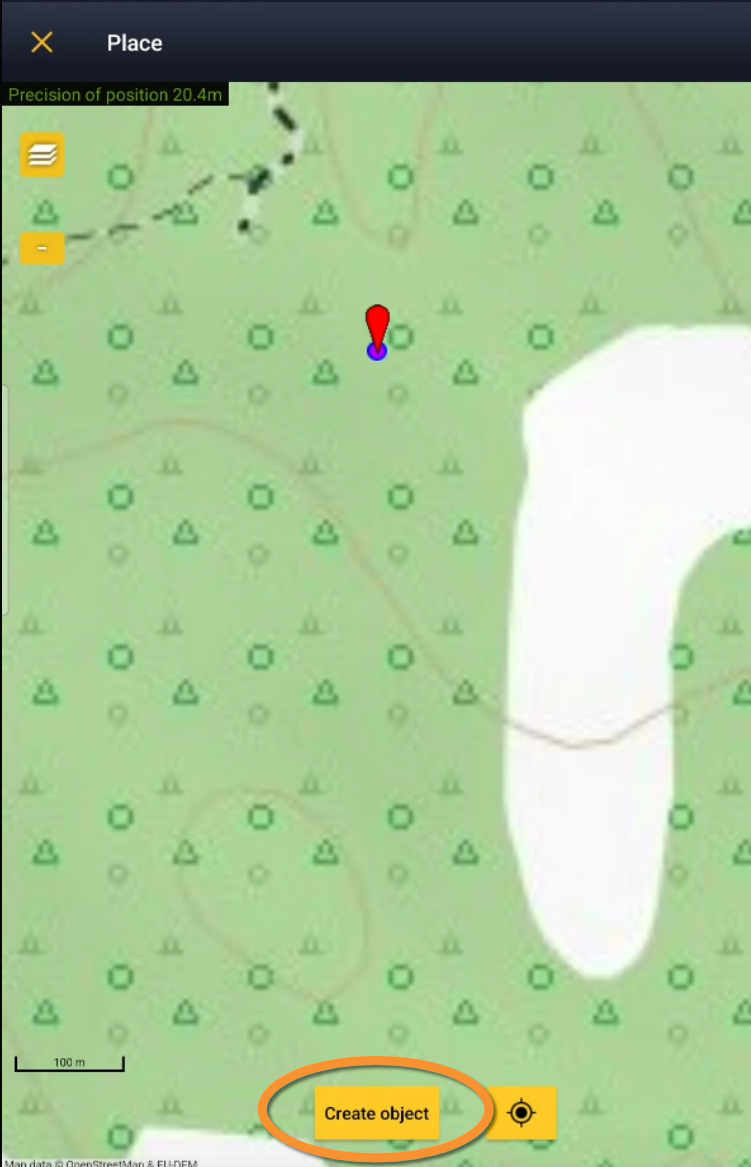
Create object. Place.
Information
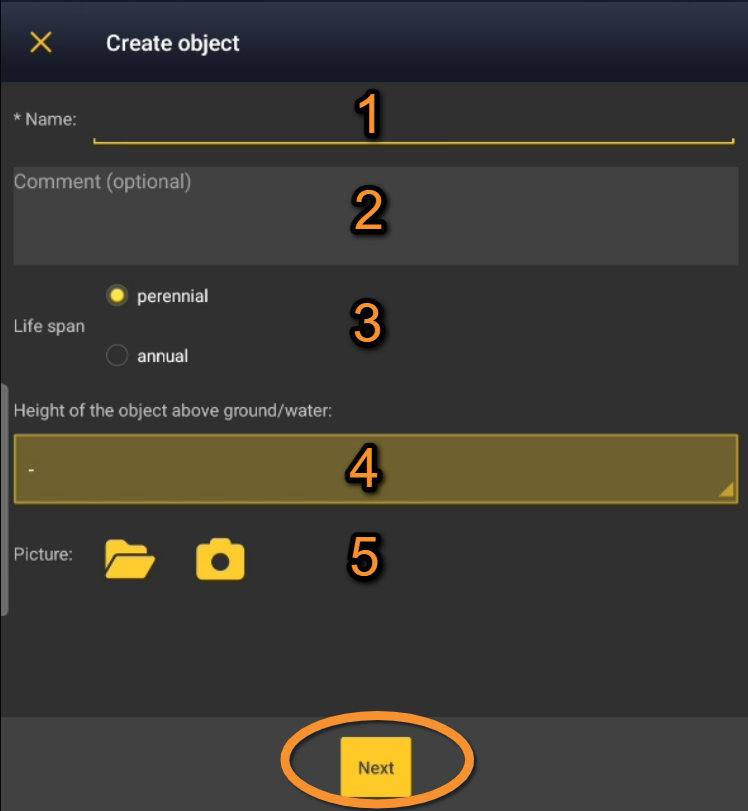
Enter object information:
- 1. Name
- 1. Name
- Enter name for the object.
- 2. Comment
- 2. Comment
- Leave a comment if necessary.
- 3. Life span
- 3. Life span
- Indicate if is a short (annual) or long life (perennial) object.
- 4. Height of the object above ground/water
- 4. Height of the object above ground/water
- Choose from the expandable menu the height at which the object is found. Choose - if unknown.
- 5. Picture
- 5. Picture
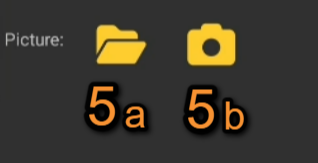
- Upload a picture of the object by selecting from your phone (5a) or taking a new one (5b). Click the bin icon (encircled, below) to delete an uploaded image.
Attach an image to an object.
5a. Select from gallery
5b. Take a picture
- Click on object position within the image (arrow, below) to mark the exact position of the object. A hollow red circle will indicate the object.
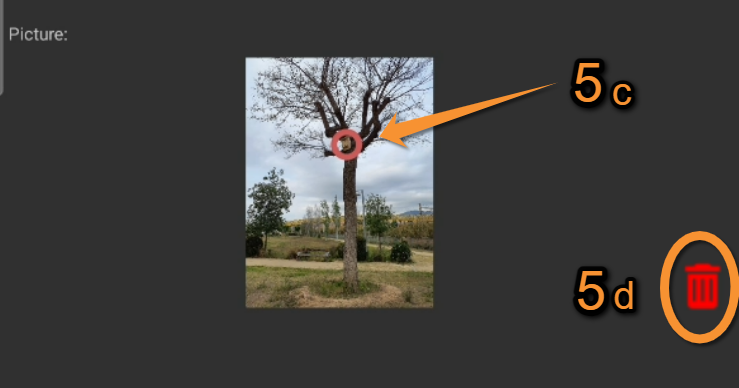
Marking an object within the picture.
5c. Mark object
5d. Delete image
Click Next when done.
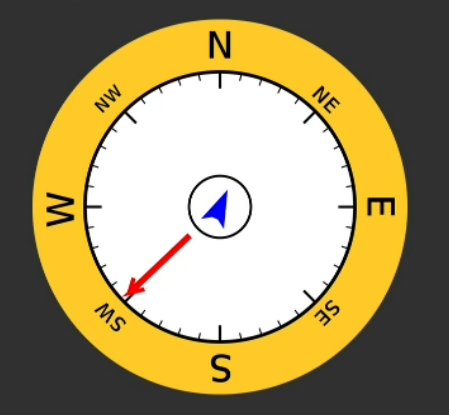
- 6. Orientation
- 6. Orientation
- Select object's orientation by clicking on the white inner circle. A red arrow will indicate the orientation.
- Click on the yellow area of the compass to delete the orientation. If orientation is not important, click Next.
Object orientation.
6a. Mark orientation
6b. Delete orientation
Click Next when done.
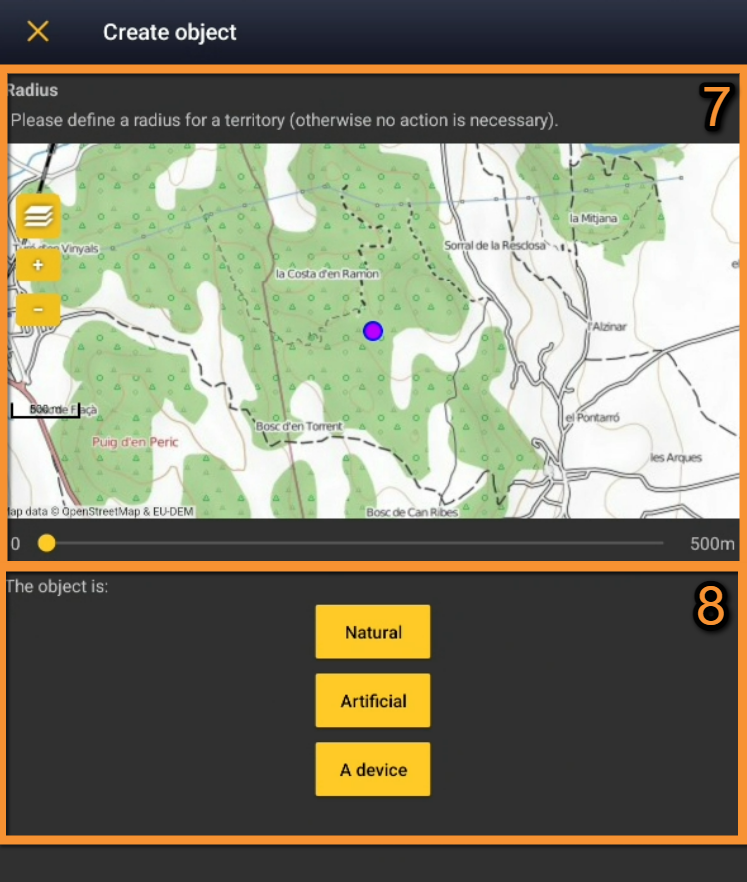
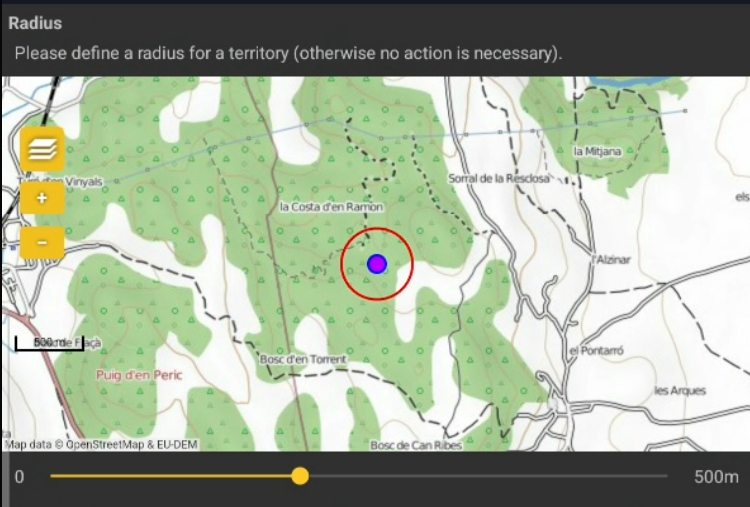
- 7. Radius
- 7. Radius
- In case the object is a territory, indicate the radius of the territory using the sliding bar (number 8 in picture below). A red line will indicate its limits.
- Note: when indicating a radius, the option "Artificial" is deactivated.
- 8. Nature
- 8. Nature
- Indicate the nature of the object.
- Choose between Natural, Artificial or a Device. According the nature of the object, next step will be different (see image as an example).
| Natural | Icon | Description |
|---|---|---|
 |
Nest Optionally, choose from the expandable menu the structure the nest lies on or the type of tree and the tree age. If the nest is not on a tree, choose - on the tree age field. |
|
 |
Burrow | |
 |
Dam | |
 |
Rock site | |
 |
Underground site | |
 |
Territory | |
 |
Vegetal Optionally choose from the expandable menu the type of forest. |
|
 |
Hydrographic Optionally choose from the expandable menu the type of water structure. |
|
 |
Other | |
| Artificial |  |
Nesting platform Optionally choose from the expandable menus the taxonomic group it is intended for, the material of construction and its support. |
 |
Birdhouse Optionally choose from the expandable menus the taxonomic group it is intended for, the material of construction and its support. |
|
 |
Building Optionally choose from the expandable menus the type of building and in which part of it lays the object. |
|
 |
Infrastructure Optionally choose from the expandable menu the type of structure. |
|
|
Other | |
| Device | N/A |
Click Save to end and save record when done.
[Top to Information]
[Top to Create object]
[Back to Create an object]
Visualising objects
Find your created objects in:
- NaturaList: Menu > Tools > My objects.
- Local portal: Main menu > All my observations. See Browsing objects > On the local portal.
Synchronise objects
To synchronise your objects
- Click on synchronise on My objects list, In the phone list, or
- Click to synchronise records when they have an object attached.
Attach objects to observations
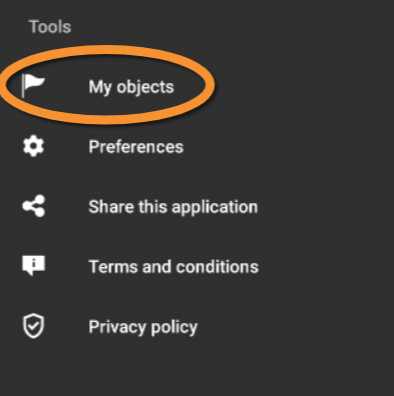
1. Open My objects list going to Menu > Tools > My objects.
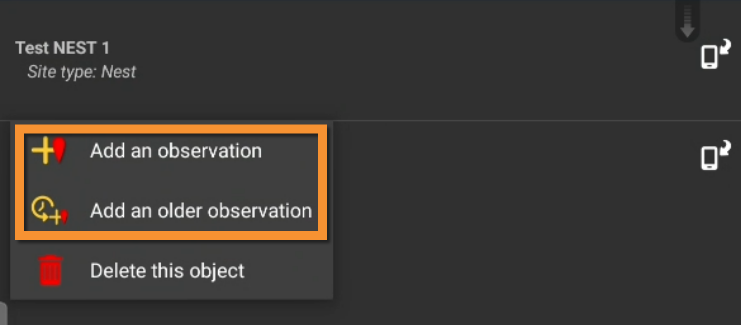
2. Click on any object from the My objects list to attach it to an observation (see images below).
3. Choose between:
- Add observation: to add an observation related to the object in real time.
- Add an older observation: to add an observation related to the object that occurred in the past.
4. Enter observation normally.
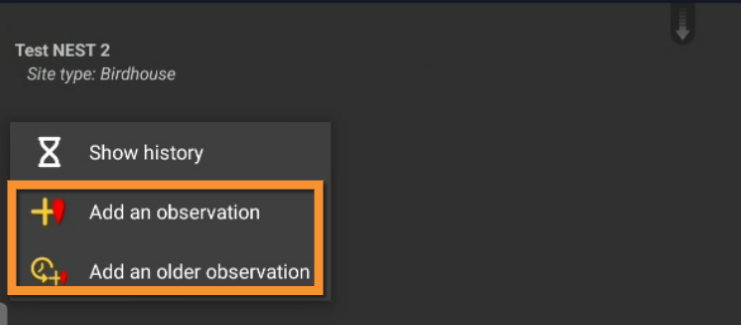
It is possible to add an observation, either in real time or in the past, independently if the object has been synchronised or not.
|
Attach an object to an observation (before synchronisation). |
Attach an object to an observation (after synchronisation). |
Browsing objects
See a list of your objects
- in NaturaList, or
- see location of objects with associated observations in the local portal that granted you the right to create objects.
On NaturaList
Find your created objects in : Menu > Tools > My objects.

List of created objects.
1. Object pending synchronisation.
Synchronised objects do not show any icon
When the object has been synchronised (no phone next to it), click on object and select See history (see image below).
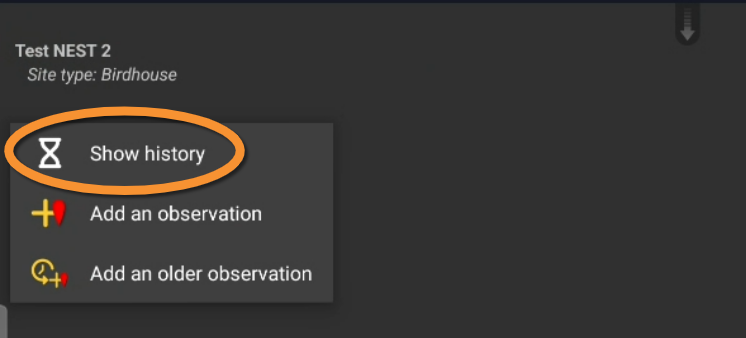
Object's history.
On the local portal
Access to synchronised objects from Main Menu > All my observations.
Click on the object you are interested in visualising.

Browsing object in the local portal.
1. Access object
2. Access associated observation
Access object
- See object's location on map.
Access observation
- See/Modify observation as explained in Web interface > Browsing records > As a registered user > From Explore tab > All my observations.
- Change location by clicking on new position on the map.
[Top to Browsing records]
[Back to Create an object]
Edit objects
Delete objects
Objects can be deleted from NaturaList only before synchronisation and if they have no associated observation yet.
1. Find your created objects in : Menu > Tools > My objects.
2. Click on any record with a phone icon (not yet synchronised).
3. Choose Delete this object (see image below).

Deleting an object.