Woodpeckers: Difference between revisions
| Line 166: | Line 166: | ||
<br/> | <br/> | ||
Enter information about each of the observations in the panel underneath (see image below). Active observation panel is highlighted in yellow. Click on any other observation panel to change the active one. Select the species from the expandable panel and type number of individuals. Altitude is recorded automatically but can be edited if necessary by typing on the field. Use the '''+''' icon (in number 5 on image below) to open the additional information panel.<br/> | |||
<br/> | |||
<center> | |||
<div class="toc" style="border-radius:5px;background-color:#ffffff;width:600px;padding-left:8px;padding-right:8px;"> | |||
[[File:Woodies. Enter observations.png|600px]] | |||
<div class="toc" style="border-radius:5px;width:585px;padding-left:15px;text-align:left; font-size:12px;"> | |||
'''Woodpeckers. Entering observations.''' | |||
</div> | |||
<p style="color:black;font-size:12px;padding-left:5px;text-align:left;column-count:1;padding-right:5px;"> | |||
'''1. Species:''' Select species name form the expandable menu. <br/> | |||
'''2. Number:''' Type number of total individuals in this observation. <br/> | |||
'''3. Altitude:''' Altitude at the bird's position. It is determined automatically, but can be changed if necessary. <br/> | |||
'''4. Delete:''' Delete observation if necessary. <br/> | |||
'''5. ID and additional information:''' A colour dot matching with the colour on the map indicates which observation it is. Next to it, a marker sign appears for observations that have already been the map. It is possible to enter additional information by opening the panel by clicking on the icon '''+''' (see below for details). | |||
</p> | |||
</div> | |||
</center> | |||
<br/> | |||
<br/> | |||
Expand the panel to enter additional information (see image below). | |||
<br/> | |||
<br/> | |||
<center> | |||
<div class="toc" style="border-radius:5px;background-color:#ffffff;width:600px;padding-left:8px;padding-right:8px;"> | |||
[[File:Woodies additional information.png|600px]] | |||
<div class="toc" style="border-radius:5px;width:585px;padding-left:15px;text-align:left; font-size:12px;"> | |||
'''Woodpeckers. Entering observations.''' | |||
</div> | |||
<p style="color:black;font-size:12px;padding-left:5px;text-align:left;column-count:1;padding-right:5px;"> | |||
'''5. Additional information panel:''' open additional information panel by clicking on the '''+'''. <br/> | |||
'''6. Age/Sex:''' Type any number of individuals (6a) in each age and sex class. Choose Age (6b) and Sex (6c) by selecting from the expandable menu. Add as many classes as necessary (6d). <br/> | |||
'''7. Comment:''' Leave a comment if necessary. Select from the tabs (7a) if you want the comment to b public or if you want it to be available only to administrators (Hidden comment), and type the text (7b). If you type the comment on the tab Hidden comment, only the comment will be hidden, not the observation.<br/> | |||
'''8. Hide from the public:''' Check the cell to keep your observation and all data associated available only to administrators. <br/> | |||
'''9. Breeding code:''' Select from the expandable menu the atlas code. Once a code is selected, its meaning appears underneath.<br/> | |||
'''10. Delete:''' Delete observations for this age and sex class. <br/> | |||
</p> | |||
</div> | |||
</center> | |||
<br/> | |||
<br/> | |||
<span id="Ending the protocol"></span> | <span id="Ending the protocol"></span> | ||
Revision as of 22:09, 25 January 2024
WOODPECKER
Access your protocol as described in wiki section Local portal > Protocols.
8 Woodpeckers
-
8.1 Preparation and data
- 8.1.1 Add observations
- 8.1.1.1 Starting the protocol
8.1.1.2 Entering observations
8.1.1.3 Ending the protocol
- 8.1.2 Results
- 8.1.2.1 Graphs
8.1.2.2 Statistics and results of recorded species
- 8.1.3 Display on map
8.1.4 Modify the protocol
8.1.5 Census results
- 8.1.5.1 Protocol section
8.1.5.2 Observations section
- 8.1.6 Download map
- 8.2 Check data
8.3 Map
WOODPECKER Preparation and data
Lists all sites available to the current profile and allows entering observations, downloading printable maps and seeing results.
8.1 Preparation and data
-
8.1.1 Add observations
- 8.1.1.1 Starting the protocol
8.1.1.2 Entering observations
8.1.1.3 Ending the protocol
- 8.1.2 Results
- 8.1.2.1 Graphs
8.1.2.2 Statistics and results of recorded species
- 8.1.3 Display on map
8.1.4 Modify the protocol
8.1.5 Census results
- 8.1.5.1 Protocol section
8.1.5.2 Observations section
- 8.1.6 Download map
WOODPECKER Add observations
Click on Add data (see image below) in the site you need to enter data to.

Protocol. Add observations.
1: Click on add data for this census: opens the list of the points counts for that place.
2: Point number

Woodpeckers. Entering data to a Woodpecker point.
1. Add data.
2. Select point.
WOODPECKER Starting the protocol
Before entering observations, it is required to enter general parameters regarding the protocol. Parameters are protocol specific. Fields marked with an asterisk are mandatory.
See wiki section Web interface > Protocols > Preparation and data > Add observations > Starting the protocol for details.
Check the cells for the species you will use the playback for (see image below).

Woodpeckers. Playback.
Select the type of list to access next step.
WOODPECKER Entering observations
Enter observations as if entering a list. See wiki section Web interface > Protocols > Preparation and data > Add observations > Entering observations for details.
Click on the map at the bird's position. A coloured marker identifying each individual observation will appear (number 1 in image below). Note the active observation is indicated by a blue marker. Distance markings appear in red for the active point and grey otherwise (number 2 in image blow). Open the map settings panel (number 3 in image below) to hide/show distance markers, observations and/or point counts, among others. Visit wiki section navigation the map to know more about the map.

Woodpeckers. Entering position.
1. Bird position: Colour markers identify individual observations. Note the active observation is blue (marker on the left).
2. Distance: Red lines indicate distances from the active point. Distances from inactive points appear in grey.
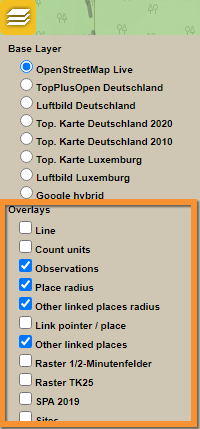
3. Map settings: Check cells to indicate which elements to show on the map.
4. Point counts:' Active point highlighted in blue, inactive ones appear in grey.
Enter information about each of the observations in the panel underneath (see image below). Active observation panel is highlighted in yellow. Click on any other observation panel to change the active one. Select the species from the expandable panel and type number of individuals. Altitude is recorded automatically but can be edited if necessary by typing on the field. Use the + icon (in number 5 on image below) to open the additional information panel.

Woodpeckers. Entering observations.
1. Species: Select species name form the expandable menu.
2. Number: Type number of total individuals in this observation.
3. Altitude: Altitude at the bird's position. It is determined automatically, but can be changed if necessary.
4. Delete: Delete observation if necessary.
5. ID and additional information: A colour dot matching with the colour on the map indicates which observation it is. Next to it, a marker sign appears for observations that have already been the map. It is possible to enter additional information by opening the panel by clicking on the icon + (see below for details).
Expand the panel to enter additional information (see image below).

Woodpeckers. Entering observations.
5. Additional information panel: open additional information panel by clicking on the +.
6. Age/Sex: Type any number of individuals (6a) in each age and sex class. Choose Age (6b) and Sex (6c) by selecting from the expandable menu. Add as many classes as necessary (6d).
7. Comment: Leave a comment if necessary. Select from the tabs (7a) if you want the comment to b public or if you want it to be available only to administrators (Hidden comment), and type the text (7b). If you type the comment on the tab Hidden comment, only the comment will be hidden, not the observation.
8. Hide from the public: Check the cell to keep your observation and all data associated available only to administrators.
9. Breeding code: Select from the expandable menu the atlas code. Once a code is selected, its meaning appears underneath.
10. Delete: Delete observations for this age and sex class.
WOODPECKER Ending the protocol
WOODPECKER Results
See some statistics about your surveys results.
Visit wiki section Web interface > Protocols > Preparation and data > Results for details.
WOODPECKER Graphs
Visit wiki section Web interface > Protocols > Preparation and data > Results > Graphs for details.
WOODPECKER Statistics and results of recorded species
Visit wiki section Web interface > Protocols > Preparation and data > Results > Statistics and results of recorded species for details.
WOODPECKER Display on map
For the selected site, see the area to survey on a map. To know how to navigate the map, refer to wiki section Web interface > Navigating the map.
Visit wiki section Web interface > Protocols > Preparation and data > Display on map for details.
WOODPECKER Modify the protocol
Modify the site to survey.
Visit wiki section Web interface > Protocols > Preparation and data > Modify the protocol for details.
WOODPECKER Census results
Click on Census results to see all available years with data for this site (see image Protocol. Selecting year to visualise). Select the one to visualise.
Visit wiki section Web interface > Protocols > Preparation and data > Census protocol for details.
WOODPECKER Protocol section
General information about the selected visit at the selected site.
Visit wiki section Web interface > Protocols > Preparation and data > Census results > Protocol section for details.
WOODPECKER Observations section
Summary of observations at the selected site.
Visit wiki section Web interface > Protocols > Preparation and data > Census results > Observations section for details.
WOODPECKER Download map
Download maps ready to print.
Visit wiki section Web interface > Protocols > Preparation and data > Download map for details.
WOODPECKER Check data
Calendar showing visits to different sites and number of species detected.
Visit wiki section Web interface > Protocols > Preparation and data > Check data for details.
WOODPECKER Map
Map and statistics for site.
Visit wiki section Web interface > Protocols > Preparation and data > Map for details.