Website administration
Parameter functionalities for basic or mirror website, and define where to add and manage content. This part of the menu differs from account to account depending on the rights granted to user. All options are described below so you can find what you need even if you have not been granted full admin rights.
Visit wiki section Admin rights to know more about administration rights.
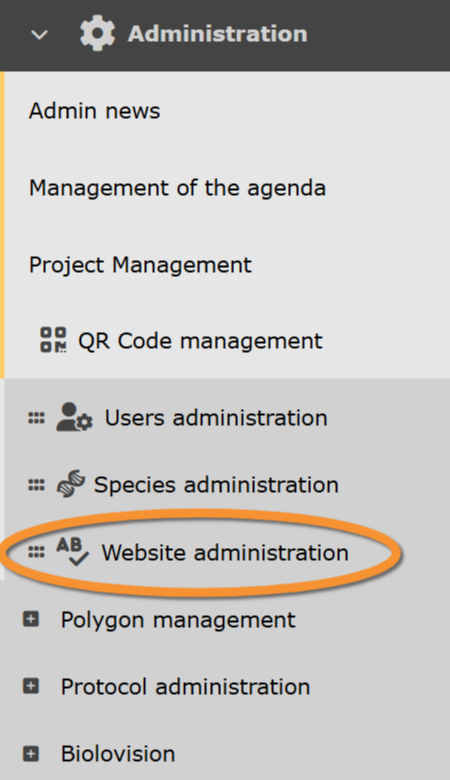
Website administration.
Admin text
Administration > Web site administration > Admin text
Admin text. Menu.
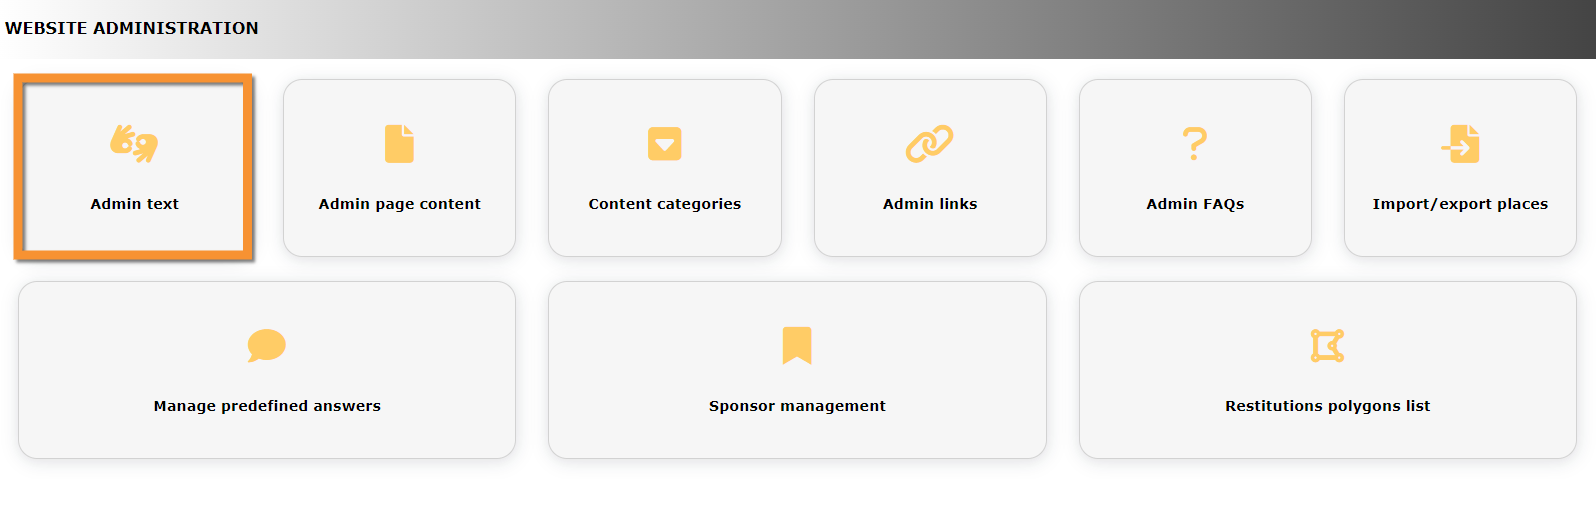
Admin page content
Create your own pages of content and choose where to attribute them in your local portal or mirror portal. Content may be available in different languages, and can be displayed directly in the menu or linked to other pages not linked to the menu. It is possible to hide content until information is ready.
Access on the web via Administration > Web site administration > Administration page content
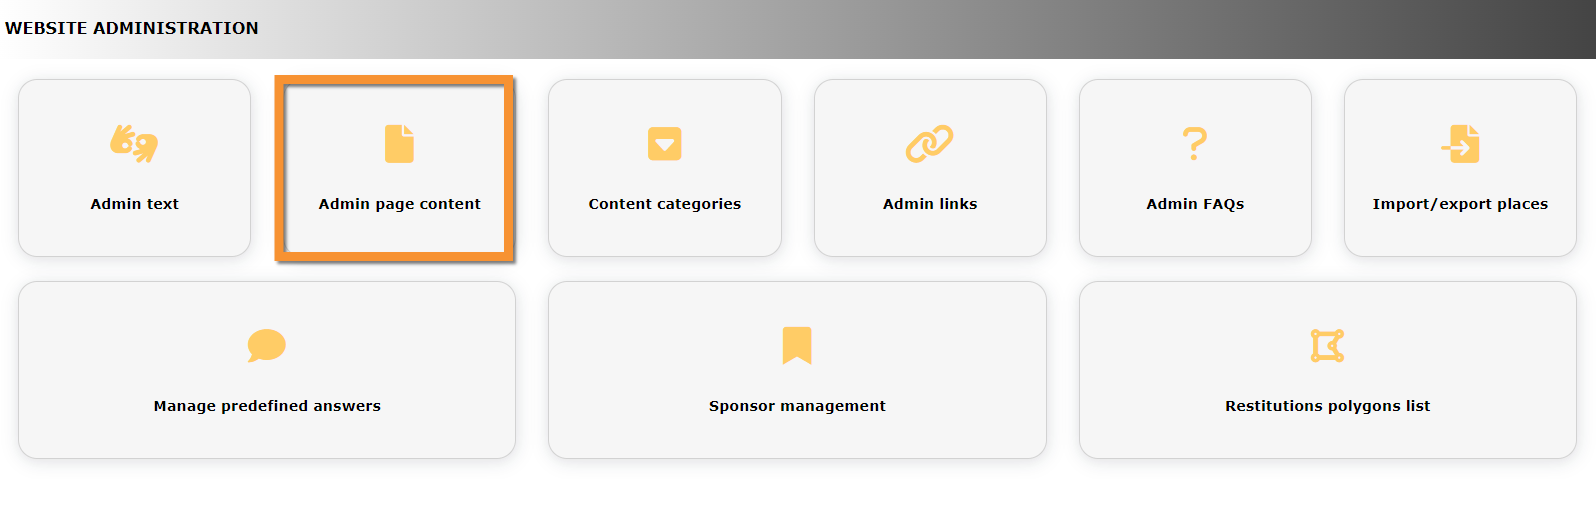
Admin page content. Menu.
List of already created content. The position of each piece of content in the main menu can be determined in Content categories. See wiki section Content categories to know more.
Use arrows under titles to alternate between ascending and descending order (see image as an example).
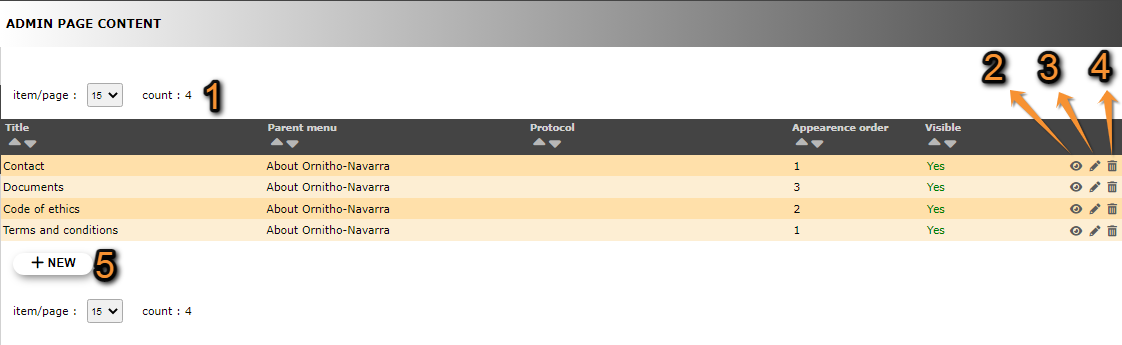
Admin page content.
1. Page and items
2. Details
3. Edit
4. Delete
5. NEW
Title: Title of page content in the language the website is selected.
Parent menu: If any, section on the menu under which this content will be displayed.
Protocol: If any, protocol the page content refers to. Only registered users with rights for this protocol will be able to see its content.
Appearance order: Order in which the sub-section will be displayed in relation to other sub-sections under the same section.
Visible: Indicates if the sub-section is visible to users.
See how sub-sections above will appear on the website in this example.
- 1. Page and items
Select page number and/or number of items per page.
- 2. Details
Click to see details of selected sub-section.

Details page content.
Title: Title of page content in different languages.
ADMIN_CONTENT_TEXT_CONTENT: Page content in different languages.
Publisher: Account that created the entry.
ADMIN_CONTENT_LIST_TEXT_UPDATE_DATE: Date and time of last update.
Creation date: Date and time of content creation.
ADMIN_CONTENT_TEXT_UPDATER: Account that made the last update.
Parent menu: If any, section under which this content will be displayed on the website.
Protocol: If any, protocol the content refers to. Only registered users with righs for this protocol will be able to see its content.
Appearance order: Order in which this content will appear in relation to other contents on the same section.
Visible: Indicates if the content is visible to users.
BACK: Go to previous screen without saving.
EDIT: Modify information (see sub-section Edit below).
DELETE: Delete entry. You will be asked to confirm.
- 3. Edit
Modify / complete content or modify parameters of the selected sub-section.
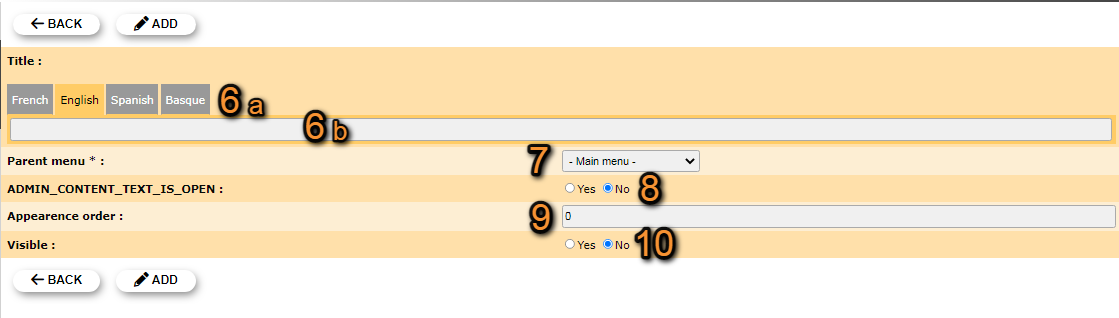
Edit admin page content.
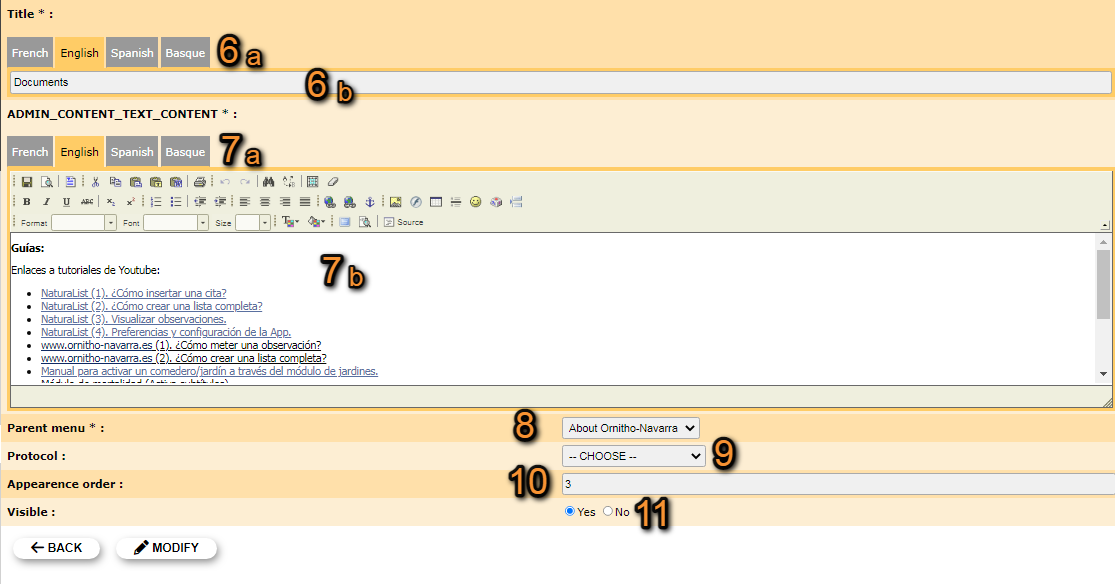
6. Title: Select language from the tabs on top (a) and add or modify a title in the selected language (b). If title field is left blank in any of the languages, this content will not appear in the menu when the site is visualised in a language without a title.
7. ADMIN_CONTENT_TEXT_CONTENT: Select language from tabs on top (a) and type or modify the content for the selected language, as in a word file (b).
8. Parent menu: Select from the expandable menu under which section to show this content. If none is selected, it will not be displayed in the menu.
9. Protocol: When necessary, select a protocll to link the content to. Only registered users with rights for this protocol will see the information.
10. Appearance order: Type number to indicate the order in which this sub-section will appear in relation to other sub-sections under the same section.
11. Visible: Indicate if the sub-section is visible to registered users.
BACK: Go to previous screen without saving.
MODIFY: Save changes.
- 4. Delete
Delete the selected sub-section from the list. You will be asked to confirm.
- 5. NEW
Create a new sub-section.

New page content.
6. Title: Select language from the tabs on top (a) and type a title in the selected language (b). Repeat to enter titles in different languages. If title field is left blank in any of the languages, this content will not appear in the menu when the site is visualised in a language without a title.
7. ADMIN_CONTENT_TEXT_CONTENT: Select language from tabs on top (a) and type the content for the selected language, as in a word file (b). Repeat to enter information in different languages.
8. Parent menu: Select from the expandable menu under which section this content will be displayed. If the field is left blank, this page content will not be displayed in the menu.
9. Protocol: If the content relates to a protocol, select from the expandable menu the name of the protocol. Only users with rights for this protocol will access the information.
10. Appearance order: Type number to indicate the order in which this sub-section will be displayed in relation to other sub-sections under the same section.
11. Visible: Indicates if the sub-section is visible to users. Hide this section from users when the content is not ready for display. Contact Biolovision if you want to restrict who sees this content.
BACK: Go to previous screen without saving.
ADD: Save new entry.
REMEMBER when selecting an order numbers do not need to be correlated. Use very separated ones (ie. 1 and 100) if you are planning to add regularly new subsections between these two. It saves modifying the order of already existing subsections.
Content categories
Administration > Web site administration > Content categories

Admin content categories. Menu.
List of sections in the main menu under which to organise subsections explained in Admin page content. Use arrows under titles to alternate between ascending and descending order (see image as an example).
Content categories.
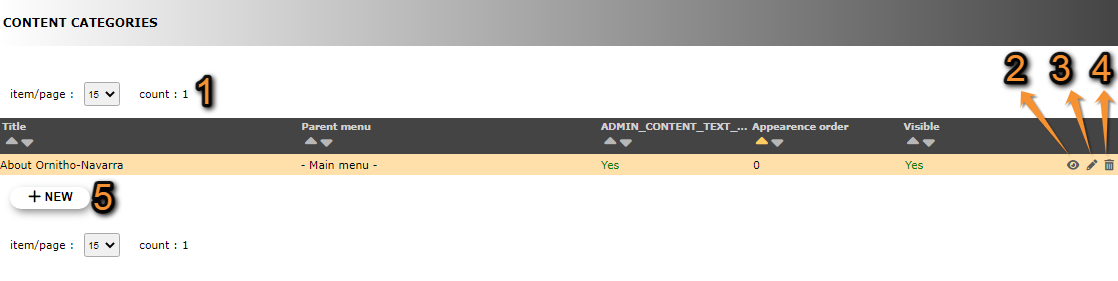
1. Page and items
2. Details
3. Edit
4. Delete
5. NEW
Title of section: Title of additional section in the language the website is selected.
Parent menu: Section on the menu under which the additional section will show.
ADMIN_CONTENT_TEXT_IS_OPEN:
Appearance order: Order in which the section will appear in relation to other section under the same bigger section.
Visible: Indicates if the section will be visible to registered users.
See how sections above will appear on the website in this example.
- 1. Search
Select page number and/or number of items per page.
- 2. Details
Click to see details of selected section.
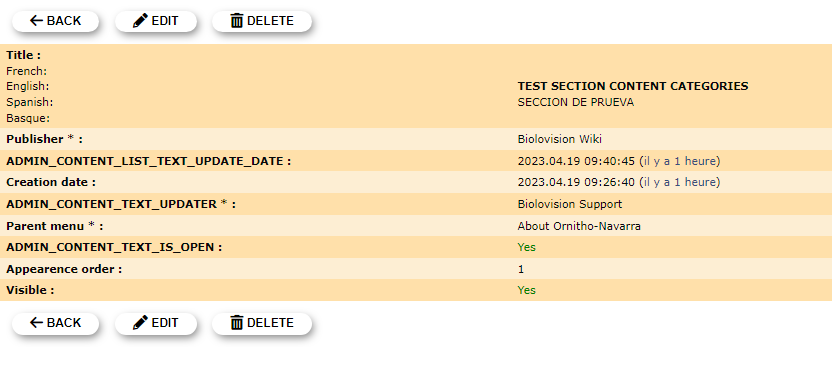
Details content category.
1. Page and items
2. Details
3. Edit
4. Delete
5. NEW
Title: Title o category in different languages.
Publisher: Account that created the category.
ADMIN_CONTENT_LIST_TEXT_UPDATE_DATE: Date and time of last update.
Creation date: Date and time of creation.
ADMIN_CONTENT_TEXT_UPDATER: Account that last updated the category.
Parent menu: Section under which the category will appear.
ADMIN_CONTENT_TEXT_IS_OPEN:
Appearence order: Order in which this category will appear in relation to other categories in the same section.
Visible: Indicates if the category will be visible to registered users.
BACK: Go to previous screen without saving.
EDIT: Modify information (see section Edit below).
DELETE: Delete entry. You will be asked to confirm.
- 3. Edit
Modify / complete content or modify parameters of the selected section.
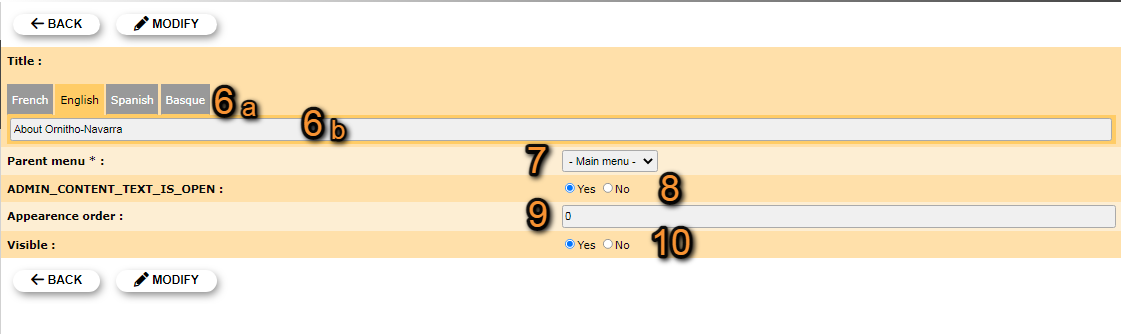
Edit content categories.
6. Title: Select language from the tabs on top (a) and add or modify a title in the selected language (b). If title field is left blank in any of the languages, this sub-section will not appear in the menu when the site is visualised in the language without title.
7. Parent menu: Select from the expandable menu under which section to show this sub-section.
8. ADMIN_CONTENT_TEXT_IS_OPEN:
9. Appearance order: Type number to indicate the order in which this section will appear in relation to other sections under the same bigger section.
10. Visible: Indicate if the section will be visible to registered users.
BACK: Go to previous screen withoust saving.
MODIFY: Save changes.
- 4. Delete
Delete the selected section from the list. You will be asked to confirm.
- 5. NEW
Create a new section.
New content category.
6. Title: Select language from the tabs on top (a) and type a title in the selected language (b). Repeat to enter titles in different languages. If title field is left blank in any of the languages, this section will not appear in the menu when the site is visualised in the language without title.
7. Parent menu: Select from the expandable menu under which bigger section will appear this section.
8. ADMIN_CONTENT_TEXT_IS_OPEN:
9. Appearance order: Type number to indicate the order in which this section will appear in relation to other sections under the same bigger section.
11. Visible: Indicate if the section will be visible to registered users.
BACK: Go to previous screen without saving.
ADD: Save new entry.
Admin links
Administration > Web site administration > Admin links
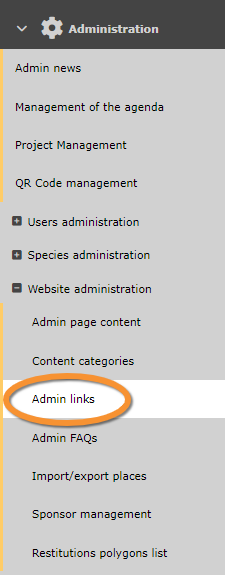
Admin links. Menu.
Add clickable links to any of the sections. Use arrows under titles to alternate between ascending and descending order (see image as an example).
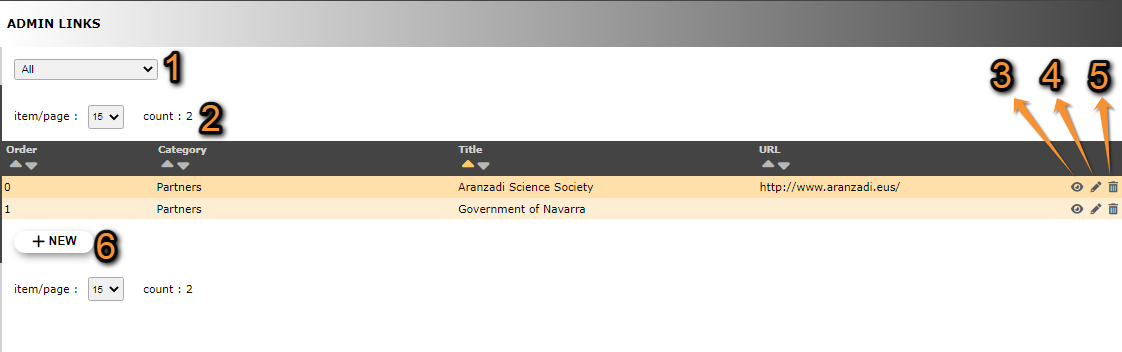
Admin links.
1. Search
2. Page and items
3. Details
4. Edit
5. Delete
6. New
Order: Order in which links will appear when on the same section.
Category: Section under which the link will appear.
Title: Title under whcih the link will appear.
URL: Electronic address of the site.
See how parameters above will appear in the website in this example.
- 1. Search
Reduce list by typing the name of a site, or part of it, and click SEACH. When a filter is applied, click on
DISPLAY ALL.
- 2. Search
Select page number and/or number of items per page.
- 3. Details
Click to see details of selected link, including name in different languages and comments if availale.
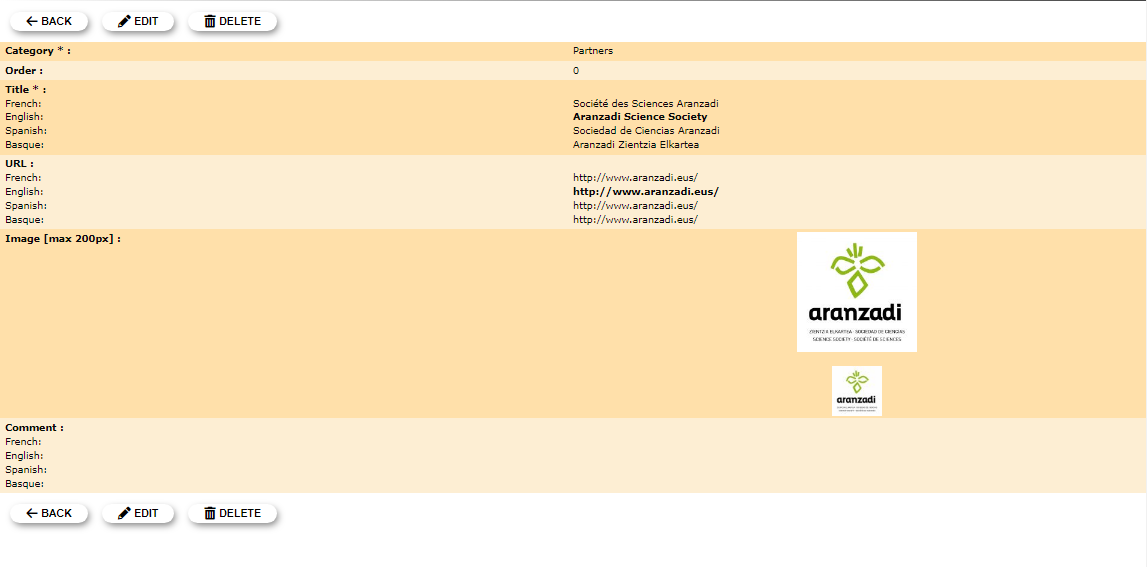
Details admin links.
BACK: Go to previous screen without saving.
EDIT: Edit details. See edit subsection below.
DELETE: Delete entry. You will be asked to confirm.
- 4. Edit
Modify / complete any detail.
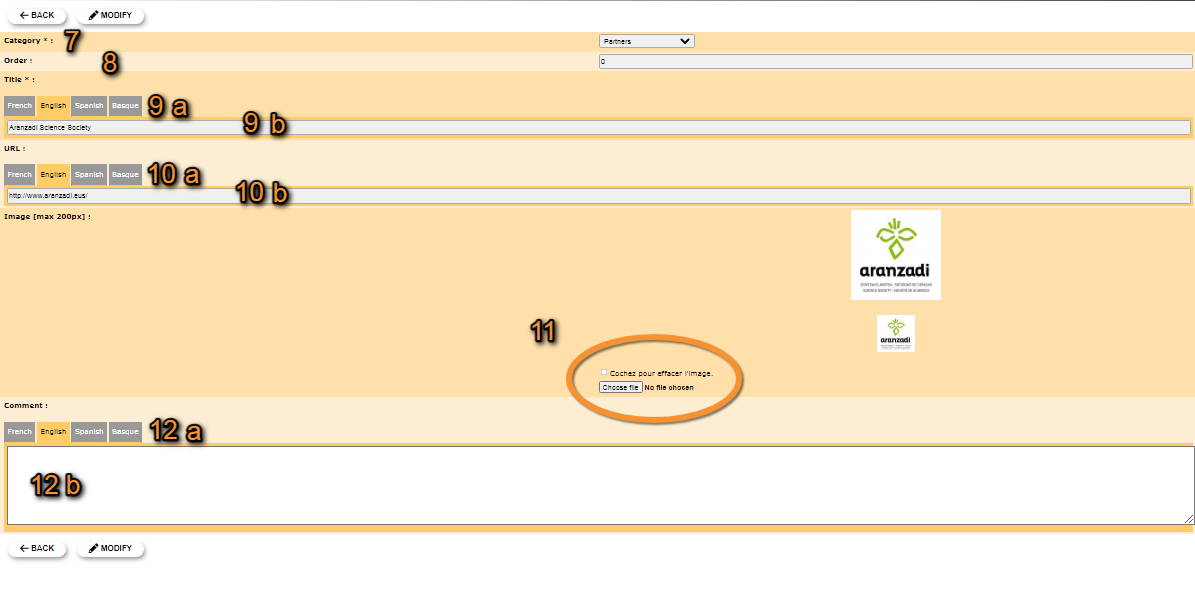
Edit admin links.
7. Category: Choose from the expandable menu under which section the link will appear.
8. Order: Type the position in which the link will appear in relation to other links on the same section.
9. Title: Choose the language to add / modify the title in from the tabs on top (a) and type / modify the text (b).
10. URL: Choose the language to add / modify the link in from the tabs on top (a) and type / modify the link (b).
11. Image: Check Cochez pour effacer l'image to delete the existing image, if any; and/or click on Choose file to upload an image. The existing image is shown.
12. Comment: Choose the language to add / modify a comment in from the tabs on top (a) and type / modify the comment (b).
BACK: Go to previous screen without saving.
MODIFY: Save changes.
- 5. Delete
Delete link. You will be asked to confirm.
- 6. NEW
Create a new link.
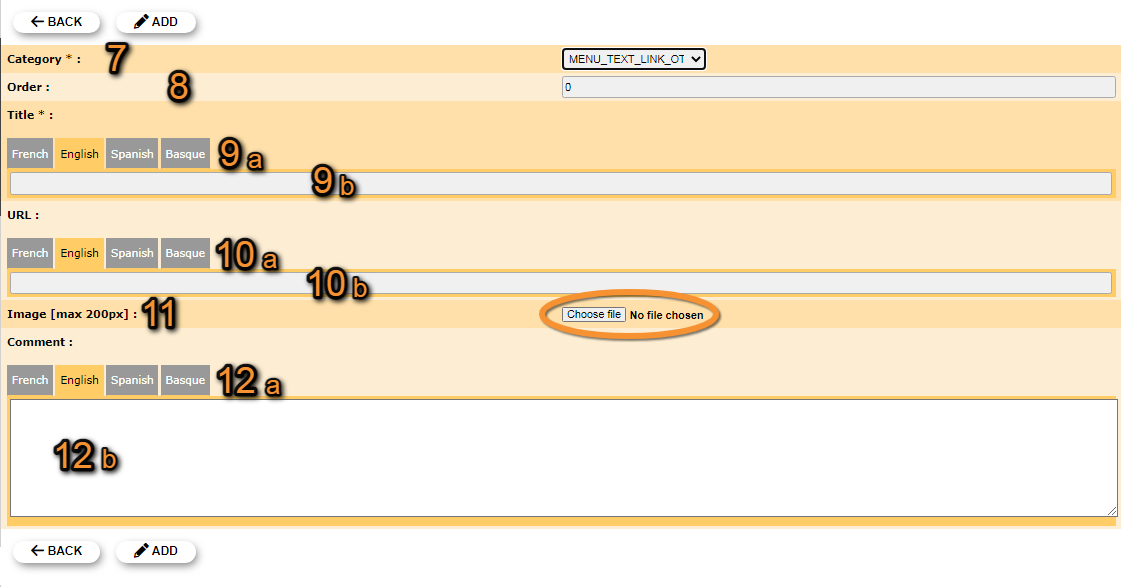
New admin link.
7. Category: Choose from the expandable menu under which section the link will appear.
8. Order: Type the position in which the link will appear in relation to other links on the same section.
9. Title: Choose the language to add a title in from the tabs on top (a) and type the text (b). Repeat the process to add the title in different languages.
10. URL: Choose the language to add a link in from the tabs on top (a) and type the link (b). Repeat the process to add the link in different languages.
11. Image: Click on Choose file to upload an image. When an image is uploaded, its name and format will appear next to the button.
12. Comment: Choose the language to add a comment in from the tabs on top (a) and type the comment (b). Repeat the process to add a comment is different languages.
BACK: Go to previous screen without saving.
ADD: Save the new link.
Admin FAQs
Administration > Web site administration > Admin FAQs
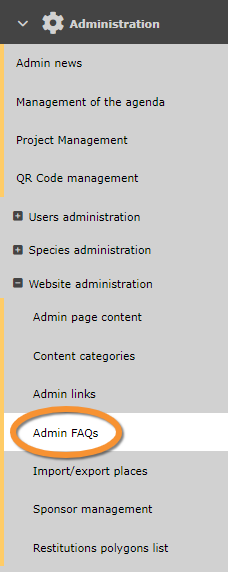
Admin FAQs. Menu.
List of frequently asked questions. Use arrows under titles to alternate between ascending and descending order (see image as an example).
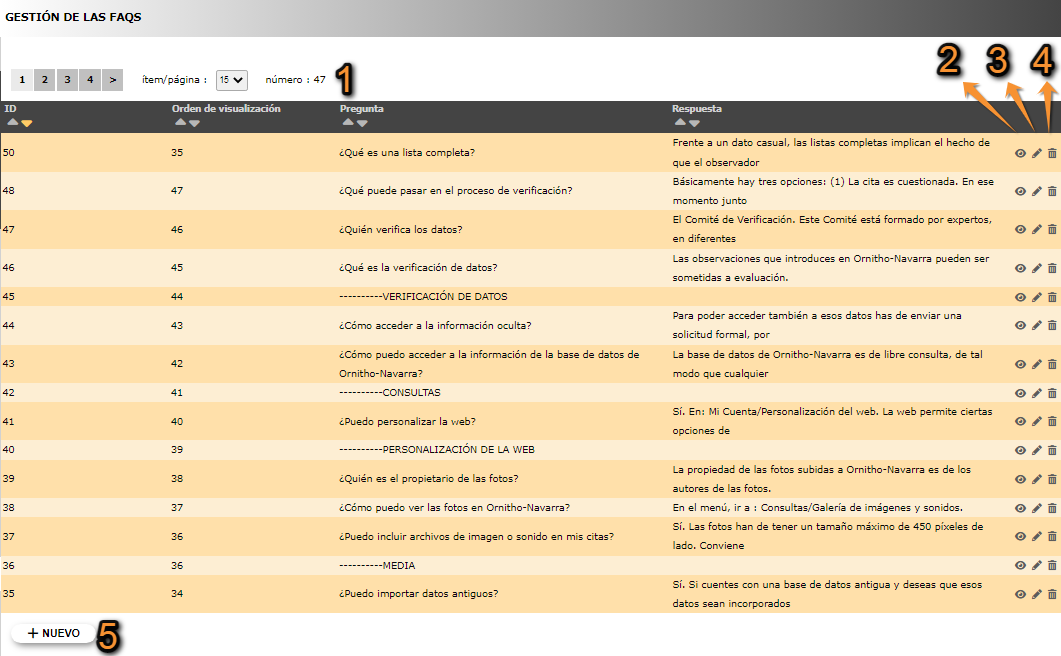
Admin FAQs.
1. Page and items
2. Details
3. Edit
3. Delete
3. NEW
ID: Question identification number.
Display order: Order in which the question will be displayed in realation to other questions.
Question: Question.
Answer: Answer to the selected question.
- 1. Page and items
Select page number and/or number of items per page.
- 2. Details
Click to see details of selected question, including its answer and last update.

Details admin FAQs.
ID: Question identification number.
Question: Question.
Answer: Answer to the question.
Display order: Order in which the question will be displayed in realation to other questions.
Last update: Date and time of last question update.
BACK: Go to previous screen without saving.
EDIT: Modify details. See sub-section edit below.
DELETE: Delete question. You will be asked to confirm.
- 3. Edit
Modify question or answer, or add it in a different language.

Edit admin FAQs.
6. Question: Select language from the tabs on top (a) and add or modify a question in the selected language (b).
7. Answer: Select language from the tabs on top (a) and add or modify the answer in the selected language (b).
8. Display order: Type the order in which this question will be displayed in relation to other questions.
BACK: Go to previous screen without saving.
MODIFY: Save changes.
- 4. Delete
Delete entry. This will delete the question and its answer in all languages. You will be asked to confirm.
- 5. NEW
Create a new question.

New FAQ.
6. Question: Select language from the tabs on top (a) and add or modify a question in the selected language (b).
7. Answer: Select language from the tabs on top (a) and add or modify the answer in the selected language (b).
8. Display order: Type the order in which this question will be displayed in relation to other questions.
BACK: Go to previous screen without saving.
ADD: Save changes and publish the new question.
Import / Export places
Administration > Web site administration > Import/Export places
Admin import/export places. Menu.
Manage predefined answers
Administration > Web site administration > Manage predefined answers

Manage predefined answers. Menu.
Sponsor management
Administration > Web site administration > Sponsor management
Sponsor management.
List of website sponsors and their logos. Use arrows under titles to alternate between ascending and descending order (see image as an example).

Sponsor management list.
1. Page and items
2. Details
3. Edit
4. Delete
5. NEW
File: Sponsor logo.
Position: Place where in the website the logo will be displayed. See subsection Logo position below for more information.
Language: Language the website should be in to display the logo. When the field is empty, the logo is displayed in all available languages.
Weight: Order in which the logo will be displayed within the position in the website where it displays when their more than one logo in its position.
Start date: Starting date logo display.
End date: Ending date of logo display.
- 1. Page and items
Select page number and/or number of items per page.
- 2. Details
Click to see details of selected sponsor.
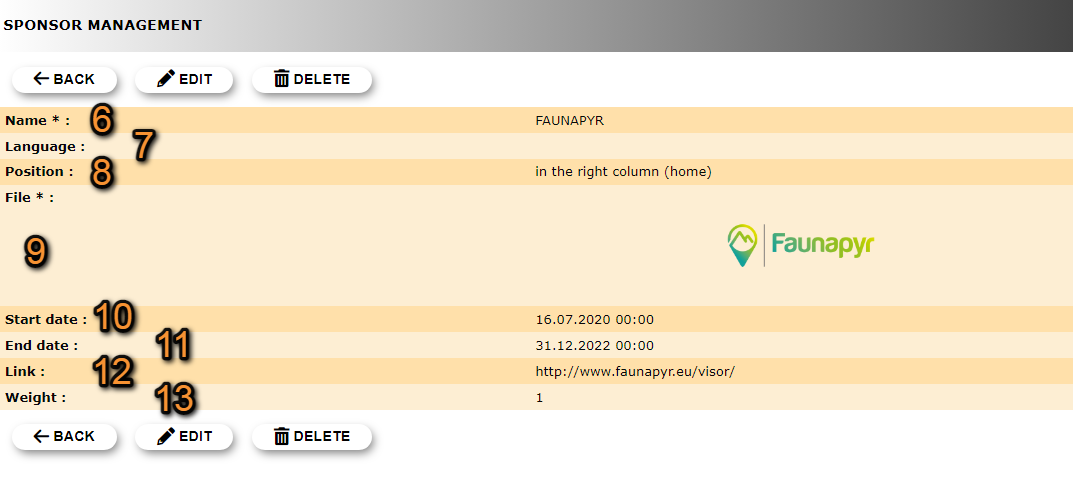
Sponsor details.
6. Name: Sponsor's name.
7. Language: Language in which the website should be displayed to show the logo. If the field is blank, the logo will be displayed in all languages.
8. Position: Place in the website where the logo will be displayed. See subsection Logo position below for more information.
9. File: Sponsor's logo.
10. Start date: Starting date of logo display.
11. End date: Ending date of logo display.
12. Link: Link to sponsor's website.
13. Weight: Indicates in which order you would like this logo to display within the selected position, when more than one logo are displayed on the same position. Lower names show first.
BACK: Go to previous screen without saving.
EDIT: Modify details. See sub-section Edit below.
DELETE: Delete sponsor entry. You will be asked to confirm.
- 3. Edit
Modify details.

Edit sponsor.
6. Name: Modify the sponsor's name.
7. Language: Change the language to display logo only in the site in the selected language. If no language is selected the logo will be visible in all languages.
8. Position: Change the place in the website where the logo will be displayed by selecting from the expandable menu. See subsection Logo position below for more information.
9. File: Click on Choose file to upload a new logo for the new sponsor. Current uploaded logo is displayed on the section.
10. Start date: Choose the starting date of logo display from the expandable calendar on the left, and the starting time of logo display from the expandable menu on the right.
11. End date: Choose the ending date of logo display from the expandable calendar on the left, and the ending time of logo display from the expandable menu on the right.
12. Link: Type a new link to sponsor's website.
13. Weight: Change the number to indicate in which order you would like this logo to display within the selected position, when more than one logo are displayed on the same position. Lower names show first.
BACK: Go to previous screen without saving.
MODIFY: Add new sponsor to the website.
- 4. Delete
Delete sponsor. Their logo will no longer be displayed on the website. You will be asked to confirm.
- 5. NEW
Announce a new sponsor.
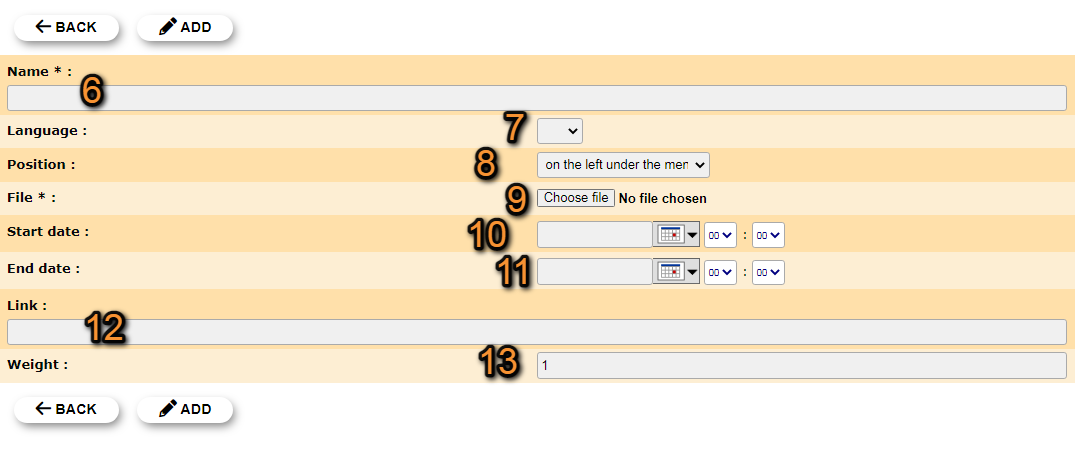
Add a new sponsor.
6. Name: Type the sponsor's name.
7. Language: If necessary, select from the expandable menu the language in which the page will be displayed. If no language is selected, the logo will be displayed in all languages.
8. Position: Select from the expandable menu the place in the website where the logo will be displayed. See subsection Logo position below for more information.
9. File: Click on Choose file to upload a logo for the new sponsor. It may require several files.
10. Start date: Choose the starting date of logo display from the expandable calendar on the left, and the starting time of logo display from the expandable menu on the right.
11. End date: Choose the ending date of logo display from the expandable calendar on the left, and the ending time of logo display from the expandable menu on the right.
12. Link: Type a link to sponsor's website.
13. Weight: Type a number to indicate in which order you would like this logo to display within the selected position, when more than one logo are displayed on the same position. Lower names show first.
BACK: Go to previous screen without saving.
ADD: Add new sponsor to the website.
Logo positions
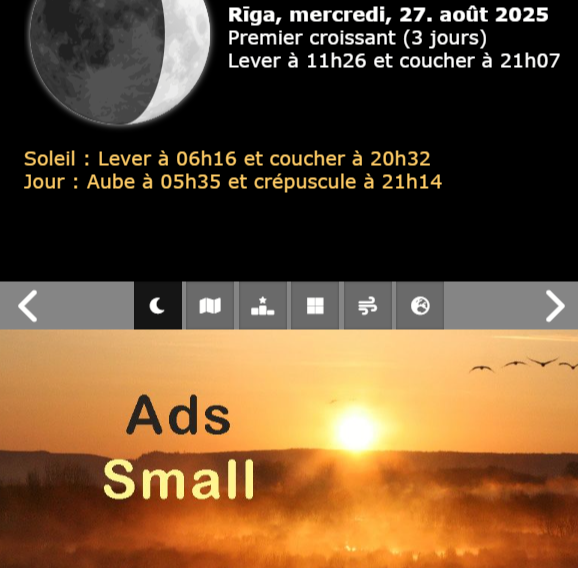
Sponsor logos can be announced in different positions across the website (see images below). Some of these position may display more than one logo while others only hold one (see table below to know more). A local site can display several logos at the same time.
![]()
Sponsors logo positions.
| Position | Order1 | Consecutive | |
|---|---|---|---|
| 1 | On the Top left corner | YES | NO |
| 2 | On the left under the menu | NO | Vertically |
| 3 | On the top right corner | NO | Horizontally |
| 4 | On the right column2,3 | YES | NO |
| 5 | At the bottom of the page | NO | Horizontally |
1 If the order of the logo is not random within the indicated position, use Weight to choose in which position its logo will be displayed. Logo with lower weight value will be displayed before logos with higher weight values.
2 Logos in this position are only visible in the Home page.
3 Requires several logos for responsive interface.
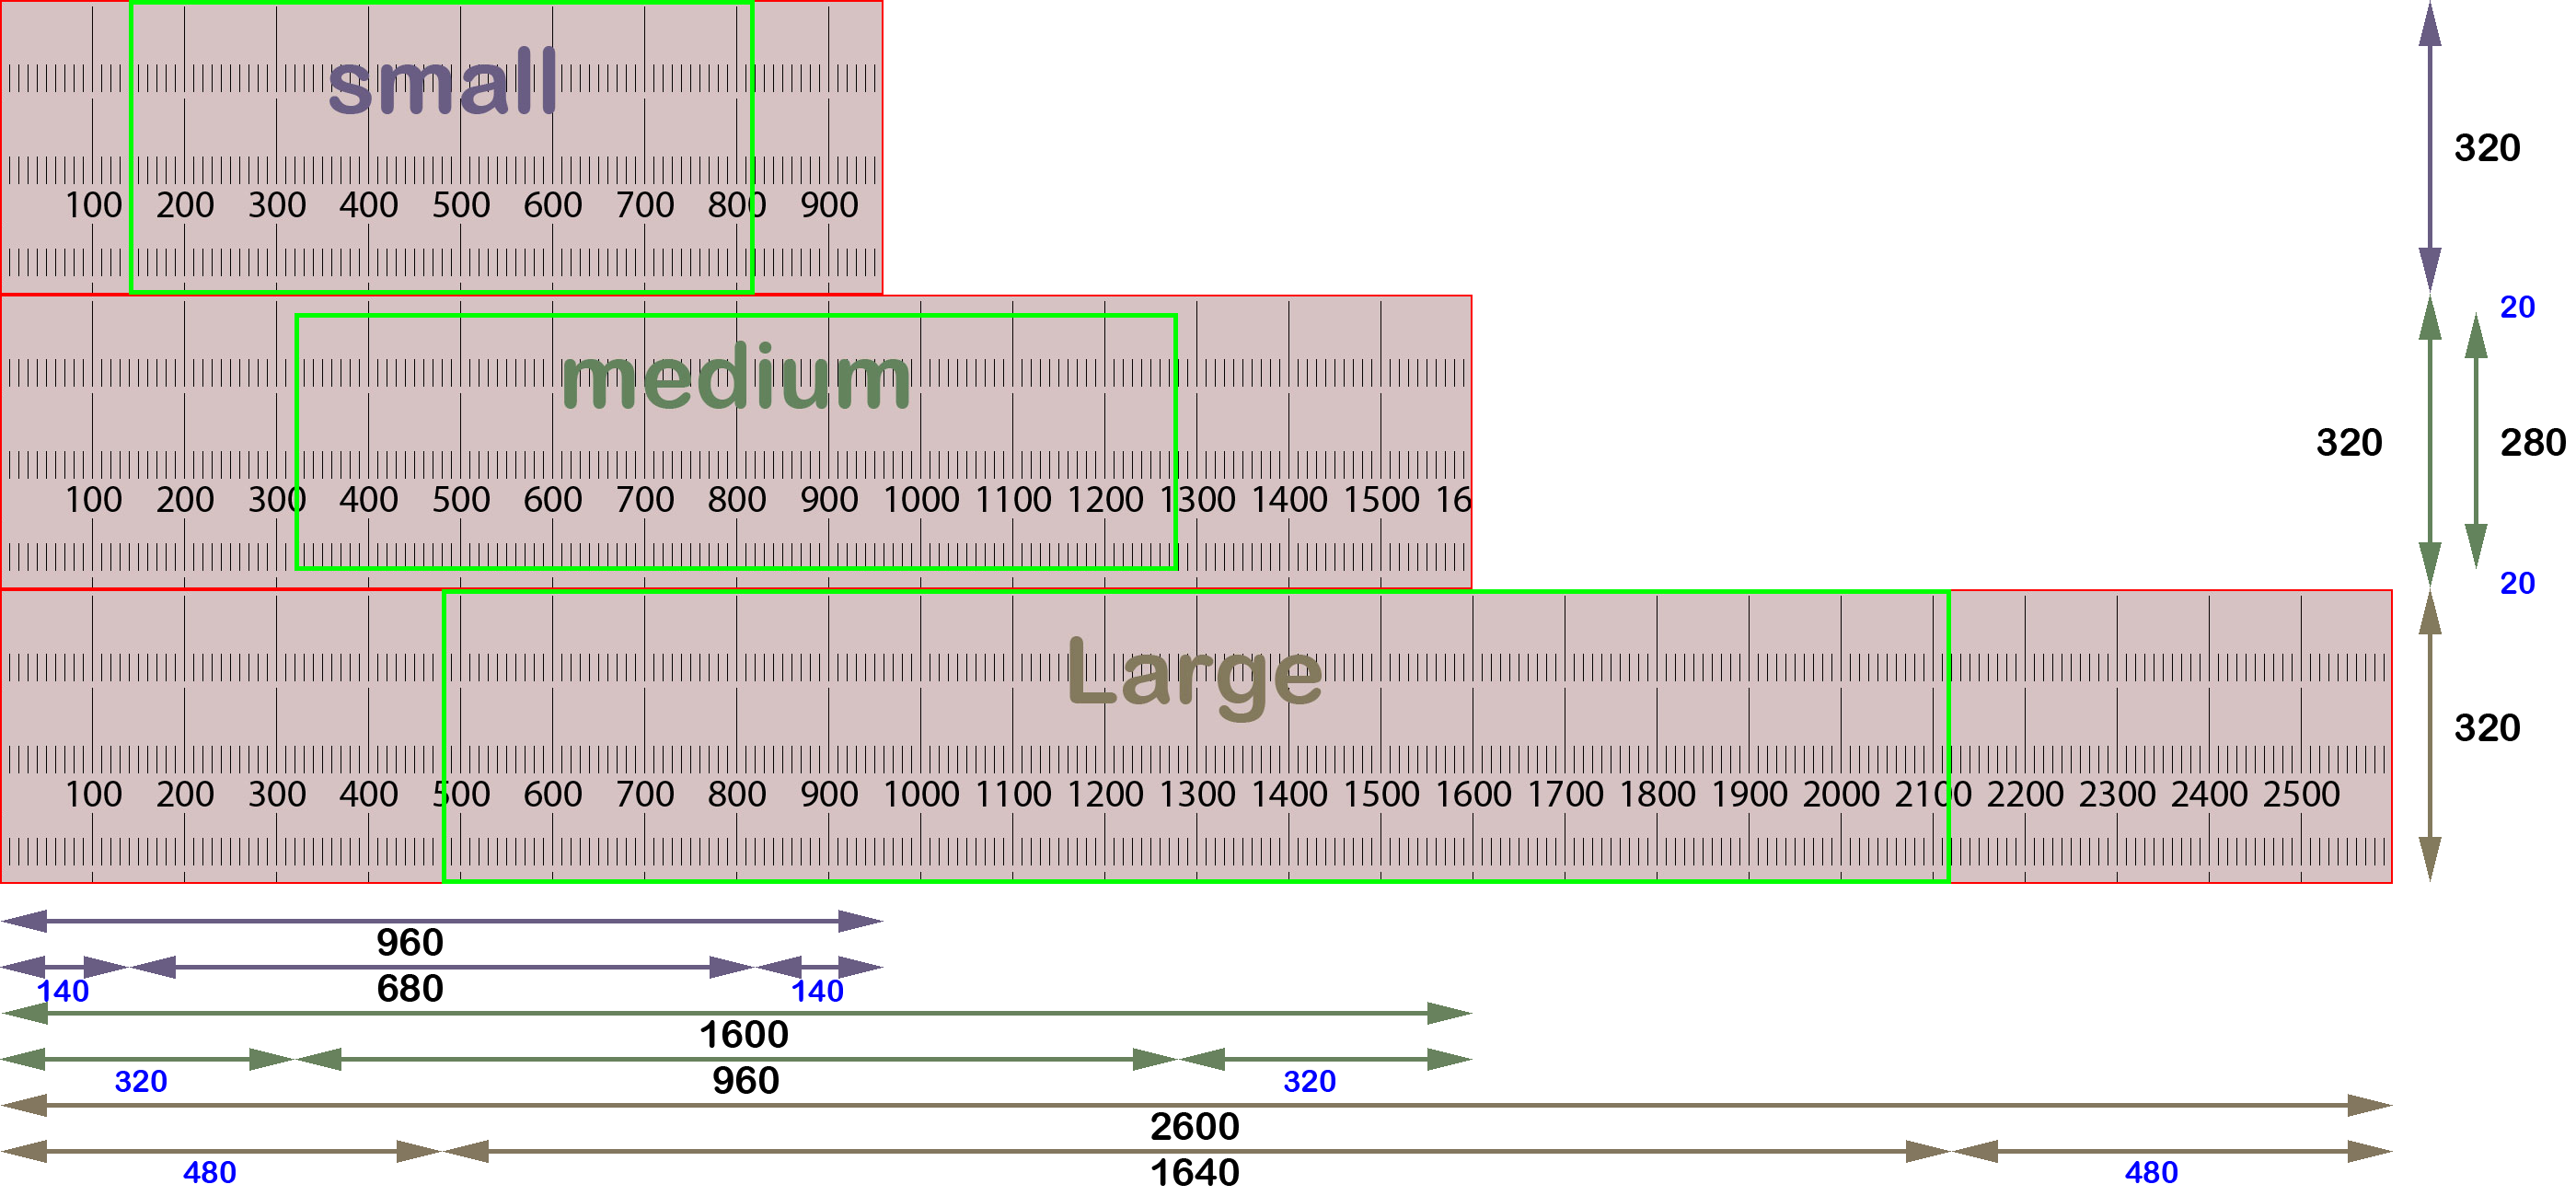
Logos on the right column
Responsive interfaces require uploading an images with three different sizes.
See recommended sizes for images below, and examples of how they look like. Length and width are given in pixels.
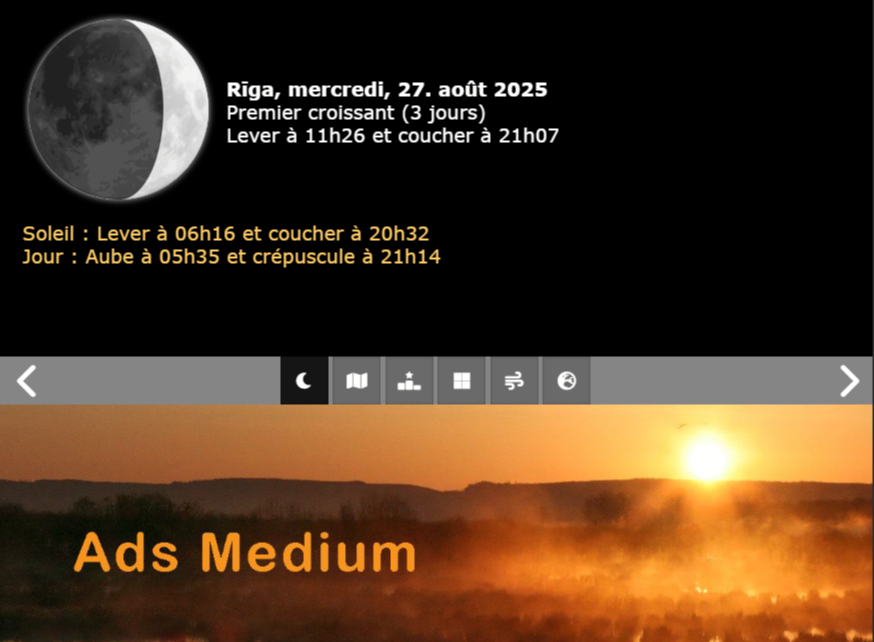
· Small: 680 px X 320 px, or 960 px X 320 px
· Medium: 960 px X 280 px, or 1600 px X 320 px
· Large: 1640 px X 320 px, or 2600 px X 320 px
Audience
Restitutions polygons list
Administration > Web site administration > Restitutions polygons list
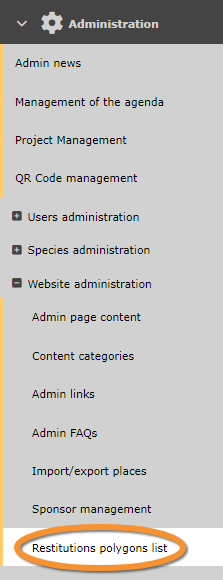
Restitutions polygons list.