QR Code management: Difference between revisions
Marked this version for translation |
|||
| (52 intermediate revisions by 2 users not shown) | |||
| Line 1: | Line 1: | ||
<translate> | |||
<!--T:1--> | |||
Administration > QR code management <br/> | |||
<br/> | |||
<!--T:2--> | |||
Create a QR code to share observation of a specific area (ie. nature reserve, point of interest, locality...) with other naturalists regardless if they are NaturaList users. <br/> | |||
<!--T:3--> | |||
<span style="color: #000000; margin-left: 25px;"><b>· </b>It provides direct access to the latest observations for that place. <br/> | |||
<span style="color: #000000; margin-left: 25px;"><b>· </b>It highlights conservation efforts and support partnerships on the ground.<br/> | |||
<br/> | |||
<!--T:4--> | |||
Creating QR codes requires special permissions. Please contact your website administrator if needed. <br/> | |||
<br/> | |||
Once access is granted, you can: <br/> | |||
<span style="color: #000000; margin-left: 25px;"><b>· </b>create a [[QR_Code_management#New_1|new place]] and [[QR_Code_management#Create_code|generate a QR code]] for it, or <br/> | |||
<span style="color: #000000; margin-left: 25px;"><b>· </b>select an existing place and generate the corresponding QR code.<br/> | |||
<br/> | <br/> | ||
<!--T:5--> | |||
See following sections to create and manage QR codes.<br/> | |||
<br/> | <br/> | ||
<!--T:6--> | |||
<center> | <center> | ||
<div class="toc" style="border-radius:5px;background-color:#ffffff;padding-left:8px;padding-right:8px;padding-bottom:8px;width:300px;"> | <div class="toc" style="border-radius:5px;background-color:#ffffff;padding-left:8px;padding-right:8px;padding-bottom:8px;width:300px;"> | ||
| Line 15: | Line 37: | ||
<br/> | <br/> | ||
<!--T:7--> | |||
<center> | <center> | ||
<div class="toc" style="border-radius: 5px; padding: 25px; text-align: left; font-family: sans-serif; color: black; width: 750px; background-color: hsl(157, 74%, 80%);"> | <div class="toc" style="border-radius: 5px; padding: 25px; text-align: left; font-family: sans-serif; color: black; width: 750px; background-color: hsl(157, 74%, 80%);"> | ||
| Line 25: | Line 45: | ||
RED BOX (Warnings): hsl(0, 77%, 78%) --> | RED BOX (Warnings): hsl(0, 77%, 78%) --> | ||
<!--T:8--> | |||
<p> | <p> | ||
For creating a code, consider:<br/> | For creating a code, consider:<br/> | ||
| Line 30: | Line 51: | ||
<span style="color: #000000; margin-left: 25px;"><b>· </b>Control its visibility: avoid reflection, create and print large enough, leave empty space around it, control the contrast... <br/> | <span style="color: #000000; margin-left: 25px;"><b>· </b>Control its visibility: avoid reflection, create and print large enough, leave empty space around it, control the contrast... <br/> | ||
<span style="color: #000000; margin-left: 25px;"><b>· </b>Say what the QR code is for. <br/> | <span style="color: #000000; margin-left: 25px;"><b>· </b>Say what the QR code is for. <br/> | ||
<span style="color: #000000; margin-left: 25px;"><b>· </b>Download the NaturaList logo to print it next to the QR code. <br/> | <span style="color: #000000; margin-left: 25px;"><b>· </b>Download the NaturaList logo to [[Media:QR example.png|print it next to the QR code]]. <br/> | ||
</p> | </p> | ||
<!--T:9--> | |||
</div> | </div> | ||
</center> | </center> | ||
| Line 38: | Line 60: | ||
<br/> | <br/> | ||
<!--T:10--> | |||
__NOTOC__ | __NOTOC__ | ||
<!--T:11--> | |||
<div class="toc" style="width:350px;"> <!-- La llargada s'ha de canviar aquí --> | <div class="toc" style="width:350px;"> <!-- La llargada s'ha de canviar aquí --> | ||
<div class="mw-collapsible mw-collapsed" data-expandtext="Show" data-collapsetext="Hide" style="width:300px;margin-bottom:0px;margin-top:0px;background-color:#f7f7f7;"> | <div class="mw-collapsible mw-collapsed" data-expandtext="Show" data-collapsetext="Hide" style="width:300px;margin-bottom:0px;margin-top:0px;background-color:#f7f7f7;"> | ||
'''Contents''' | '''Contents''' | ||
<div class="mw-collapsible-content" style="width:350px;background-color:#f7f7f7;"> <!-- I també cal canviar la llargada aquí --> | <div class="mw-collapsible-content" style="width:350px;background-color:#f7f7f7;"> <!-- I també cal canviar la llargada aquí --> | ||
<ol> | <ol> | ||
1. [[QR Code management#QR code creation|QR code creation]] <br/> | |||
1. [[QR Code management#Places and QR code creation|Places and QR code creation]] <br /> | 1. [[QR Code management#Places and QR code creation|Places and QR code creation]] <br /> | ||
<ol>1.1 [[QR Code management#Create code|Create a QR code for this site]]<br/> | <ol>1.1 [[QR Code management#Create code|Create a QR code for this site]]<br/> | ||
| Line 59: | Line 84: | ||
<br/> | <br/> | ||
<!--T:12--> | |||
<span id="QR code creation"></span> | |||
=QR code creation= | |||
<br/> | |||
<!--T:13--> | |||
<center> | |||
<div class="toc" style="border-radius:5px;background-color:#ffffff;padding-left:8px;padding-right:8px;padding-bottom:8px;width:800px;"> | |||
[[File: New 1.png|800px|link=https://help.biolovision.net/images/1/19/New_1.png]] | |||
[[File: New 2.png|800px|link=https://help.biolovision.net/images/e/e3/New_2.png]] | |||
<div class="toc" style="border-radius:5px;padding-left:15px;text-align:left; font-size:12px;width:775px;"> | |||
'''Create a new QR code.''' | |||
</div> | |||
</div> | |||
</center> | |||
<br/> | |||
<br/> | |||
<!--T:14--> | |||
Creating a QR code requires special rights. <br/> | |||
Contact your local administrator regarding these rights. <br/> | |||
<br/> | |||
<!--T:15--> | |||
To create a new QR code <br/> | |||
1. Access Administration > QR Code management > places and QR code creation. <br/> | |||
2. Press [[Media:+ New.png|<b>+ NEW</b>]] at the bottom of the page. <br/> | |||
<br/> | |||
<!--T:16--> | |||
1. Provide site's basic details: Name and coordinates. <br/> | |||
<span style="color: #000000; margin-left: 25px;"><b>· </b>Type coordinates or select from the map below. See to know how to navigate the map if necessary. <br/> | |||
2. Set QR parameters for the site: <br/> | |||
<span style="color: #000000; margin-left: 25px;"><b>· Radius:</b> Select from the expandable menu the radius from given coordinates delimiting the area the QR code applies to.. <br/> | |||
<span style="color: #000000; margin-left: 25px;"><b>· Number of days:</b> Select from the expandable menu the number of days the QR will be valid. <br/> | |||
<span style="color: #000000; margin-left: 25px;"><b>· Project / [[Glossary#Partner|partner]]:</b> Type the name, or part of the name, of the project or partner whose icon will be displayed when scanning the QR code on the left hand field, and select the project/partner name from the expandable menu on the right. <br/> | |||
<span style="color: #000000; margin-left: 25px;"><b>· [[Glossary#Advertising|Advertising?]]:</b> Check if there is any advertising or partner. <br/> | |||
<span style="color: #000000; margin-left: 25px;"><b>· Comment:</b> Leave a comment if appropriate. Select the name of the language from the taps and type a comment in the language selected (see [[Media:Comment language.png|image as an example]]). <br/> | |||
3. When done, press ADD. <br/> | |||
<br/> | |||
<br/> | |||
<!--T:17--> | |||
[[QR Code management#QR code creation|[Top to QR code creation]]] <br/> | |||
[[#top|[Back to QR code management]]] <br/> | |||
<br/> | |||
<!--T:18--> | |||
=Places and QR code creation= | =Places and QR code creation= | ||
<br/> | <br/> | ||
<!--T:19--> | |||
See existing QR codes.<br/> | See existing QR codes.<br/> | ||
<br/> | <br/> | ||
<!--T:20--> | |||
<center> | <center> | ||
{| style="text-align:left; border:0px solid black; vertical-align:top;"| | {| style="text-align:left; border:0px solid black; vertical-align:top;"| | ||
| Line 108: | Line 183: | ||
<br/> | <br/> | ||
<!--T:21--> | |||
<span id="Search 1"></span> | <span id="Search 1"></span> | ||
<b>1. Search </b> <br/> | <b>1. Search </b> <br/> | ||
| Line 114: | Line 190: | ||
<br/> | <br/> | ||
<!--T:22--> | |||
<span id="Page 1"></span> | <span id="Page 1"></span> | ||
<b>2. Page and items</b> <br/> | <b>2. Page and items</b> <br/> | ||
| Line 119: | Line 196: | ||
<br/> | <br/> | ||
<!--T:23--> | |||
<span id="Details 1"></span> | <span id="Details 1"></span> | ||
<b>3. Details</b><br/> | <b>3. Details</b><br/> | ||
| Line 124: | Line 202: | ||
<br/> | <br/> | ||
<!--T:24--> | |||
<center> | <center> | ||
<div class="toc" style="border-radius:5px;background-color:#ffffff;padding-left:8px;padding-right:8px;width:700px;"> | <div class="toc" style="border-radius:5px;background-color:#ffffff;padding-left:8px;padding-right:8px;width:700px;"> | ||
| Line 151: | Line 230: | ||
<br/> | <br/> | ||
<!--T:25--> | |||
<center> | <center> | ||
<div class="toc" style="border-radius: 5px; padding: 25px; text-align: left; font-family: sans-serif; color: black; width: 90%;background-color:white;"> | <div class="toc" style="border-radius: 5px; padding: 25px; text-align: left; font-family: sans-serif; color: black; width: 90%;background-color:white;"> | ||
| Line 157: | Line 237: | ||
<br/> | <br/> | ||
<!--T:26--> | |||
<center> | <center> | ||
<div class="toc" style="border-radius: 5px; padding: 25px; text-align: left; font-family: sans-serif; color: black; width: 400px; background-color: #ffffdb"> | <div class="toc" style="border-radius: 5px; padding: 25px; text-align: left; font-family: sans-serif; color: black; width: 400px; background-color: #ffffdb"> | ||
| Line 164: | Line 245: | ||
RED BOX (Warnings): hsl(0, 77%, 78%) --> | RED BOX (Warnings): hsl(0, 77%, 78%) --> | ||
<!--T:27--> | |||
<p> | <p> | ||
<b>To generate a QR code: </b><br/> | <b>To generate a QR code: </b><br/> | ||
| Line 173: | Line 255: | ||
</p> | </p> | ||
<!--T:28--> | |||
</div> | </div> | ||
</center> | </center> | ||
<br /> | <br /> | ||
<!--T:29--> | |||
To generate a QR code: <br/> | To generate a QR code: <br/> | ||
<br/> | |||
<!--T:30--> | |||
<center> | |||
<div class="toc" style="border-radius:5px;background-color:#ffffff;padding-left:8px;padding-right:8px; padding-bottom:8px;width:600px;"> | |||
[[File:Generate code.png|600px|link=https://help.biolovision.net/images/c/c5/Generate_code.png]] | |||
<div class="toc" style="border-radius:5px;padding-left:15px;text-align:left; font-size:12px;width:575px;"> | |||
'''Generate QR code.''' | |||
</div> | |||
<p style="color:black;font-size:12px;padding-left:30px;text-align:left;column-count:2;"> | |||
<b>1.</b> Choose size. <br /> | |||
<b>2.</b> Choose transparency.<br/> | |||
<b>3.</b> Check guidelines. <br /> | |||
<b>4.</b> See final result. <br/> | |||
<b>5.</b> Generate the code. <br/> | |||
<b>6.</b> Add NaturaList code. <br/> | |||
</p> | |||
</div> | |||
</center> | |||
<br/> | |||
<br/> | |||
<!--T:31--> | |||
<span style="color: #000000; margin-left: 25px;"><b>1. </b>Select size of QR code from the expandable menu. <br/> | <span style="color: #000000; margin-left: 25px;"><b>1. </b>Select size of QR code from the expandable menu. <br/> | ||
<span style="color: #000000; margin-left: 25px;"><b>2. </b>Check the cell <b>Transparent background?</b> if interested. <br/> | <span style="color: #000000; margin-left: 25px;"><b>2. </b>Check the cell <b>Transparent background?</b> if interested. <br/> | ||
| Line 192: | Line 299: | ||
</div> | </div> | ||
<!--T:32--> | |||
|style="padding: 10px"| | |style="padding: 10px"| | ||
<div class="toc" style="border-radius:5px;background-color:lightyellow;width:250px;padding-left:8px;padding-right:8px;padding-bottom:8px;"> | <div class="toc" style="border-radius:5px;background-color:lightyellow;width:250px;padding-left:8px;padding-right:8px;padding-bottom:8px;"> | ||
| Line 200: | Line 308: | ||
</div> | </div> | ||
<!--T:33--> | |||
|} | |} | ||
</center> | </center> | ||
| Line 206: | Line 315: | ||
<!--T:34--> | |||
<span style="color: #000000; margin-left: 25px;"><b>3. </b>Check guidelines if necessary. <br/> | <span style="color: #000000; margin-left: 25px;"><b>3. </b>Check guidelines if necessary. <br/> | ||
<span style="color: #000000; margin-left: 45px;"><b>· </b>Make sure there is internet where you intend to post the QR code. Ie. 3G/4G... <br/> | <span style="color: #000000; margin-left: 45px;"><b>· </b>Make sure there is internet where you intend to post the QR code. Ie. 3G/4G... <br/> | ||
| Line 214: | Line 324: | ||
<br/> | <br/> | ||
<!--T:35--> | |||
<center> | <center> | ||
<div class="toc" style="border-radius:5px;background-color:#ffffff;padding-left:8px;padding-right:8px;padding-bottom:8px;width:300px;"> | <div class="toc" style="border-radius:5px;background-color:#ffffff;padding-left:8px;padding-right:8px;padding-bottom:8px;width:300px;"> | ||
| Line 225: | Line 336: | ||
<br/> | <br/> | ||
<!--T:36--> | |||
<span style="color: #000000; margin-left: 25px;"><b>5. </b>Generate the code. <br/> | <span style="color: #000000; margin-left: 25px;"><b>5. </b>Generate the code. <br/> | ||
<span style="color: #000000; margin-left: 25px;"><b>6. </b>Download NaturaList code to place it next to your QR. <br/> | <span style="color: #000000; margin-left: 25px;"><b>6. </b>Download NaturaList code to place it next to your QR. <br/> | ||
< | <!--T:37--> | ||
</div> | </div> | ||
</center> | </center> | ||
| Line 248: | Line 346: | ||
<br/> | <br/> | ||
< | <!--T:38--> | ||
<span id="Edit 1"></span> | <span id="Edit 1"></span> | ||
<b>4. Edit</b> <br/> | <b>4. Edit</b> <br/> | ||
| Line 259: | Line 352: | ||
<br/> | <br/> | ||
<!--T:39--> | |||
1. Modify if necessary site's basic details: Name and coordinates. <br/> | 1. Modify if necessary site's basic details: Name and coordinates. <br/> | ||
<span style="color: #000000; margin-left: 25px;"><b>· </b>Type new coordinates or select from the map below. See wiki section Web interface > Local portal > [[Navigating_the_map|Navigating the map]] to know how to navigate the map if necessary. <br/> | <span style="color: #000000; margin-left: 25px;"><b>· </b>Type new coordinates or select from the map below. See wiki section Web interface > Local portal > [[Navigating_the_map|Navigating the map]] to know how to navigate the map if necessary. <br/> | ||
| Line 266: | Line 360: | ||
<span style="color: #000000; margin-left: 25px;"><b>· Project / [[Glossary#Partner|partner]]:</b> Type the name, or part of the name, of the project or partner whose icon will be displayed when scanning the QR code on the left hand field, and select the project/partner name from the expandable menu on the right. <br/> | <span style="color: #000000; margin-left: 25px;"><b>· Project / [[Glossary#Partner|partner]]:</b> Type the name, or part of the name, of the project or partner whose icon will be displayed when scanning the QR code on the left hand field, and select the project/partner name from the expandable menu on the right. <br/> | ||
<span style="color: #000000; margin-left: 25px;"><b>· [[Glossary#Advertising|Advertising?]]:</b> Check if the QR code contains any publicity. <br/> | <span style="color: #000000; margin-left: 25px;"><b>· [[Glossary#Advertising|Advertising?]]:</b> Check if the QR code contains any publicity. <br/> | ||
<span style="color: #000000; margin-left: 25px;"><b>· Comment:</b> Leave a comment if appropriate. Select the name of the language from the taps and type a comment in the language selected (see [[Media: Comment language.png|image as an example]]). <br/> | <span style="color: #000000; margin-left: 25px;"><b>· Comment:</b> Leave a comment if appropriate. Select the name of the language from the taps and type a comment in the language selected (see [[Media:Comment language.png|image as an example]]). <br/> | ||
3. When done, press ADD. <br/> | 3. When done, press ADD. <br/> | ||
<br/> | <br/> | ||
<!--T:40--> | |||
<center> | <center> | ||
<div class="toc" style="border-radius:5px;background-color:#ffffff;padding-left:8px;padding-right:8px;padding-bottom:8px;width:800px;"> | <div class="toc" style="border-radius:5px;background-color:#ffffff;padding-left:8px;padding-right:8px;padding-bottom:8px;width:800px;"> | ||
| Line 283: | Line 378: | ||
<br/> | <br/> | ||
<!--T:41--> | |||
<span id="Delete 1"></span> | <span id="Delete 1"></span> | ||
<b>5. Delete</b> <br/> | <b>5. Delete</b> <br/> | ||
| Line 288: | Line 384: | ||
<br/> | <br/> | ||
<!--T:42--> | |||
See a summary of QR details and <br/> | See a summary of QR details and <br/> | ||
<span style="color: #000000; margin-left: 25px;"><b>· </b>Press <b>YES</b> to definitely delete the QR code, or <br/> | <span style="color: #000000; margin-left: 25px;"><b>· </b>Press <b>YES</b> to definitely delete the QR code, or <br/> | ||
| Line 293: | Line 390: | ||
<br/> | <br/> | ||
<!--T:43--> | |||
<center> | <center> | ||
<div class="toc" style="border-radius:5px;background-color:#ffffff;padding-left:8px;padding-right:8px;padding-bottom:8px;width:600px;"> | <div class="toc" style="border-radius:5px;background-color:#ffffff;padding-left:8px;padding-right:8px;padding-bottom:8px;width:600px;"> | ||
| Line 305: | Line 403: | ||
<br/> | <br/> | ||
<span id | <!--T:44--> | ||
<span id="New 1"></span> | |||
<b>6. New </b> <br/> | <b>6. New </b> <br/> | ||
Create a new QR code. <br/> | Create a new QR code. <br/> | ||
<br/> | <br/> | ||
<!--T:45--> | |||
1. Provide site's basic details: Name and coordinates. <br/> | 1. Provide site's basic details: Name and coordinates. <br/> | ||
<span style="color: #000000; margin-left: 25px;"><b>· </b>Type coordinates or select from the map below. See to know how to navigate the map if necessary. <br/> | <span style="color: #000000; margin-left: 25px;"><b>· </b>Type coordinates or select from the map below. See to know how to navigate the map if necessary. <br/> | ||
| Line 317: | Line 417: | ||
<span style="color: #000000; margin-left: 25px;"><b>· Project / [[Glossary#Partner|partner]]:</b> Type the name, or part of the name, of the project or partner whose icon will be displayed when scanning the QR code on the left hand field, and select the project/partner name from the expandable menu on the right. <br/> | <span style="color: #000000; margin-left: 25px;"><b>· Project / [[Glossary#Partner|partner]]:</b> Type the name, or part of the name, of the project or partner whose icon will be displayed when scanning the QR code on the left hand field, and select the project/partner name from the expandable menu on the right. <br/> | ||
<span style="color: #000000; margin-left: 25px;"><b>· [[Glossary#Advertising|Advertising?]]:</b> Check if there is any advertising or partner. <br/> | <span style="color: #000000; margin-left: 25px;"><b>· [[Glossary#Advertising|Advertising?]]:</b> Check if there is any advertising or partner. <br/> | ||
<span style="color: #000000; margin-left: 25px;"><b>· Comment:</b> Leave a comment if appropriate. Select the name of the language from the taps and type a comment in the language selected (see [[Media: Comment language.png|image as an example]]). <br/> | <span style="color: #000000; margin-left: 25px;"><b>· Comment:</b> Leave a comment if appropriate. Select the name of the language from the taps and type a comment in the language selected (see [[Media:Comment language.png|image as an example]]). <br/> | ||
3. When done, press ADD. <br/> | 3. When done, press ADD. <br/> | ||
<br/> | <br/> | ||
<!--T:46--> | |||
<center> | <center> | ||
<div class="toc" style="border-radius:5px;background-color:#ffffff;padding-left:8px;padding-right:8px;padding-bottom:8px;width:800px;"> | <div class="toc" style="border-radius:5px;background-color:#ffffff;padding-left:8px;padding-right:8px;padding-bottom:8px;width:800px;"> | ||
| Line 333: | Line 434: | ||
<br/> | <br/> | ||
<!--T:47--> | |||
<span id="Export 1"></span> | <span id="Export 1"></span> | ||
<b>7. Export</b><br/> | <b>7. Export</b><br/> | ||
| Line 338: | Line 440: | ||
<br/> | <br/> | ||
<!--T:48--> | |||
<span id="Export views 1"></span> | <span id="Export views 1"></span> | ||
<center> | <center> | ||
| Line 344: | Line 447: | ||
Export a .txt file summarising number of visits each QR code in the local portal had. <br/> | Export a .txt file summarising number of visits each QR code in the local portal had. <br/> | ||
Downloading the .txt requires identification. <br/> | Downloading the .txt requires identification. <br/> | ||
It can later be displayed on an excel sheet. See [[Media: | It can later be displayed on an excel sheet. See [[Media:Export views excel.png|here an example]]. <br/> | ||
<br/> | <br/> | ||
<!--T:49--> | |||
<span style="color: #000000; margin-left: 25px;">1. Select the year to download visits from the expandable menu. <br/> | <span style="color: #000000; margin-left: 25px;">1. Select the year to download visits from the expandable menu. <br/> | ||
<span style="color: #000000; margin-left: 25px;">2. Press <b>EXPORT VIEWS</b> <br/> | <span style="color: #000000; margin-left: 25px;">2. Press <b>EXPORT VIEWS</b> <br/> | ||
<br/> | <br/> | ||
<!--T:50--> | |||
<center> | <center> | ||
<div class="toc" style="border-radius:5px;background-color:#ffffff;padding-left:8px;padding-right:8px;width:600px;"> | <div class="toc" style="border-radius:5px;background-color:#ffffff;padding-left:8px;padding-right:8px;width:600px;"> | ||
| Line 366: | Line 470: | ||
<br/> | <br/> | ||
<!--T:51--> | |||
</div> | </div> | ||
</center> | </center> | ||
| Line 371: | Line 476: | ||
<br/> | <br/> | ||
<!--T:52--> | |||
[[QR Code management#Places and QR code creation|[Top to Places and QR code creation]]]<br/> | [[QR Code management#Places and QR code creation|[Top to Places and QR code creation]]]<br/> | ||
[[#top|[Back to QR Code management]]]<br/> | [[#top|[Back to QR Code management]]]<br/> | ||
<br/> | <br/> | ||
<!--T:53--> | |||
=QR code group= | =QR code group= | ||
<br/> | <br/> | ||
<!--T:54--> | |||
List or [[Glossary#Partner|partners]] and projects participating in QR codes in this local portal. <br/> | List or [[Glossary#Partner|partners]] and projects participating in QR codes in this local portal. <br/> | ||
<br/> | <br/> | ||
<!--T:55--> | |||
Creating a group/project allows: <br/> | |||
<span style="color: #000000; margin-left: 25px;"><b>· </b> to link QR codes to a specific group or project. <br/> | |||
<span style="color: #000000; margin-left: 35px;">This makes it easier to use the search tool in the [[QR_Code_management#Places_and_QR_code_creation|Places section]] and in the [[QR_Code_management#QR_code_creation|QR code creation]] panel to find all related QR codes. <br/> | |||
<span style="color: #000000; margin-left: 25px;"><b>· </b> to [[QR_Code_management#map|display on a map]] codes belonging to the group. <br/> | |||
<br/> | |||
<br/> | |||
<!--T:56--> | |||
<center> | <center> | ||
<div class="toc" style="border-radius:5px;background-color:#ffffff;padding-left:8px;padding-right:8px; padding-bottom:8px;width:700px;"> | <div class="toc" style="border-radius:5px;background-color:#ffffff;padding-left:8px;padding-right:8px; padding-bottom:8px;width:700px;"> | ||
| Line 391: | Line 508: | ||
<b>2.</b> [[QR Code management#Edit 2|Edit]] <br/> | <b>2.</b> [[QR Code management#Edit 2|Edit]] <br/> | ||
<b>3.</b> [[QR Code management#Delete 2|Delete]] <br /> | <b>3.</b> [[QR Code management#Delete 2|Delete]] <br /> | ||
<b>4.</b> [[QR Code management#New 2|New]] <br/> | <b>4.</b> [[QR Code management#Map|Map]] <br /> | ||
<b>5.</b> [[QR Code management#New 2|New]] <br/> | |||
</p> | </p> | ||
<p style="color:black;font-size:12px;padding-left:5px;text-align:left;column-count:1;padding-right:5px;"> | <p style="color:black;font-size:12px;padding-left:5px;text-align:left;column-count:1;padding-right:5px;"> | ||
| Line 402: | Line 520: | ||
<br/> | <br/> | ||
<!--T:57--> | |||
<span id="Details 2"></span> | <span id="Details 2"></span> | ||
<b>1. Details</b><br/> | <b>1. Details</b><br/> | ||
| Line 407: | Line 526: | ||
<br/> | <br/> | ||
<!--T:58--> | |||
<center> | <center> | ||
<div class="toc" style="border-radius:5px;background-color:#ffffff;padding-left:8px;padding-right:8px;width:700px;"> | <div class="toc" style="border-radius:5px;background-color:#ffffff;padding-left:8px;padding-right:8px;width:700px;"> | ||
| Line 427: | Line 547: | ||
<br/> | <br/> | ||
<!--T:59--> | |||
<span id="Edit 2"></span> | <span id="Edit 2"></span> | ||
<b>2. Edit</b><br/> | <b>2. Edit</b><br/> | ||
| Line 432: | Line 553: | ||
<br/> | <br/> | ||
<!--T:60--> | |||
<center> | <center> | ||
<div class="toc" style="border-radius:5px;background-color:#ffffff;padding-left:8px;padding-right:8px;width:500px;"> | <div class="toc" style="border-radius:5px;background-color:#ffffff;padding-left:8px;padding-right:8px;width:500px;"> | ||
| Line 450: | Line 572: | ||
<br/> | <br/> | ||
<!--T:61--> | |||
<span id="Delete 2"></span> | <span id="Delete 2"></span> | ||
<b>3. Delete</b><br/> | <b>3. Delete</b><br/> | ||
| Line 455: | Line 578: | ||
<br/> | <br/> | ||
<!--T:62--> | |||
<span style="color: #000000; margin-left: 25px;"><b>· </b>Press <b>YES</b> to definitely delete the project/partner, or <br/> | <span style="color: #000000; margin-left: 25px;"><b>· </b>Press <b>YES</b> to definitely delete the project/partner, or <br/> | ||
<span style="color: #000000; margin-left: 25px;"><b>· </b>Press <b>NO</b> to cancel delete and keep the project/partner. <br/> | <span style="color: #000000; margin-left: 25px;"><b>· </b>Press <b>NO</b> to cancel delete and keep the project/partner. <br/> | ||
<br/> | <br/> | ||
<!--T:63--> | |||
<center> | <center> | ||
<div class="toc" style="border-radius:5px;background-color:#ffffff;padding-left:8px;padding-right:8px;width:600px;"> | <div class="toc" style="border-radius:5px;background-color:#ffffff;padding-left:8px;padding-right:8px;width:600px;"> | ||
| Line 470: | Line 595: | ||
<br/> | <br/> | ||
<!--T:64--> | |||
<span id="map"></span> | |||
<b>4. Map</b> <br/> | |||
Indicates if a QR code group will be displayed on the map. <br/> | |||
<br/> | |||
<span style="color: #000000; margin-left: 25px;"><b>· </b>Access the map at Menu > Consulting > [[Media:Access map.png|Les bons coins]]. <br/> | |||
<span style="color: #000000; margin-left: 25px;"><b>· </b>Only one map per local portal is possible. <br/> | |||
<span style="color: #000000; margin-left: 25px;"><b>· </b>It can display one or several QR code projects at the same time, and each item is clickable. <br/> | |||
<span style="color: #000000; margin-left: 25px;"><b>· </b>Saved quick-search polygons created in the search engine may also appear in blue in the map. <br/> | |||
<span style="color: #000000; margin-left: 25px;"><b>· </b>The feature needs to be activated. <br/> | |||
<span style="color: #000000; margin-left: 35px;">At the moment, it is only available at [https://www.ornitho.ch/ www.ornitho.ch] in French. Contact Biolovision to activate it in your local portal. <br/> | |||
<br/> | |||
<!--T:65--> | |||
<center> | |||
<div class="toc" style="border-radius:5px;background-color:#ffffff;padding-left:8px;padding-right:8px;padding-bottom:8px;width:600px;"> | |||
[[File:QR Map.png|600px|link=https://help.biolovision.net/images/3/36/QR_Map.png|Click image to enlarge]] | |||
<div class="toc" style="border-radius:5px;padding-left:15px;text-align:left; font-size:12px;width:575px;"> | |||
'''QR codes group map.''' | |||
</div> | |||
</div> | |||
</center> | |||
<br/> | |||
<br/> | |||
<!--T:66--> | |||
<center> | |||
<div class="toc" style="border-radius: 5px; padding: 25px; text-align: left; font-family: sans-serif; color: black; width: 600px; background-color: rgb(199, 235, 255)"> | |||
<!-- GREEN BOX (Tips): hsl(157, 74%, 80%) , #a6f2d5 , rgb(166, 242, 213) | |||
YELLOW BOX (Summaries): hsl(60, 100%, 93%) , #ffffdb , rgb(255, 255, 219) | |||
BLUE BOX (Information): hsl(201, 100%, 89%) , #c7ebff , rgb(199, 235, 255) | |||
RED BOX (Warnings): hsl(0, 77%, 78%) , #f29c9c , rgb(242, 156, 156)--> | |||
<!--T:67--> | |||
<p> | |||
NOTE<br/> | |||
<span style="color: #000000; margin-left: 25px;"><b>· </b>Only one map per local portal is possible.<br/> | |||
<span style="color: #000000; margin-left: 25px;"><b>· </b>At the moment, it is only available at [https://www.ornitho.ch/ www.ornitho.ch] in French.<br/> | |||
<span style="color: #000000; margin-left: 25px;"><b>· </b>Contact Biolovision to activate it in your local portal. <br/> | |||
</p> | |||
<!--T:68--> | |||
</div> | |||
</center> | |||
<br /> | |||
<!--T:69--> | |||
<span id="New 2"></span> | <span id="New 2"></span> | ||
<b> | <b>5. New</b><br/> | ||
Create a new Partner or project. <br/> | Create a new Partner or project. <br/> | ||
<br/> | <br/> | ||
<!--T:70--> | |||
1. Type the name of partner or project involved. <br/> | 1. Type the name of partner or project involved. <br/> | ||
2. Press <b>ADD</b> to save the new partner/project.<br/> | 2. Press <b>ADD</b> to save the new partner/project.<br/> | ||
<br/> | <br/> | ||
<!--T:71--> | |||
<center> | <center> | ||
<div class="toc" style="border-radius:5px;background-color:#ffffff;padding-left:8px;padding-right:8px;width:500px;"> | <div class="toc" style="border-radius:5px;background-color:#ffffff;padding-left:8px;padding-right:8px;width:500px;"> | ||
| Line 497: | Line 671: | ||
<br/> | <br/> | ||
<!--T:72--> | |||
[[QR Code management#QR code group|[Top to QR code group]]]<br/> | [[QR Code management#QR code group|[Top to QR code group]]]<br/> | ||
[[#top|[Back to QR Code management]]]<br/> | [[#top|[Back to QR Code management]]]<br/> | ||
<br/> | <br/> | ||
<!--T:73--> | |||
=Advertising= | =Advertising= | ||
<br/> | <br/> | ||
<!--T:74--> | |||
List of logos of advertising parties. <br/> | List of logos of advertising parties. <br/> | ||
<br/> | <br/> | ||
<!--T:75--> | |||
<center> | <center> | ||
<div class="toc" style="border-radius:5px;background-color:#ffffff;padding-left:8px;padding-right:8px;width:600px;"> | <div class="toc" style="border-radius:5px;background-color:#ffffff;padding-left:8px;padding-right:8px;width:600px;"> | ||
| Line 528: | Line 706: | ||
<br/> | <br/> | ||
<!--T:76--> | |||
Advertisers' logos are displayed on the main screen when scanning the QR code. <br/> | |||
<br/> | <br/> | ||
<!--T:77--> | |||
<center> | <center> | ||
<div class="toc" style="border-radius:5px;background-color:#ffffff;padding-left:8px;padding-right:8px;padding-bottom:8px;width:300px;"> | <div class="toc" style="border-radius:5px;background-color:#ffffff;padding-left:8px;padding-right:8px;padding-bottom:8px;width:300px;"> | ||
| Line 542: | Line 722: | ||
<br/> | <br/> | ||
<!--T:78--> | |||
To insert advertising, <br/> | |||
1. [[QR Code management#New 3|upload a logo]] (recommended 420 px wide). <br/> | |||
2. [[QR_Code_management#Add_advertising_to_places|assign the logo to a specific place]]. <br/> | |||
<br/> | |||
<!--T:79--> | |||
<span id="Details 3"></span> | <span id="Details 3"></span> | ||
<b>1. Details</b><br/> | <b>1. Details</b><br/> | ||
| Line 547: | Line 734: | ||
<br/> | <br/> | ||
<!--T:80--> | |||
<center> | <center> | ||
<div class="toc" style="border-radius:5px;background-color:#ffffff;padding-left:8px;padding-right:8px;width:700px;"> | <div class="toc" style="border-radius:5px;background-color:#ffffff;padding-left:8px;padding-right:8px;width:700px;"> | ||
| Line 567: | Line 755: | ||
<br/> | <br/> | ||
<!--T:81--> | |||
<span id="Edit 3"></span> | <span id="Edit 3"></span> | ||
<b>2. Edit</b><br/> | <b>2. Edit</b><br/> | ||
| Line 572: | Line 761: | ||
<br/> | <br/> | ||
<!--T:82--> | |||
1. Press <b>Choose from</b> and <br/> | 1. Press <b>Choose from</b> and <br/> | ||
2. Select the logo to upload from your computer. <br/> | 2. Select the logo to upload from your computer. <br/> | ||
3. Press <b>MODIFY</b> to change logo. <br/> | 3. Press <b>MODIFY</b> to change logo. <br/> | ||
<!--T:83--> | |||
The new logo will appear directly on the main list. <br/> | The new logo will appear directly on the main list. <br/> | ||
<br/> | <br/> | ||
<!--T:84--> | |||
<center> | <center> | ||
<div class="toc" style="border-radius:5px;background-color:#ffffff;padding-left:8px;padding-right:8px;width:700px;"> | <div class="toc" style="border-radius:5px;background-color:#ffffff;padding-left:8px;padding-right:8px;width:700px;"> | ||
| Line 594: | Line 786: | ||
<br/> | <br/> | ||
<!--T:85--> | |||
<span id="Delete 3"></span> | <span id="Delete 3"></span> | ||
<b>3. Delete</b><br/> | <b>3. Delete</b><br/> | ||
| Line 599: | Line 792: | ||
<br/> | <br/> | ||
<!--T:86--> | |||
See a summary of QR details and <br/> | See a summary of QR details and <br/> | ||
<span style="color: #000000; margin-left: 25px;"><b>· </b>Press <b>YES</b> to definitely delete the logo, or <br/> | <span style="color: #000000; margin-left: 25px;"><b>· </b>Press <b>YES</b> to definitely delete the logo, or <br/> | ||
| Line 604: | Line 798: | ||
<br/> | <br/> | ||
<!--T:87--> | |||
<center> | <center> | ||
<div class="toc" style="border-radius:5px;background-color:#ffffff;padding-left:8px;padding-right:8px;padding-bottom:8px;width:700px;"> | <div class="toc" style="border-radius:5px;background-color:#ffffff;padding-left:8px;padding-right:8px;padding-bottom:8px;width:700px;"> | ||
| Line 617: | Line 812: | ||
<span id="New"></span> | <!--T:88--> | ||
<span id="New 3"></span> | |||
<b>4. New</b><br/> | <b>4. New</b><br/> | ||
Upload a new advertising logo. <br/> | Upload a new advertising logo. <br/> | ||
<br/> | <br/> | ||
<!--T:89--> | |||
1. Press <b>Choose from</b> and <br/> | 1. Press <b>Choose from</b> and <br/> | ||
2. Select the logo to upload from your computer. <br/> | 2. Select the logo to upload from your computer. <br/> | ||
The file name will be shown next to the button (see image below). <br/> | <span style="color: #000000; margin-left: 25px;"><b>. </b>The file name will be shown next to the button (see image below). <br/> | ||
<span style="color: #000000; margin-left: 25px;"><b>· </b>We recommend a width of 420 pixels. <br/> | |||
3. Press <b>ADD</b> to upload the new logo. <br/> | 3. Press <b>ADD</b> to upload the new logo. <br/> | ||
<!--T:90--> | |||
The new logo will appear directly on the main list. <br/> | The new logo will appear directly on the main list. <br/> | ||
<br/> | <br/> | ||
<!--T:91--> | |||
<center> | <center> | ||
<div class="toc" style="border-radius:5px;background-color:#ffffff;padding-left:8px;padding-right:8px;padding-bottom:8px;width:700px;"> | <div class="toc" style="border-radius:5px;background-color:#ffffff;padding-left:8px;padding-right:8px;padding-bottom:8px;width:700px;"> | ||
| Line 641: | Line 841: | ||
<br/> | <br/> | ||
<!--T:92--> | |||
[[QR Code management#Advertising|[Top to Advertising]]]<br/> | [[QR Code management#Advertising|[Top to Advertising]]]<br/> | ||
[[#top|[Back to QR Code management]]]<br/> | [[#top|[Back to QR Code management]]]<br/> | ||
<br/> | <br/> | ||
<!--T:93--> | |||
=Add advertising to places= | =Add advertising to places= | ||
<br/> | <br/> | ||
<!--T:94--> | |||
Associate an advertising logo to a place. <br/> | Associate an advertising logo to a place. <br/> | ||
<br/> | <br/> | ||
<!--T:95--> | |||
<center> | <center> | ||
<div class="toc" style="border-radius:5px;background-color:#ffffff;padding-left:8px;padding-right:8px; padding-bottom:8px;width:600px;"> | <div class="toc" style="border-radius:5px;background-color:#ffffff;padding-left:8px;padding-right:8px; padding-bottom:8px;width:600px;"> | ||
[[File:Add advertising.png|600px|link=https://help.biolovision.net/images/ | [[File:Add advertising.png|600px|link=https://help.biolovision.net/images/2/25/Add_advertising.png]] | ||
<div class="toc" style="border-radius:5px;padding-left:15px;text-align:left; font-size:12px;width:575px;"> | <div class="toc" style="border-radius:5px;padding-left:15px;text-align:left; font-size:12px;width:575px;"> | ||
'''Add advertising to place.''' | '''Add advertising to place.''' | ||
| Line 672: | Line 876: | ||
<br/> | <br/> | ||
<!--T:96--> | |||
<span id="Details 4"></span> | <span id="Details 4"></span> | ||
<b>1. Details</b><br/> | <b>1. Details</b><br/> | ||
| Line 677: | Line 882: | ||
<br/> | <br/> | ||
<!--T:97--> | |||
<center> | <center> | ||
<div class="toc" style="border-radius:5px;background-color:#ffffff;padding-left:8px;padding-right:8px;width:700px;"> | <div class="toc" style="border-radius:5px;background-color:#ffffff;padding-left:8px;padding-right:8px;width:700px;"> | ||
| Line 697: | Line 903: | ||
<br/> | <br/> | ||
<!--T:98--> | |||
<Span id="Edit 4"></span> | <Span id="Edit 4"></span> | ||
<b>2. Edit</b><br/> | <b>2. Edit</b><br/> | ||
| Line 702: | Line 909: | ||
<br/> | <br/> | ||
<!--T:99--> | |||
1. Change place name by typing name, or part of it, on the left hand field and selecting from the expandable menu on the right.<br/> | 1. Change place name by typing name, or part of it, on the left hand field and selecting from the expandable menu on the right.<br/> | ||
2. Change advertiser's logo by typing the logo's file name, or part of it, on the left hand field and selecting from the expandable menu on the right. <br/> | 2. Change advertiser's logo by typing the logo's file name, or part of it, on the left hand field and selecting from the expandable menu on the right. <br/> | ||
<br/> | <br/> | ||
<!--T:100--> | |||
<center> | <center> | ||
<div class="toc" style="border-radius:5px;background-color:#ffffff;padding-left:8px;padding-right:8px;width:700px;"> | <div class="toc" style="border-radius:5px;background-color:#ffffff;padding-left:8px;padding-right:8px;width:700px;"> | ||
| Line 725: | Line 934: | ||
<br/> | <br/> | ||
<!--T:101--> | |||
<span id="Delete 4"></span> | <span id="Delete 4"></span> | ||
<b>3. Delete</b><br/> | <b>3. Delete</b><br/> | ||
| Line 730: | Line 940: | ||
<br/> | <br/> | ||
<!--T:102--> | |||
See name and advertiser's logo file and <br/> | See name and advertiser's logo file and <br/> | ||
<span style="color: #000000; margin-left: 25px;"><b>· </b>Press <b>YES</b> to definitely delete the entry, or <br/> | <span style="color: #000000; margin-left: 25px;"><b>· </b>Press <b>YES</b> to definitely delete the entry, or <br/> | ||
| Line 735: | Line 946: | ||
<br/> | <br/> | ||
<!--T:103--> | |||
<center> | <center> | ||
<div class="toc" style="border-radius:5px;background-color:#ffffff;padding-left:8px;padding-right:8px;padding-bottom:8px;width:700px;"> | <div class="toc" style="border-radius:5px;background-color:#ffffff;padding-left:8px;padding-right:8px;padding-bottom:8px;width:700px;"> | ||
| Line 746: | Line 958: | ||
<br/> | <br/> | ||
<!--T:104--> | |||
<span id="New 4"></span> | <span id="New 4"></span> | ||
<b>4. New</b><br/> | <b>4. New</b><br/> | ||
| Line 751: | Line 964: | ||
<br/> | <br/> | ||
<!--T:105--> | |||
1. Select place name by typing name, or part of it, on the left hand field and selecting from the expandable menu on the right.<br/> | 1. Select place name by typing name, or part of it, on the left hand field and selecting from the expandable menu on the right.<br/> | ||
2. Select advertiser's logo by typing the logo's file name, or part of it, on the left hand field and selecting from the expandable menu on the right. <br/> | 2. Select advertiser's logo by typing the logo's file name, or part of it, on the left hand field and selecting from the expandable menu on the right. <br/> | ||
<br/> | <br/> | ||
<!--T:106--> | |||
<center> | <center> | ||
<div class="toc" style="border-radius:5px;background-color:#ffffff;padding-left:8px;padding-right:8px;padding-bottom:8px;width:700px;"> | <div class="toc" style="border-radius:5px;background-color:#ffffff;padding-left:8px;padding-right:8px;padding-bottom:8px;width:700px;"> | ||
| Line 774: | Line 989: | ||
<br/> | <br/> | ||
<!--T:107--> | |||
[[QR Code management#Add advertising to places|[Top to Add advertising to places]]]<br/> | [[QR Code management#Add advertising to places|[Top to Add advertising to places]]]<br/> | ||
[[#top|[Back to QR Code management]]]<br/> | [[#top|[Back to QR Code management]]]<br/> | ||
<br/> | <br/> | ||
<!--T:108--> | |||
=Partner= | =Partner= | ||
<br/> | <br/> | ||
<!--T:109--> | |||
List of collaborating parties ([[Glossary#Partner|partners]]) with their logos and websites. <br/> | List of collaborating parties ([[Glossary#Partner|partners]]) with their logos and websites. <br/> | ||
Partners are non-commercial collaborators. See a list of partners at your local portal > Menu > Useful information > [[Media:22092022WIKI local partners.png|The partners]]. <br/> | |||
<br/> | |||
<br/> | <br/> | ||
<!--T:110--> | |||
<center> | <center> | ||
<div class="toc" style="border-radius:5px;background-color:#ffffff;padding-left:8px;padding-right:8px;width:700px;"> | <div class="toc" style="border-radius:5px;background-color:#ffffff;padding-left:8px;padding-right:8px;width:700px;"> | ||
| Line 806: | Line 1,027: | ||
<br/> | <br/> | ||
<!--T:111--> | |||
Partners' logos are displayed at the bottom of the screen when consulting the list of observations. <br/> | |||
<br/> | |||
<!--T:112--> | |||
<center> | |||
<div class="toc" style="border-radius:5px;background-color:#ffffff;padding-left:8px;padding-right:8px;padding-bottom:8px;width:300px;"> | |||
[[File:QR click example.png|300px]] | |||
<div class="toc" style="border-radius:5px;padding-left:15px;text-align:left; font-size:12px;width:275px;"> | |||
'''Partner logo. Example.''' | |||
</div> | |||
</div> | |||
</center> | |||
<br/> | |||
<br/> | |||
<!--T:113--> | |||
To insert a partner, <br/> | |||
1. upload the partner's logo (recommended 420 px wide), <br/> | |||
2. insert partner's website, <br/> | |||
2. assign the logo to [[QR_Code_management#Add_partners_to_places|a specific place]]. <br/> | |||
<br/> | |||
<br/> | |||
<!--T:114--> | |||
<span id="Details 5"></span> | <span id="Details 5"></span> | ||
<b>1. Details</b><br/> | <b>1. Details</b><br/> | ||
| Line 811: | Line 1,057: | ||
<br/> | <br/> | ||
<!--T:115--> | |||
<center> | <center> | ||
<div class="toc" style="border-radius:5px;background-color:#ffffff;padding-left:8px;padding-right:8px;width:700px;"> | <div class="toc" style="border-radius:5px;background-color:#ffffff;padding-left:8px;padding-right:8px;width:700px;"> | ||
| Line 832: | Line 1,079: | ||
<br/> | <br/> | ||
<!--T:116--> | |||
<span id="Edit 5"></span> | <span id="Edit 5"></span> | ||
<b>2. Edit</b><br/> | <b>2. Edit</b><br/> | ||
| Line 837: | Line 1,085: | ||
<br/> | <br/> | ||
<!--T:117--> | |||
1. Change partner's logo by typing the logo's file name, or part of it, on the left hand field and selecting from the expandable menu on the right. <br/> | 1. Change partner's logo by typing the logo's file name, or part of it, on the left hand field and selecting from the expandable menu on the right. <br/> | ||
1. Change partner's name by typing name, or part of it, on the left hand field and selecting from the expandable menu on the right.<br/> | 1. Change partner's name by typing name, or part of it, on the left hand field and selecting from the expandable menu on the right.<br/> | ||
<br/> | <br/> | ||
<!--T:118--> | |||
<center> | <center> | ||
<div class="toc" style="border-radius:5px;background-color:#ffffff;padding-left:8px;padding-right:8px;width:700px;"> | <div class="toc" style="border-radius:5px;background-color:#ffffff;padding-left:8px;padding-right:8px;width:700px;"> | ||
| Line 860: | Line 1,110: | ||
<br/> | <br/> | ||
<!--T:119--> | |||
<span id="Delete 5"></span> | <span id="Delete 5"></span> | ||
<b>3. Delete</b><br/> | <b>3. Delete</b><br/> | ||
| Line 865: | Line 1,116: | ||
<br/> | <br/> | ||
<!--T:120--> | |||
See a summary partner's details and <br/> | See a summary partner's details and <br/> | ||
<span style="color: #000000; margin-left: 25px;"><b>· </b>Press <b>YES</b> to definitely delete the entry, or <br/> | <span style="color: #000000; margin-left: 25px;"><b>· </b>Press <b>YES</b> to definitely delete the entry, or <br/> | ||
| Line 870: | Line 1,122: | ||
<br/> | <br/> | ||
<!--T:121--> | |||
<center> | <center> | ||
<div class="toc" style="border-radius:5px;background-color:#ffffff;padding-left:8px;padding-right:8px;padding-bottom:8px;width:700px;"> | <div class="toc" style="border-radius:5px;background-color:#ffffff;padding-left:8px;padding-right:8px;padding-bottom:8px;width:700px;"> | ||
| Line 882: | Line 1,135: | ||
<br/> | <br/> | ||
<!--T:122--> | |||
<span id="New 5"></span> | <span id="New 5"></span> | ||
<b>4. New</b><br/> | <b>4. New</b><br/> | ||
| Line 887: | Line 1,141: | ||
<br/> | <br/> | ||
<!--T:123--> | |||
1. Upload partner's logo:<br/> | 1. Upload partner's logo:<br/> | ||
<span style="color: #000000; margin-left: 25px;"><b>· </b>Press <b>Choose from</b> and <br/> | <span style="color: #000000; margin-left: 25px;"><b>· </b>Press <b>Choose from</b> and <br/> | ||
| Line 896: | Line 1,151: | ||
<br/> | <br/> | ||
<!--T:124--> | |||
<center> | <center> | ||
<div class="toc" style="border-radius:5px;background-color:#ffffff;padding-left:8px;padding-right:8px;padding-bottom:8px;width:700px;"> | <div class="toc" style="border-radius:5px;background-color:#ffffff;padding-left:8px;padding-right:8px;padding-bottom:8px;width:700px;"> | ||
| Line 915: | Line 1,171: | ||
<br/> | <br/> | ||
<!--T:125--> | |||
[[QR Code management#Partner|[Top to Partner]]]<br/> | [[QR Code management#Partner|[Top to Partner]]]<br/> | ||
[[#top|[Back to QR Code management]]]<br/> | [[#top|[Back to QR Code management]]]<br/> | ||
<br/> | <br/> | ||
<!--T:126--> | |||
=Add partners to places= | =Add partners to places= | ||
<br/> | <br/> | ||
<!--T:127--> | |||
List of [[Glossary#Partner|partner's]] and the places they are associated to. <br/> | List of [[Glossary#Partner|partner's]] and the places they are associated to. <br/> | ||
<br/> | <br/> | ||
<!--T:128--> | |||
<center> | <center> | ||
<div class="toc" style="border-radius:5px;background-color:#ffffff;padding-left:8px;padding-right:8px; padding-bottom:8px;width:600px;"> | <div class="toc" style="border-radius:5px;background-color:#ffffff;padding-left:8px;padding-right:8px; padding-bottom:8px;width:600px;"> | ||
| Line 946: | Line 1,206: | ||
<br/> | <br/> | ||
<!--T:129--> | |||
<span id="Details 6"></span> | <span id="Details 6"></span> | ||
<b>Details</b><br/> | <b>Details</b><br/> | ||
| Line 951: | Line 1,212: | ||
<br/> | <br/> | ||
<!--T:130--> | |||
<center> | <center> | ||
<div class="toc" style="border-radius:5px;background-color:#ffffff;padding-left:8px;padding-right:8px; padding-bottom:8px;width:700px;"> | <div class="toc" style="border-radius:5px;background-color:#ffffff;padding-left:8px;padding-right:8px; padding-bottom:8px;width:700px;"> | ||
| Line 971: | Line 1,233: | ||
<br/> | <br/> | ||
<!--T:131--> | |||
<span id="Edit 6"></span> | <span id="Edit 6"></span> | ||
<b>Edit</b><br/> | <b>Edit</b><br/> | ||
| Line 976: | Line 1,239: | ||
<br/> | <br/> | ||
<!--T:132--> | |||
1. Change place name by typing name, or part of it, on the left hand field and selecting from the expandable menu on the right.<br/> | 1. Change place name by typing name, or part of it, on the left hand field and selecting from the expandable menu on the right.<br/> | ||
2. Change partner's logo by typing the file name, or part of it, on the left hand field and selecting from the expandable menu on the right. <br/> | 2. Change partner's logo by typing the file name, or part of it, on the left hand field and selecting from the expandable menu on the right. <br/> | ||
<br/> | <br/> | ||
<!--T:133--> | |||
<center> | <center> | ||
<div class="toc" style="border-radius:5px;background-color:#ffffff;padding-left:8px;padding-right:8px;width:700px;"> | <div class="toc" style="border-radius:5px;background-color:#ffffff;padding-left:8px;padding-right:8px;width:700px;"> | ||
| Line 999: | Line 1,264: | ||
<br/> | <br/> | ||
<!--T:134--> | |||
<br/> | <br/> | ||
<!--T:135--> | |||
<span id="Delete 6"></span> | <span id="Delete 6"></span> | ||
<b>Delete</b><br/> | <b>Delete</b><br/> | ||
| Line 1,006: | Line 1,273: | ||
<br/> | <br/> | ||
<!--T:136--> | |||
See partner's name and logo file and <br/> | See partner's name and logo file and <br/> | ||
<span style="color: #000000; margin-left: 25px;"><b>· </b>Press <b>YES</b> to definitely delete the entry, or <br/> | <span style="color: #000000; margin-left: 25px;"><b>· </b>Press <b>YES</b> to definitely delete the entry, or <br/> | ||
| Line 1,011: | Line 1,279: | ||
<br/> | <br/> | ||
<!--T:137--> | |||
<center> | <center> | ||
<div class="toc" style="border-radius:5px;background-color:#ffffff;padding-left:8px;padding-right:8px;width:700px;"> | <div class="toc" style="border-radius:5px;background-color:#ffffff;padding-left:8px;padding-right:8px;width:700px;"> | ||
| Line 1,022: | Line 1,291: | ||
<br/> | <br/> | ||
<!--T:138--> | |||
<span id="New 6"></span> | <span id="New 6"></span> | ||
<b>New</b><br/> | <b>New</b><br/> | ||
| Line 1,027: | Line 1,297: | ||
<br/> | <br/> | ||
<!--T:139--> | |||
1. Select place name by typing name, or part of it, on the left hand field and selecting from the expandable menu on the right.<br/> | 1. Select place name by typing name, or part of it, on the left hand field and selecting from the expandable menu on the right.<br/> | ||
2. Select partner's logo by typing the logo's file name, or part of it, on the left hand field and selecting from the expandable menu on the right. <br/> | 2. Select partner's logo by typing the logo's file name, or part of it, on the left hand field and selecting from the expandable menu on the right. <br/> | ||
<br/> | <br/> | ||
<!--T:140--> | |||
<center> | <center> | ||
<div class="toc" style="border-radius:5px;background-color:#ffffff;padding-left:8px;padding-right:8px;width:700px;"> | <div class="toc" style="border-radius:5px;background-color:#ffffff;padding-left:8px;padding-right:8px;width:700px;"> | ||
| Line 1,050: | Line 1,322: | ||
<br/> | <br/> | ||
<!--T:141--> | |||
[[QR Code management#Add partners to places|[Top to Add partners to places]]]<br/> | [[QR Code management#Add partners to places|[Top to Add partners to places]]]<br/> | ||
[[#top|[Back to QR Code management]]]<br/> | [[#top|[Back to QR Code management]]]<br/> | ||
< | </translate> | ||
Latest revision as of 15:00, 4 May 2026
Administration > QR code management
Create a QR code to share observation of a specific area (ie. nature reserve, point of interest, locality...) with other naturalists regardless if they are NaturaList users.
· It provides direct access to the latest observations for that place.
· It highlights conservation efforts and support partnerships on the ground.
Creating QR codes requires special permissions. Please contact your website administrator if needed.
Once access is granted, you can:
· create a new place and generate a QR code for it, or
· select an existing place and generate the corresponding QR code.
See following sections to create and manage QR codes.

QR Code management.
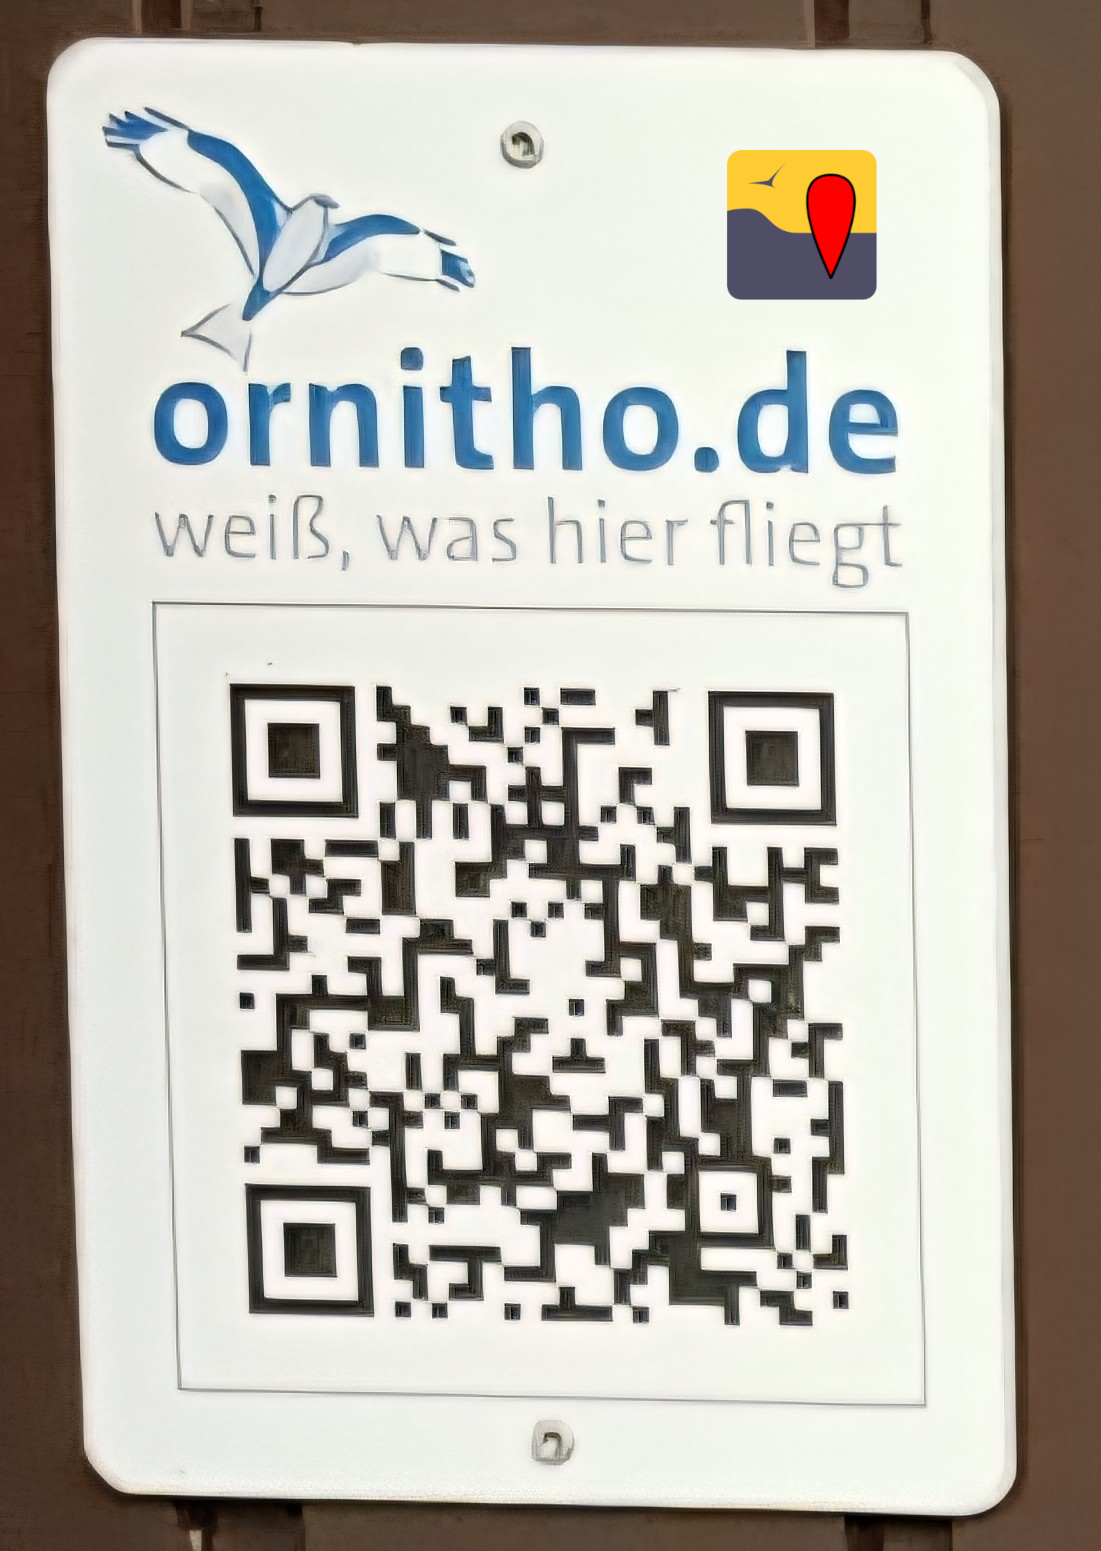
For creating a code, consider:
· Make sure there is internet where you intend to post the QR code. Ie. 3G/4G...
· Control its visibility: avoid reflection, create and print large enough, leave empty space around it, control the contrast...
· Say what the QR code is for.
· Download the NaturaList logo to print it next to the QR code.
Contents
QR code creation
Create a new QR code.
Creating a QR code requires special rights.
Contact your local administrator regarding these rights.
To create a new QR code
1. Access Administration > QR Code management > places and QR code creation.
2. Press + NEW at the bottom of the page.
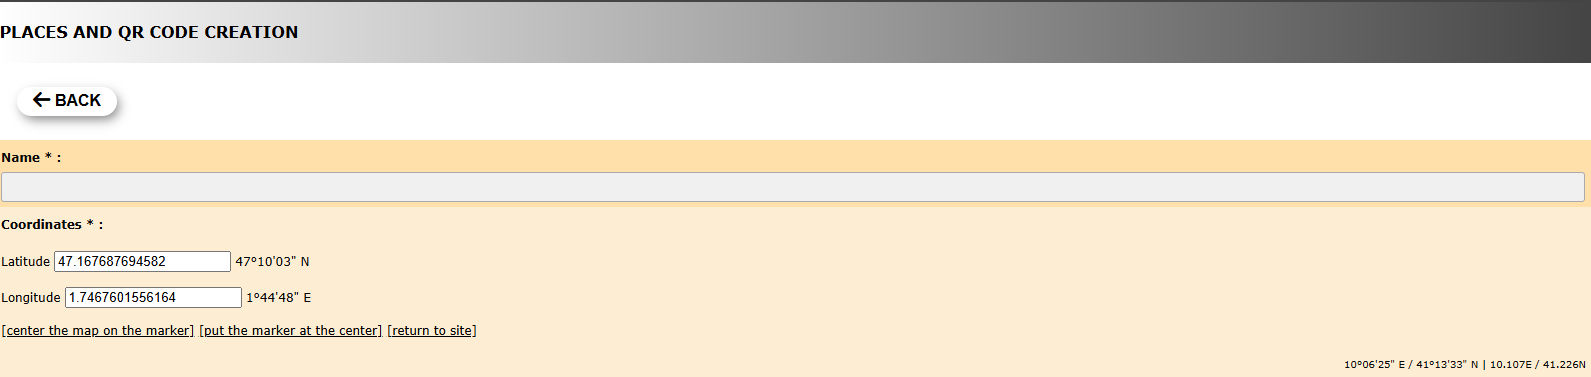
1. Provide site's basic details: Name and coordinates.
· Type coordinates or select from the map below. See to know how to navigate the map if necessary.
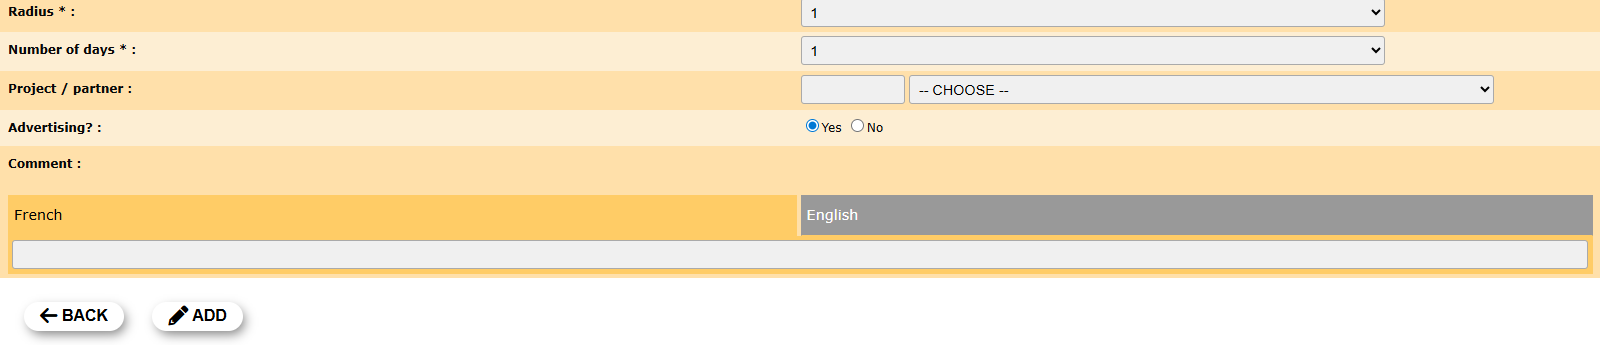
2. Set QR parameters for the site:
· Radius: Select from the expandable menu the radius from given coordinates delimiting the area the QR code applies to..
· Number of days: Select from the expandable menu the number of days the QR will be valid.
· Project / partner: Type the name, or part of the name, of the project or partner whose icon will be displayed when scanning the QR code on the left hand field, and select the project/partner name from the expandable menu on the right.
· Advertising?: Check if there is any advertising or partner.
· Comment: Leave a comment if appropriate. Select the name of the language from the taps and type a comment in the language selected (see image as an example).
3. When done, press ADD.
[Top to QR code creation]
[Back to QR code management]
Places and QR code creation
See existing QR codes.
|
QR code creation menu 1.
1. Search
ID: Number automatically assigned to this QR entry. |


1. Search
Reduce list by typing the name of a site, user, or part of it, and click SEARCH.
When a filter is applied and you want to deactivate it, click on DISPLAY ALL to see the full list.
2. Page and items
Select page number and/or number of items per page. Count indicate the total of items found for the search.
3. Details
See details of the QR code and generate the code if necessary.
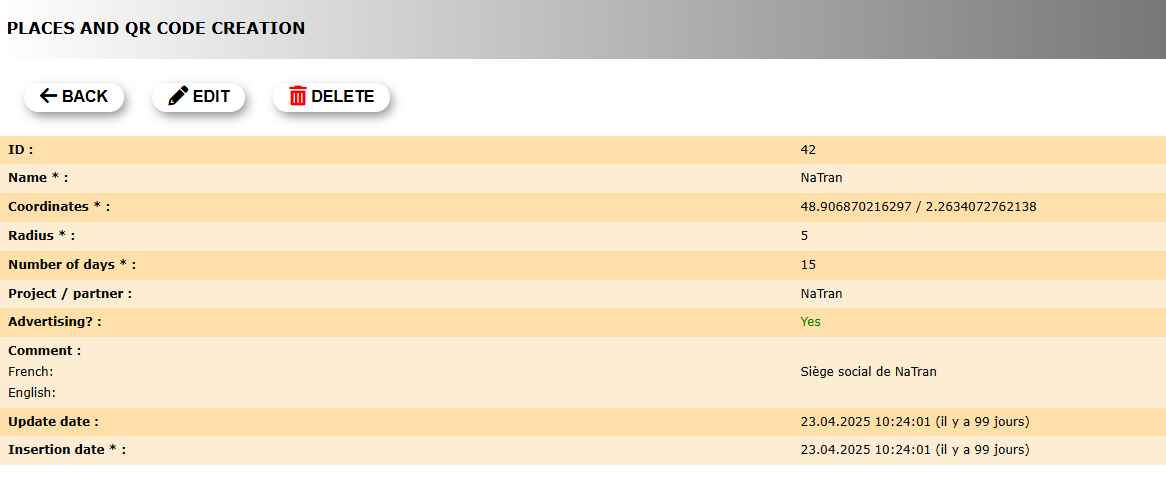
QR Code details.
ID: Automatically assigned number to identify this QR code.
Name: Name given to the QR code.
Coordinates: Coordinates at the center of the area the QR code applies to.
Radius: Radius from coordinates delimiting the area the QR code applies to.
Number of days: Number of last days the QR code covers.
Project / partner: Collaborator's name, if any.
Advertising?: Indicates if there is any publicity involved.
Comment: Comment left by the creator, if any, in the languages chosen when created the QR code.
Update date: Date of last update.
Insertion date:
BACK: Go to previous screen without saving.
EDIT: Modify any of the fields.
DELETE: Delete QR code.
Create a QR code for this place
To generate a QR code:
1. Select size of QR code from the expandable menu.
2. Check the cell Transparent background? if interested.
3. Check guidelines if necessary.
4. Generate the code.
5. Download NaturaList code to place it next to your QR.
To generate a QR code:
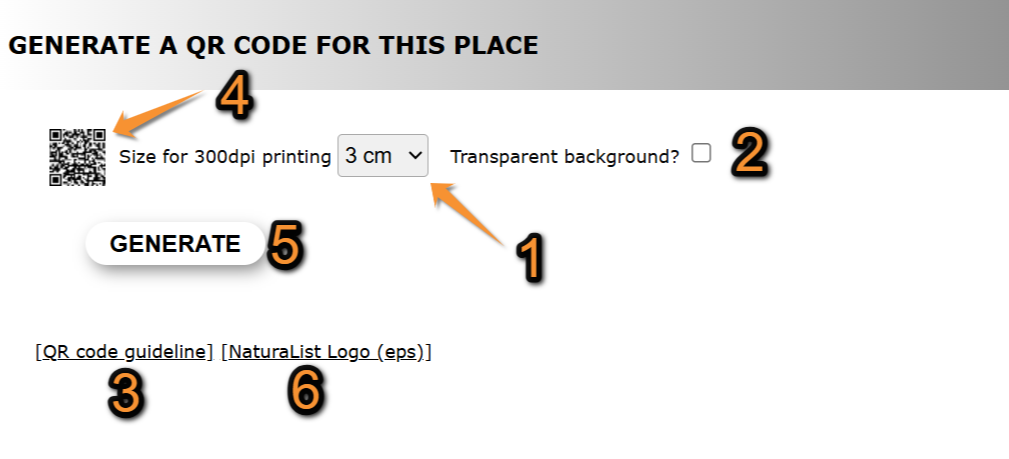
Generate QR code.
1. Choose size.
2. Choose transparency.
3. Check guidelines.
4. See final result.
5. Generate the code.
6. Add NaturaList code.
1. Select size of QR code from the expandable menu.
2. Check the cell Transparent background? if interested.
|
Normal QR code (unchecked cell). Example. |
Transparent QR code (Checked cell). Example. |
3. Check guidelines if necessary.
· Make sure there is internet where you intend to post the QR code. Ie. 3G/4G...
· Control its visibility: avoid reflection, create and print large enough, leave empty space around it, control the contrast...
· Say what the QR code is for.
4. Click on the QR to see final result.

Final result. Example.
5. Generate the code.
6. Download NaturaList code to place it next to your QR.
4. Edit
Modify information of a QR code.
1. Modify if necessary site's basic details: Name and coordinates.
· Type new coordinates or select from the map below. See wiki section Web interface > Local portal > Navigating the map to know how to navigate the map if necessary.
2. Modify QR parameters for the site:
· Radius: Select from the expandable menu the radius from given coordinates delimiting the area the QR code applies to.
· Number of days: Select from the expandable menu the number of days the QR will be valid.
· Project / partner: Type the name, or part of the name, of the project or partner whose icon will be displayed when scanning the QR code on the left hand field, and select the project/partner name from the expandable menu on the right.
· Advertising?: Check if the QR code contains any publicity.
· Comment: Leave a comment if appropriate. Select the name of the language from the taps and type a comment in the language selected (see image as an example).
3. When done, press ADD.
Create a new QR code.
5. Delete
Use ![]() to delete the selected QR code.
to delete the selected QR code.
See a summary of QR details and
· Press YES to definitely delete the QR code, or
· Press NO to cancel delete and keep the QR code.
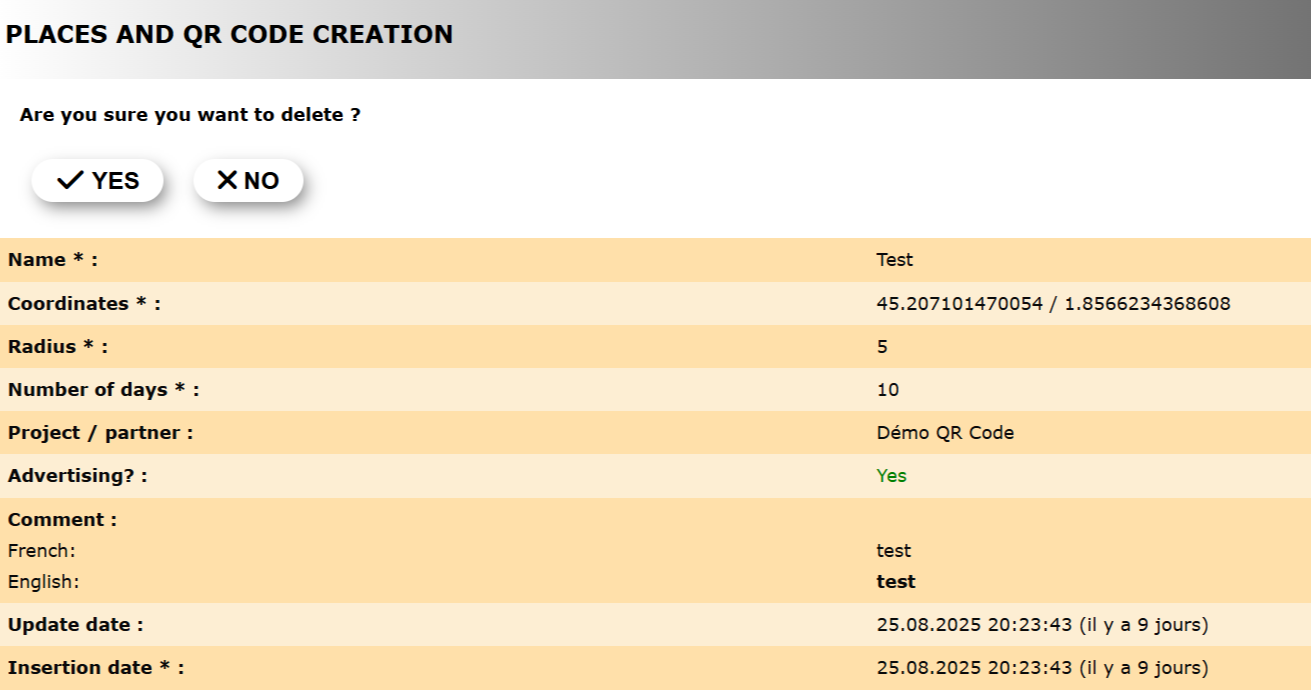
Delete QR code.
6. New
Create a new QR code.
1. Provide site's basic details: Name and coordinates.
· Type coordinates or select from the map below. See to know how to navigate the map if necessary.
2. Set QR parameters for the site:
· Radius: Select from the expandable menu the radius from given coordinates delimiting the area the QR code applies to..
· Number of days: Select from the expandable menu the number of days the QR will be valid.
· Project / partner: Type the name, or part of the name, of the project or partner whose icon will be displayed when scanning the QR code on the left hand field, and select the project/partner name from the expandable menu on the right.
· Advertising?: Check if there is any advertising or partner.
· Comment: Leave a comment if appropriate. Select the name of the language from the taps and type a comment in the language selected (see image as an example).
3. When done, press ADD.
Create a new QR code.
7. Export
Export details of existing QR codes on the local portal as a .txt file.
8. Export views
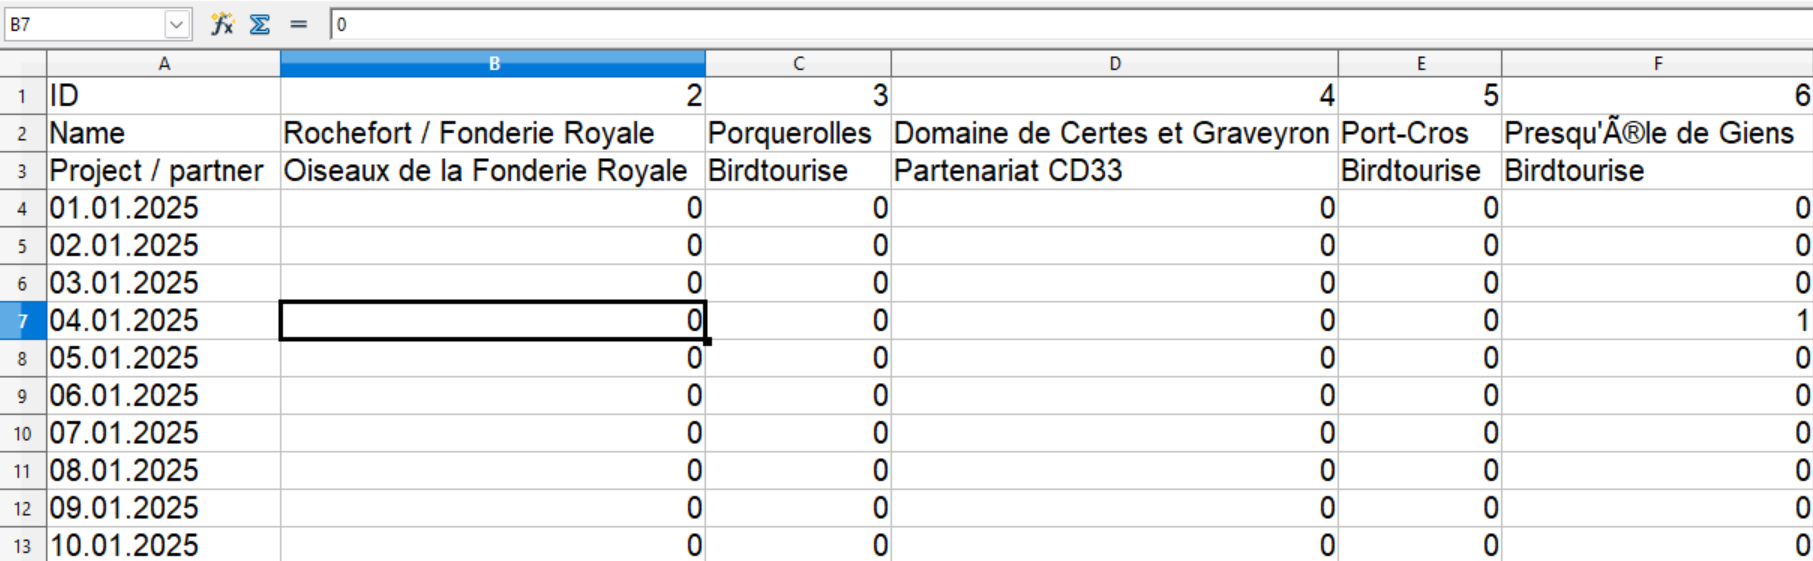
Export a .txt file summarising number of visits each QR code in the local portal had.
Downloading the .txt requires identification.
It can later be displayed on an excel sheet. See here an example.
1. Select the year to download visits from the expandable menu.
2. Press EXPORT VIEWS

Export views of QR codes.
1. Select the year to visualise the data.
2. Start download.
[Top to Places and QR code creation]
[Back to QR Code management]
QR code group
List or partners and projects participating in QR codes in this local portal.
Creating a group/project allows:
· to link QR codes to a specific group or project.
This makes it easier to use the search tool in the Places section and in the QR code creation panel to find all related QR codes.
· to display on a map codes belonging to the group.

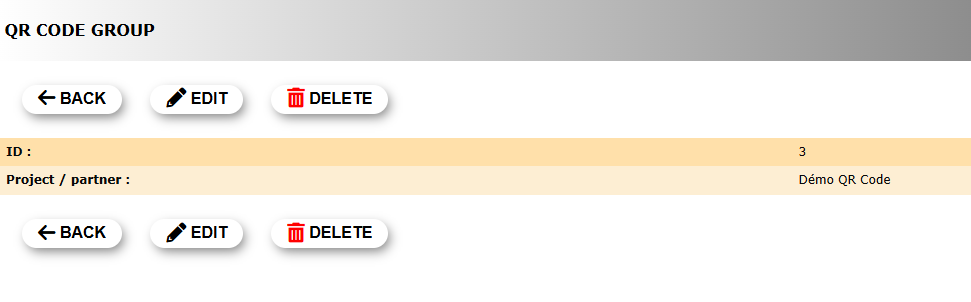
1. Details
See details of the selected QR partner.
2. Edit
Modify name of partner or project.

QR Code group. Edit.
Project/Partner: Name of the project or partner selected.
BACK: Go back to previous screen without saving.
MODIFY: Save changes.
3. Delete
Press ![]() to delete the selected partner or project.
to delete the selected partner or project.
· Press YES to definitely delete the project/partner, or
· Press NO to cancel delete and keep the project/partner.
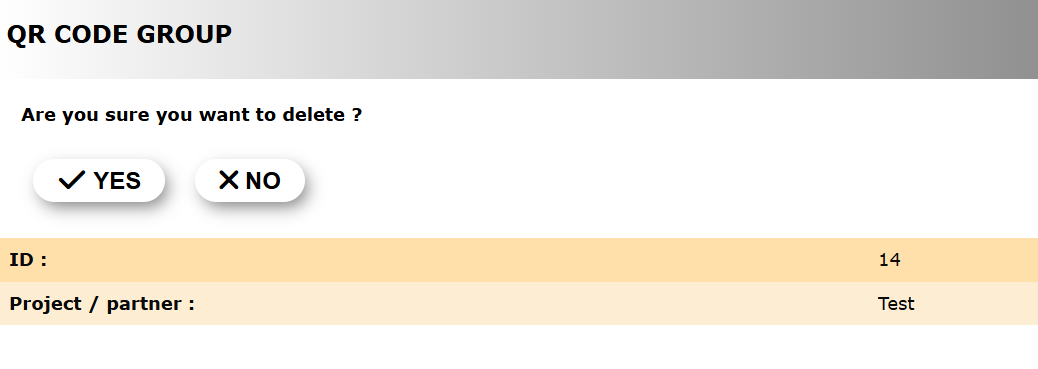
QR Code group. Delete.
4. Map
Indicates if a QR code group will be displayed on the map.
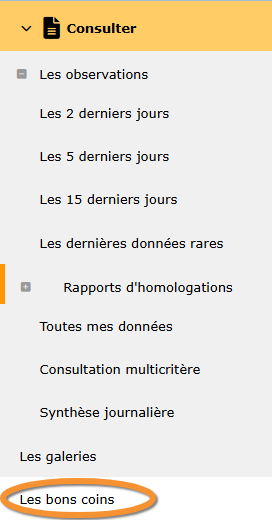
· Access the map at Menu > Consulting > Les bons coins.
· Only one map per local portal is possible.
· It can display one or several QR code projects at the same time, and each item is clickable.
· Saved quick-search polygons created in the search engine may also appear in blue in the map.
· The feature needs to be activated.
At the moment, it is only available at www.ornitho.ch in French. Contact Biolovision to activate it in your local portal.
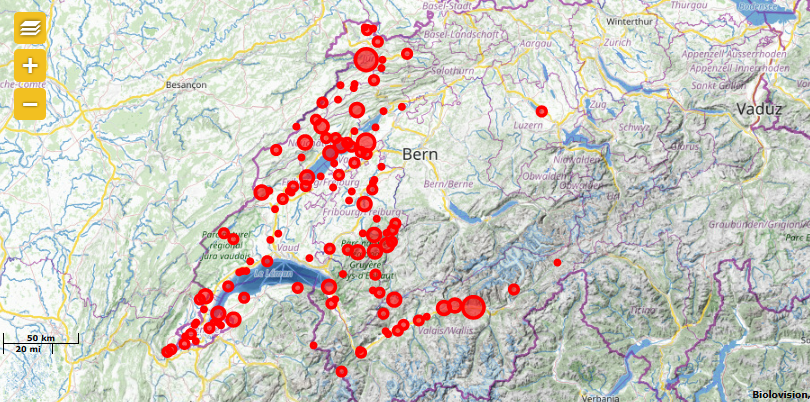
QR codes group map.
NOTE
· Only one map per local portal is possible.
· At the moment, it is only available at www.ornitho.ch in French.
· Contact Biolovision to activate it in your local portal.
5. New
Create a new Partner or project.
1. Type the name of partner or project involved.
2. Press ADD to save the new partner/project.
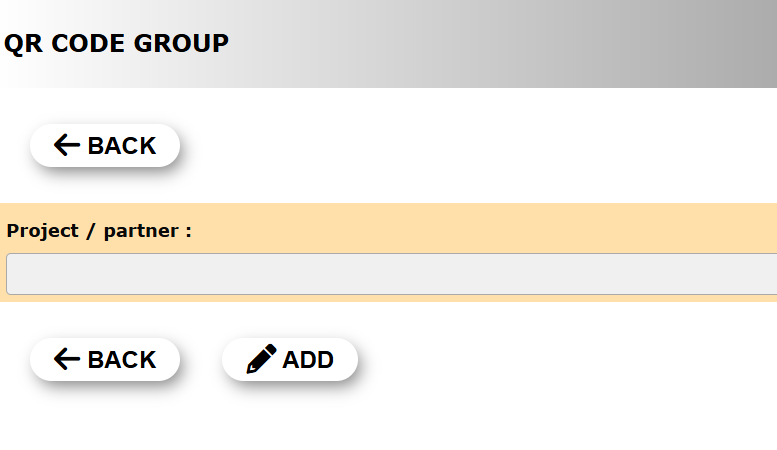
QR Code group. Delete.
Project/Partner: Type the name of the project or partner participating on the QR code.
BACK: Go to previous screen without saving.
ADD: Save new project/partner.
[Top to QR code group]
[Back to QR Code management]
Advertising
List of logos of advertising parties.

Advertisers' logos are displayed on the main screen when scanning the QR code.

Example advertising.
To insert advertising,
1. upload a logo (recommended 420 px wide).
2. assign the logo to a specific place.
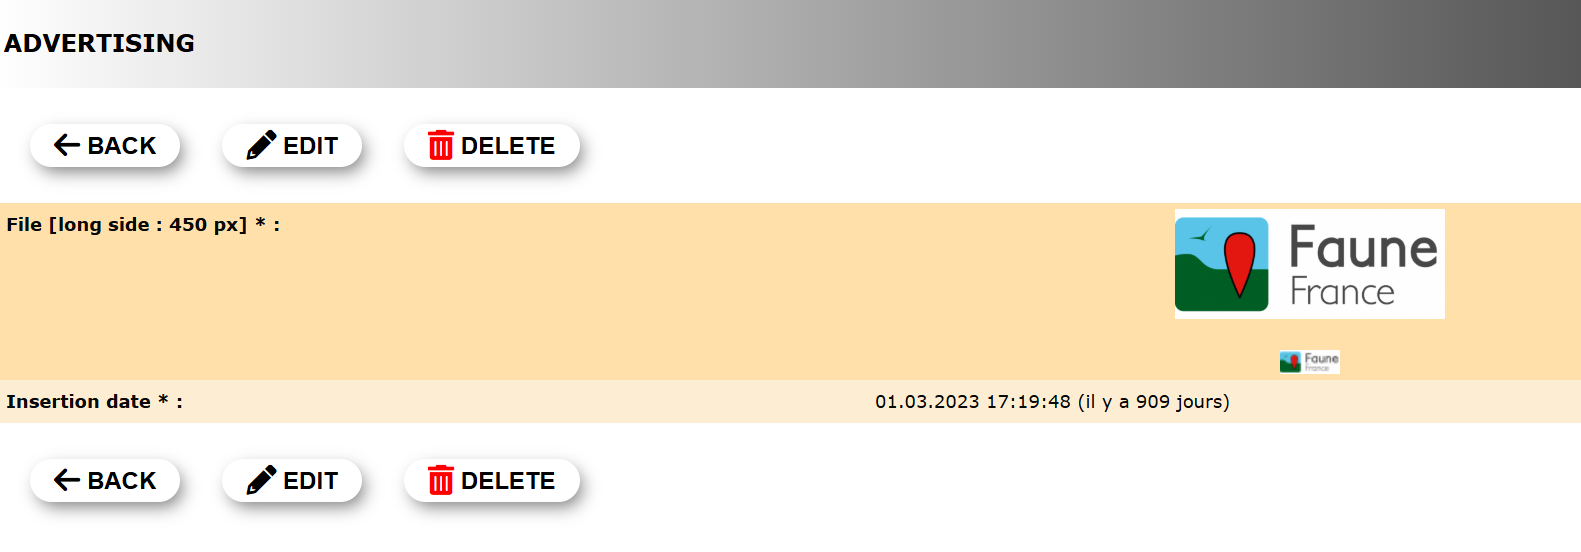
1. Details
See logo and insertion date of advertiser.
2. Edit
Modify advertiser logo.
1. Press Choose from and
2. Select the logo to upload from your computer.
3. Press MODIFY to change logo.
The new logo will appear directly on the main list.

Advertising. Edit.
BACK: Go to previous screen without saving.
MODIFY: Save changes.
3. Delete
Use ![]() to delete the selected logo.
to delete the selected logo.
See a summary of QR details and
· Press YES to definitely delete the logo, or
· Press NO to cancel delete and keep the logo.

Advertising. Delete.
4. New
Upload a new advertising logo.
1. Press Choose from and
2. Select the logo to upload from your computer.
. The file name will be shown next to the button (see image below).
· We recommend a width of 420 pixels.
3. Press ADD to upload the new logo.
The new logo will appear directly on the main list.

Advertising. New.
[Top to Advertising]
[Back to QR Code management]
Add advertising to places
Associate an advertising logo to a place.
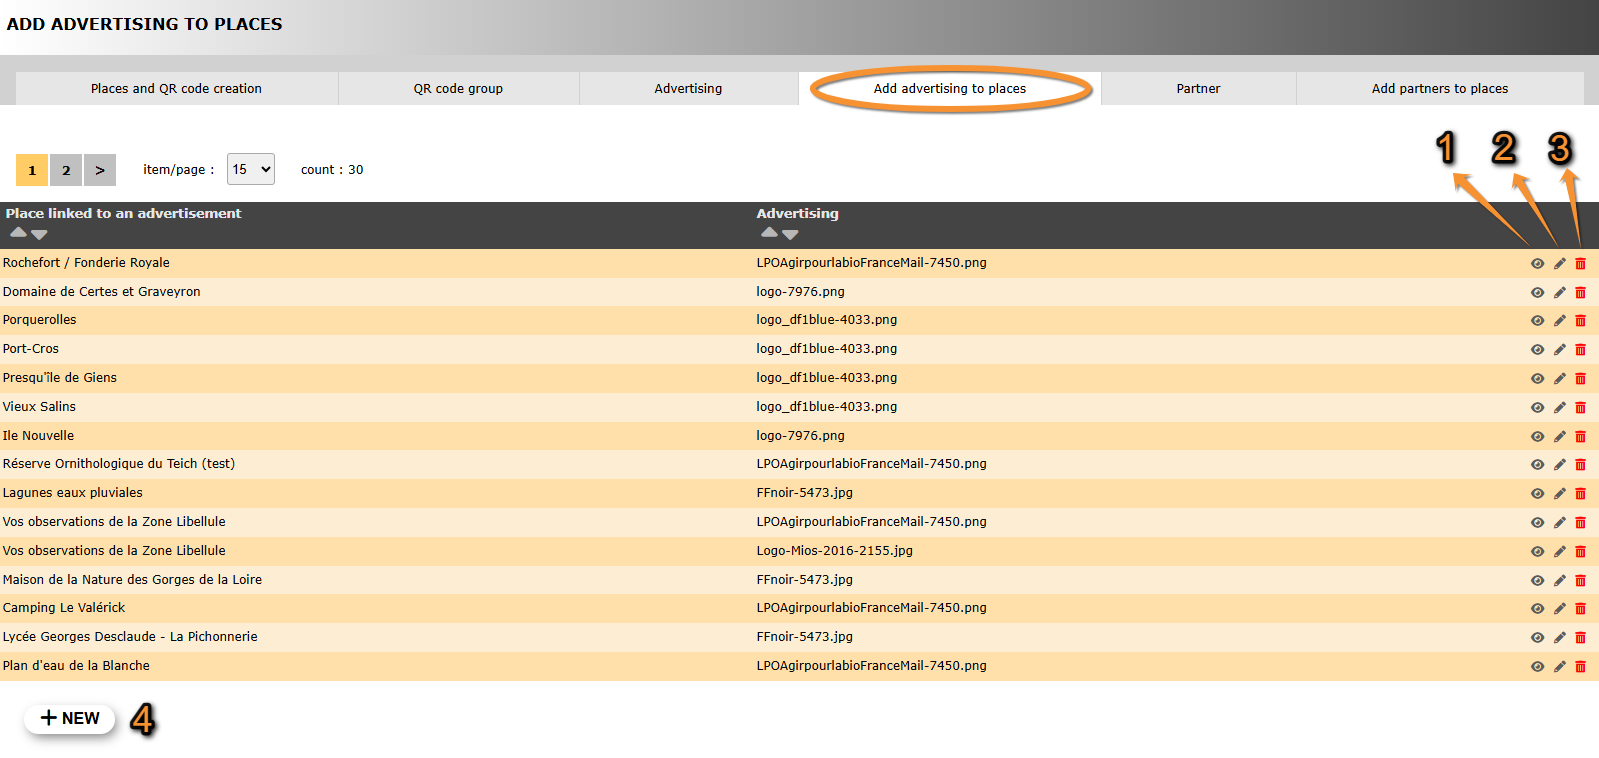
1. Details
See details of selected entry.

2. Edit
Modify place name and/or advertiser's logo, if necessary.
1. Change place name by typing name, or part of it, on the left hand field and selecting from the expandable menu on the right.
2. Change advertiser's logo by typing the logo's file name, or part of it, on the left hand field and selecting from the expandable menu on the right.
Add advertising to place. Edit.
1. Change place name.
2. Change advertiser's logo.
BACK: Go to previous screen without saving.
MODIFY: Save new place name and/or logo.
3. Delete
Use ![]() to delete the selected entry.
to delete the selected entry.
See name and advertiser's logo file and
· Press YES to definitely delete the entry, or
· Press NO to cancel delete and keep the entry.
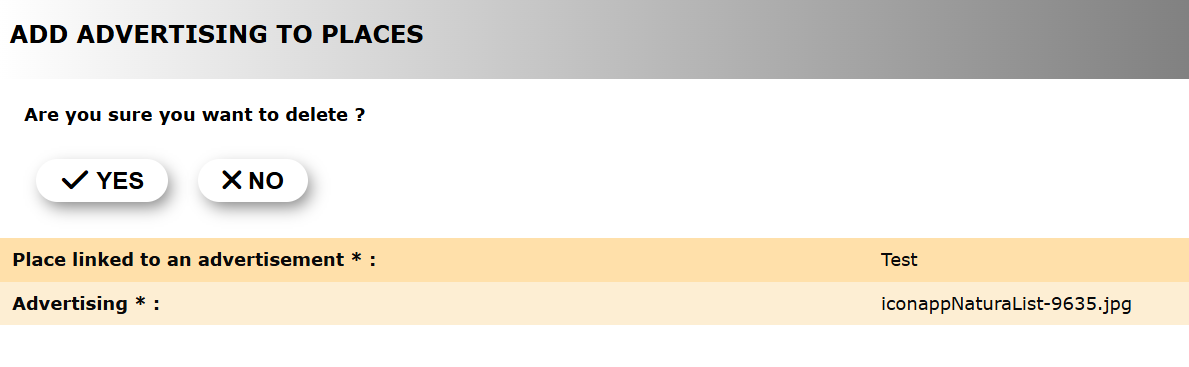
Add advertising. Delete.
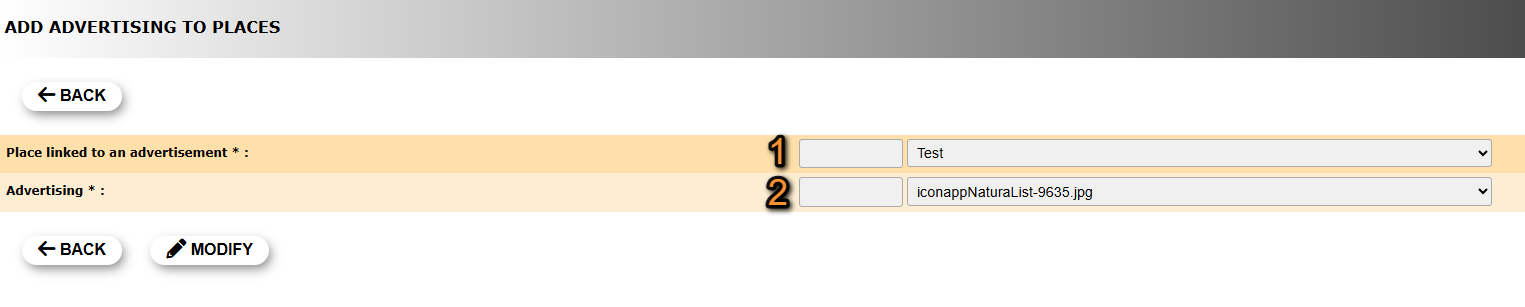
4. New
Associate a place to an advertiser's logo.
1. Select place name by typing name, or part of it, on the left hand field and selecting from the expandable menu on the right.
2. Select advertiser's logo by typing the logo's file name, or part of it, on the left hand field and selecting from the expandable menu on the right.

Add advertising. New.
1. Select place name.
2. Select advertiser's logo.
BACK: Go to previous screen without saving.
ADD: Save new place name - logo.
[Top to Add advertising to places]
[Back to QR Code management]
Partner
List of collaborating parties (partners) with their logos and websites.
Partners are non-commercial collaborators. See a list of partners at your local portal > Menu > Useful information > The partners.

Partners' logos are displayed at the bottom of the screen when consulting the list of observations.

Partner logo. Example.
To insert a partner,
1. upload the partner's logo (recommended 420 px wide),
2. insert partner's website,
2. assign the logo to a specific place.
1. Details
See details of selected partner.

2. Edit
Edit details of selected partner.
1. Change partner's logo by typing the logo's file name, or part of it, on the left hand field and selecting from the expandable menu on the right.
1. Change partner's name by typing name, or part of it, on the left hand field and selecting from the expandable menu on the right.

Partner. Edit.
1. Change partner's logo.
2. Change partner's name.
BACK: Go to previous screen without saving.
MODIFY: Save new partner's name and/or logo.
3. Delete
Use ![]() to delete the selected entry.
to delete the selected entry.
See a summary partner's details and
· Press YES to definitely delete the entry, or
· Press NO to cancel delete and keep the entry.

Partner. Delete.
4. New
Create a new entry for a partner.
1. Upload partner's logo:
· Press Choose from and
· Select the logo to upload from your computer.
The file name will be shown next to the button (see image below).
· Press ADD to upload the new logo.
The new logo will appear directly on the main list.
2. Type the partner's website address.

Partner. New.
1. Select advertiser's logo.
2. Type partner's website address.
BACK: Go to previous screen without saving.
ADD: Save new place name - logo.
[Top to Partner]
[Back to QR Code management]
Add partners to places
List of partner's and the places they are associated to.

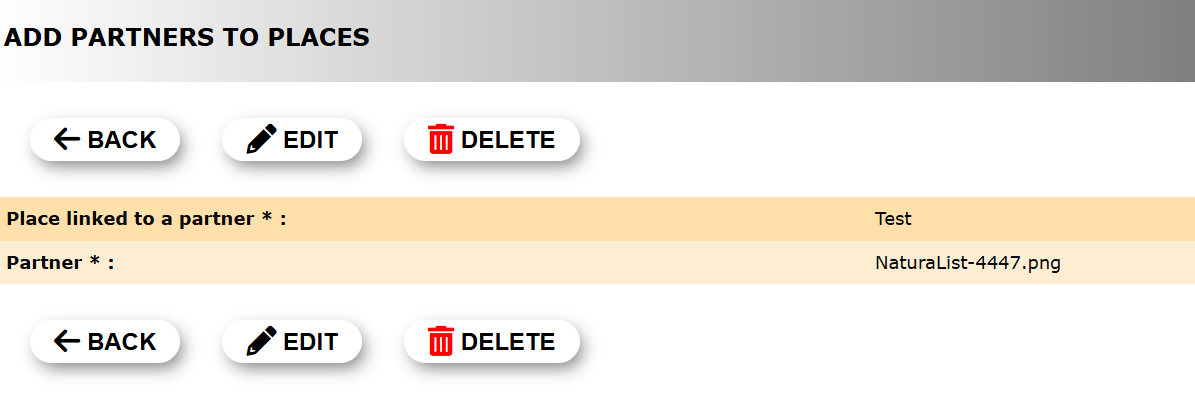
Details
See details of partners's logo files and the places they are associated to.
Edit
Modify the partner's logo and/or name, if necessary.
1. Change place name by typing name, or part of it, on the left hand field and selecting from the expandable menu on the right.
2. Change partner's logo by typing the file name, or part of it, on the left hand field and selecting from the expandable menu on the right.
Add partners to places. Edit.
1. Change place name.
2. Change partner's logo.
BACK: Go to previous screen without saving.
MODIFY: Save new place name and/or logo.
Delete
Use ![]() to delete the selected entry.
to delete the selected entry.
See partner's name and logo file and
· Press YES to definitely delete the entry, or
· Press NO to cancel delete and keep the entry.

Add partners to places. Delete.
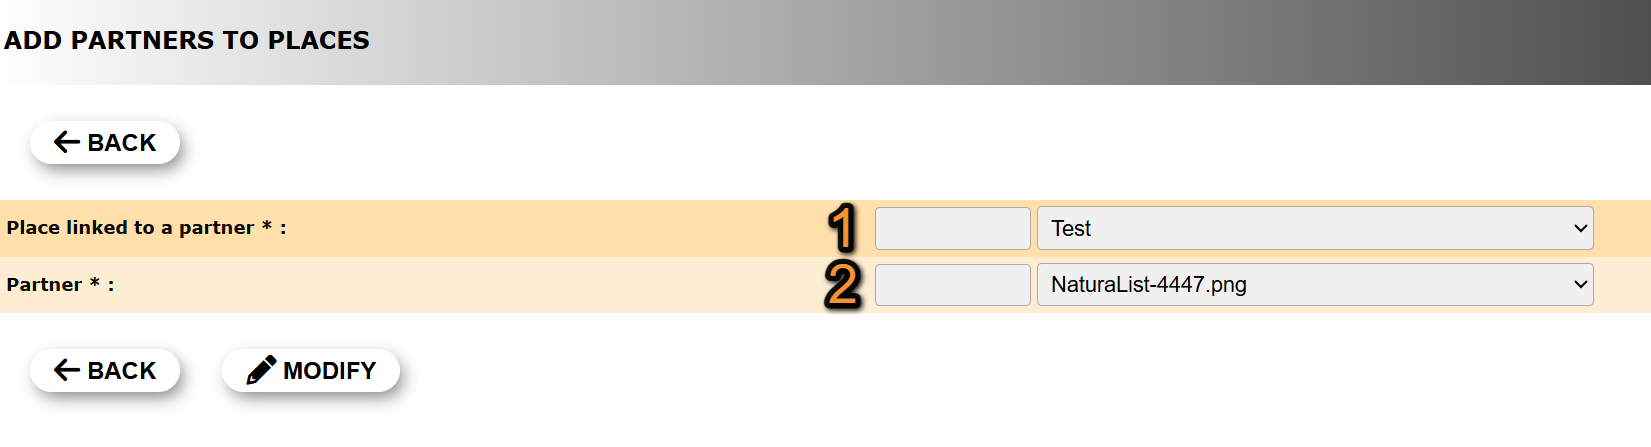
New
Associate a place to a partner's logo.
1. Select place name by typing name, or part of it, on the left hand field and selecting from the expandable menu on the right.
2. Select partner's logo by typing the logo's file name, or part of it, on the left hand field and selecting from the expandable menu on the right.

Add partners to places. New.
1. Select place name.
2. Select partner's logo.
BACK: Go to previous screen without saving.
ADD: Save new place name - logo.
[Top to Add partners to places]
[Back to QR Code management]