STOC ONF: Difference between revisions
| Line 56: | Line 56: | ||
3. Select a place to create the protocol at and click on [[Media:Select point.png|"Create a protocoled census - STOC ONF"]], as explained in wiki section Administration > Protocol management > [[Protocol_management#create site|Site]]. <br/> | 3. Select a place to create the protocol at and click on [[Media:Select point.png|"Create a protocoled census - STOC ONF"]], as explained in wiki section Administration > Protocol management > [[Protocol_management#create site|Site]]. <br/> | ||
<span id="select square"></span> | <span id="select square"></span> | ||
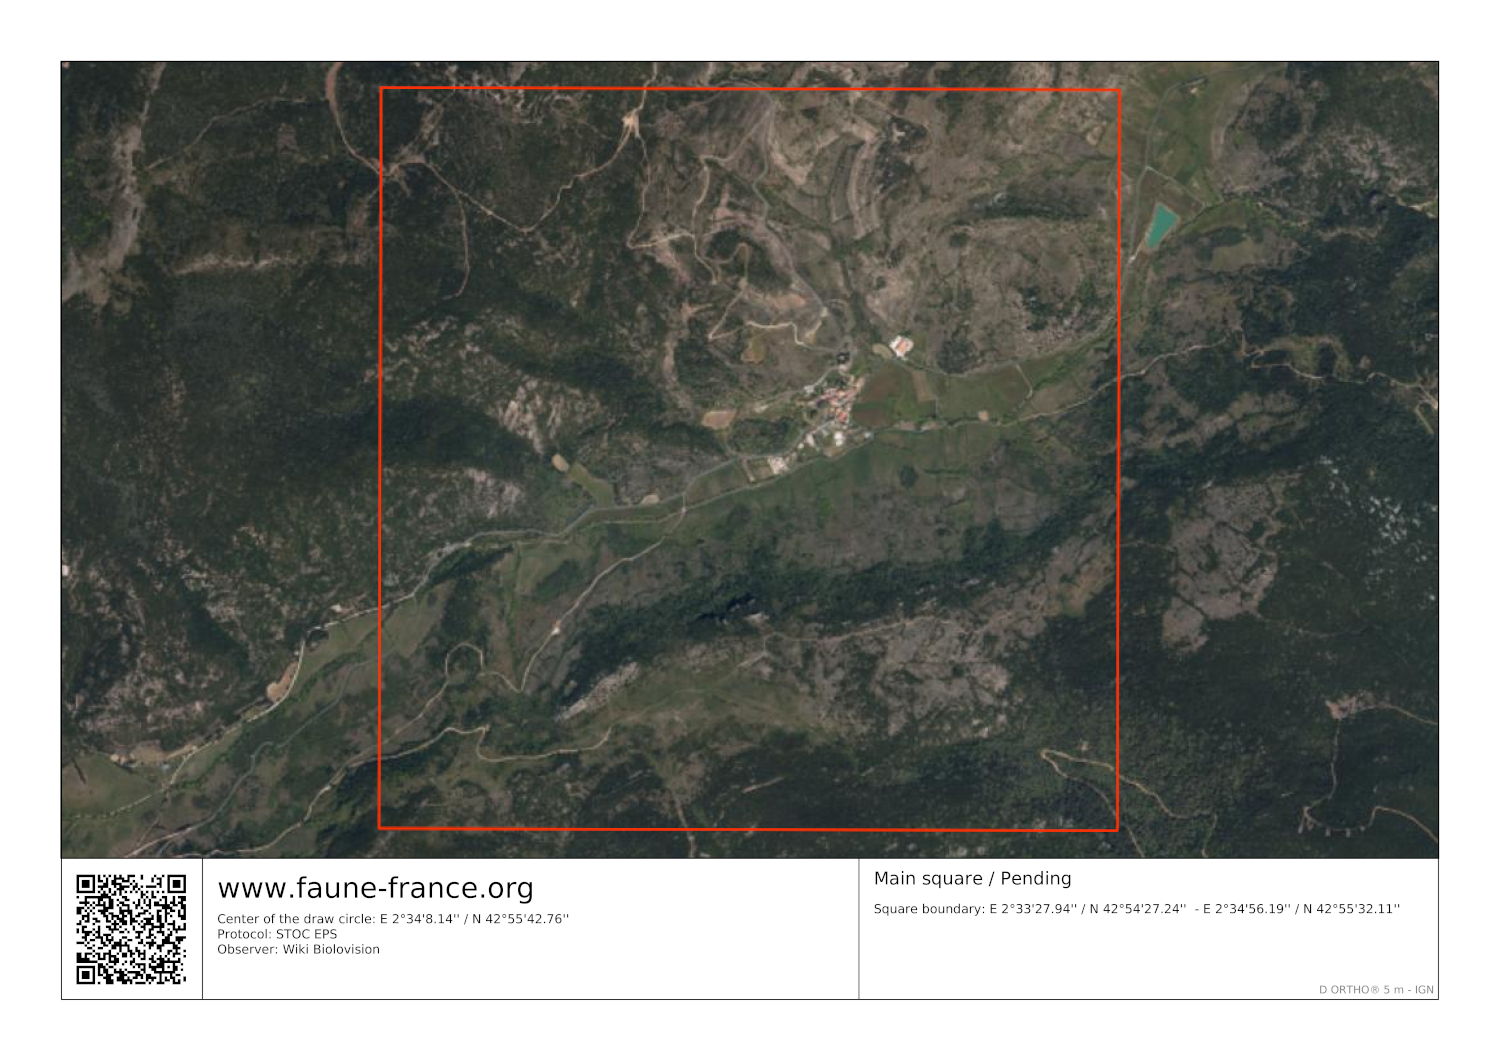
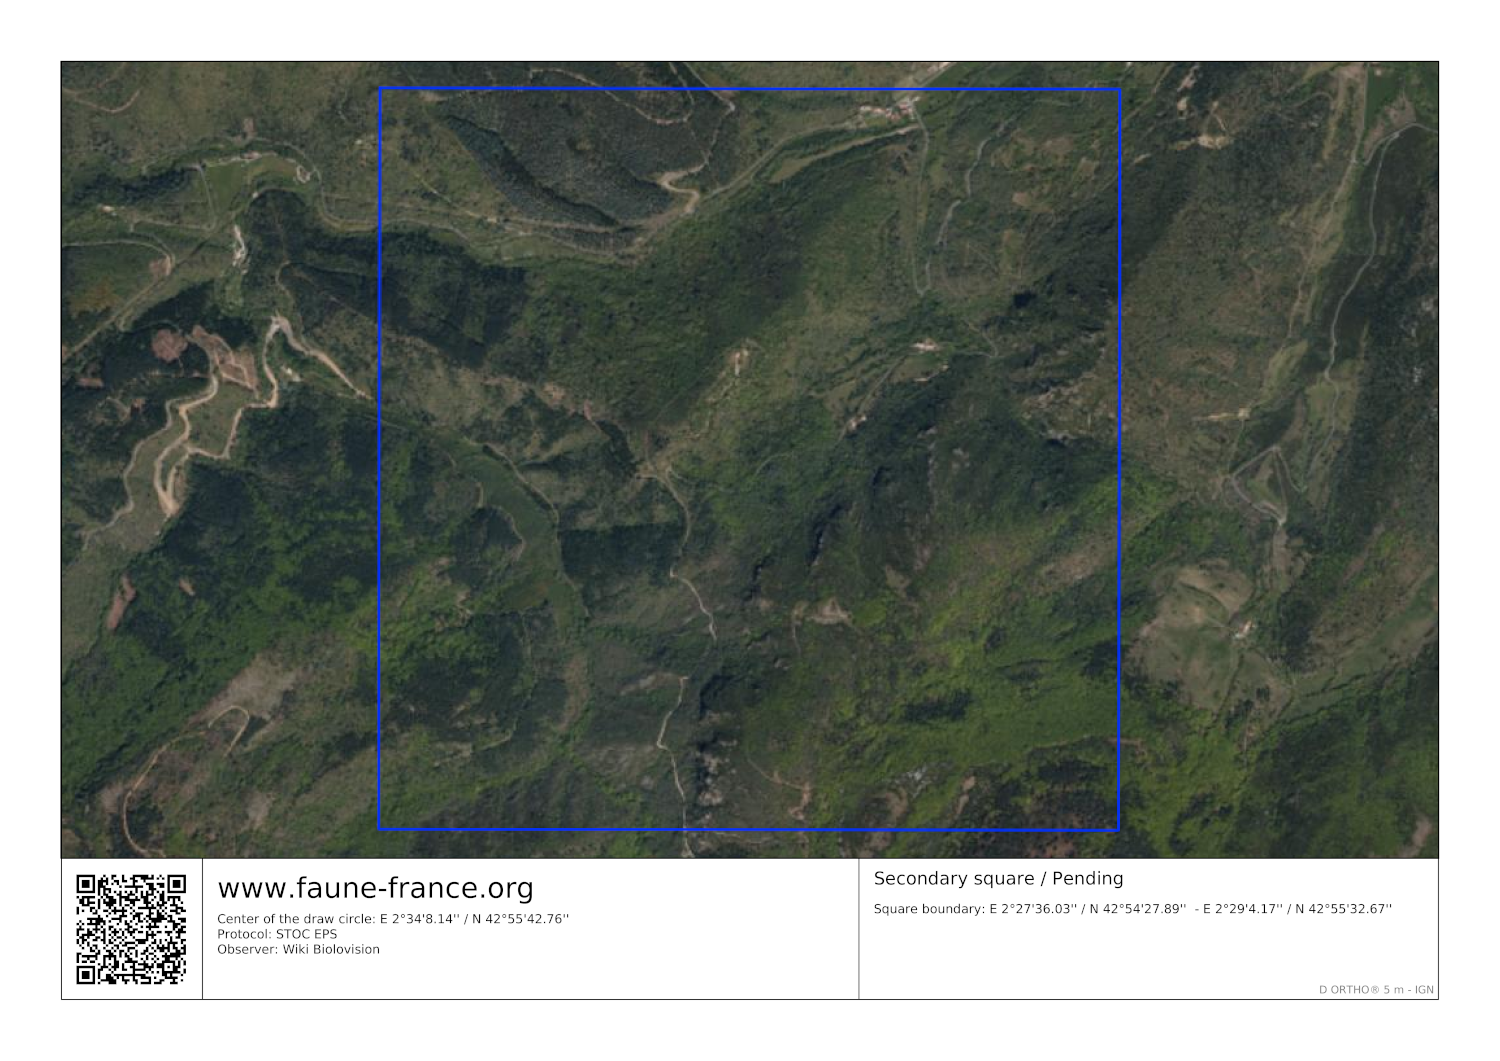
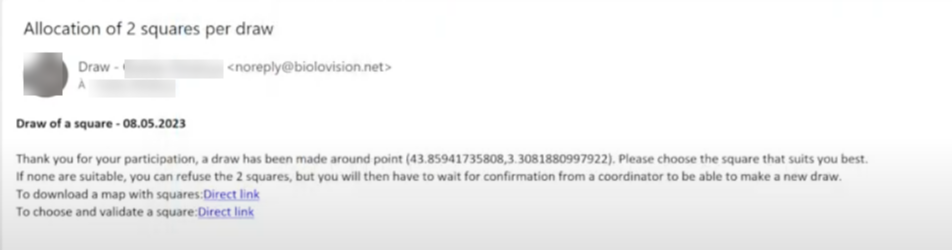
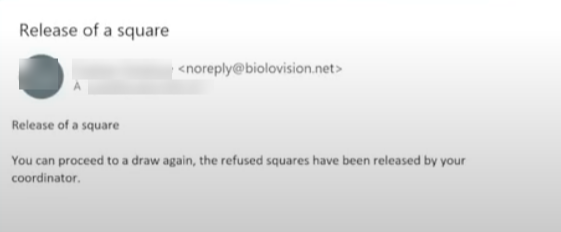
4. Select one of the two squares created randomly by the system within an radius of 10 km from the selected point (see image below). You will receive an [[Media: email instructions.png|email with instructions]]. Either: <br/> | <span id=Validate"></span>4. Select one of the two squares created randomly by the system within an radius of 10 km from the selected point (see image below). You will receive an [[Media: email instructions.png|email with instructions]]. Either: <br/> | ||
:: Accept square, or <br/> | :: Accept square, or <br/> | ||
:: Reject square. <br/> | :: Reject square. <br/> | ||
<br/> | <br/> | ||
<span id="Random selection"></span> | |||
<center> | <center> | ||
<div class="toc" style="border-radius:5px;background-color:#ffffff;padding-left:8px;padding-right:8px; padding-bottom:8px;width:600px;"> | <div class="toc" style="border-radius:5px;background-color:#ffffff;padding-left:8px;padding-right:8px; padding-bottom:8px;width:600px;"> | ||
Revision as of 11:09, 17 October 2025
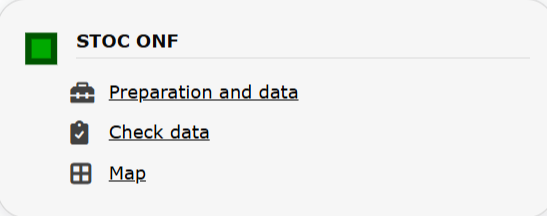
STOC_ONF
Access your protocol from Menu > Take part > All my protocol > STOC ONF.
For other options, visit wiki section Web interface > Local portal > Protocols > Accessing protocols.
STOC ONF. Menu.
36 STOC ONF
-
36.1 Selection of a study site
36.2 Preparation and data
- 36.2.1 Add observations
- 36.2.1.1 Starting the protocol
36.2.1.2 Entering observations
36.2.1.3 Ending the protocol
-
36.2.2 Results
36.2.3 Display on map
36.2.4 Modify the protocol
36.2.5 Census results
36.2.6 Download map
- 36.3 Check data
36.4 Map
Selection of study site
Observers can be assigned a study site or can select one by themselves.
To select your study site:
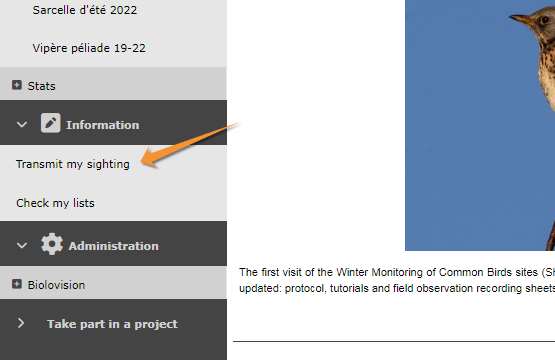
1. Go to Menu > Take part > Transmit my sighting, or
- Press Submit button on home page.
2. Scroll down to "by clicking on the map" and zoom in until you see the locations.
3. Select a place to create the protocol at and click on "Create a protocoled census - STOC ONF", as explained in wiki section Administration > Protocol management > Site.
4. Select one of the two squares created randomly by the system within an radius of 10 km from the selected point (see image below). You will receive an email with instructions. Either:
- Accept square, or
- Reject square.
- Accept square, or

Randomly created survey squares.
1. Limit of a 10 km radius
2. Randomly created survey squares
NOTE
. Random squares are created only once. It is not possible to close and enter again to change the random selection.
. The observer should select one of the squares. If both squares are rejected, an explanation is required and needs to be validated by an administrator. Meanwhile, it is possible to create another study site at a different place.
Once a square is accepted,
3. Name the new survey site as explained in wiki section Administration > Protocol management > Site.
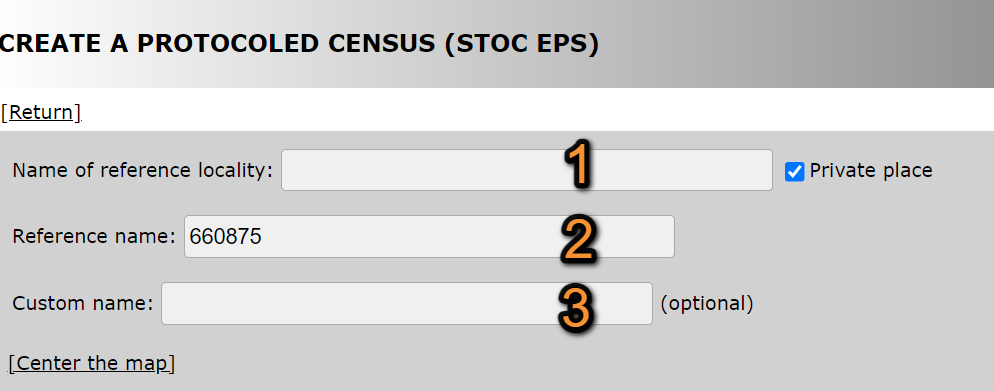
Name the new study area.
1. Name of reference locality: Location name under which all observations of the protocol will be associated to.
2. Reference name: Name/Code automatically assigned to the square.
3. Custom name: Additional name to the site if known. This name can be changed afterwards.
4. Start drawing your site. Visit wiki section Web interface > Geometry editor for more information on using the drawing tools. Remember you can also import a shapefile.
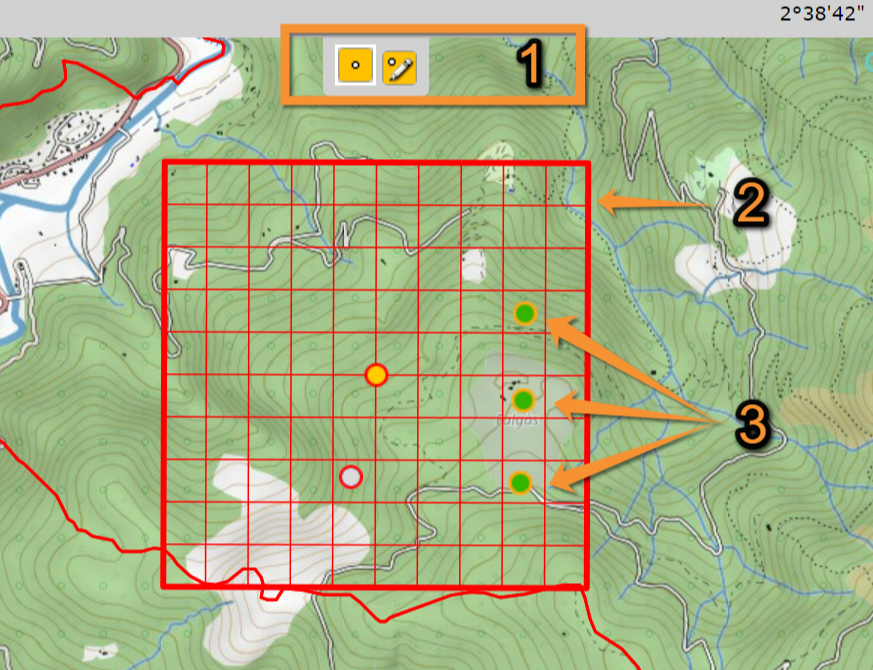
Drawing geometry.
1. Drawing tools
2. Study area
3. Survey points
5. When done, choose between:
- SAVE AND STAY: Save the site and remain on the page.
- SAVE AND CREATE A NEW: Save the site and create another.
- SAVE AND ADD A RECORD: Save the site and start entering data.
- SAVE AND STAY: Save the site and remain on the page.
[Top to selection of study site]
[Back to STOC ONF protocol]
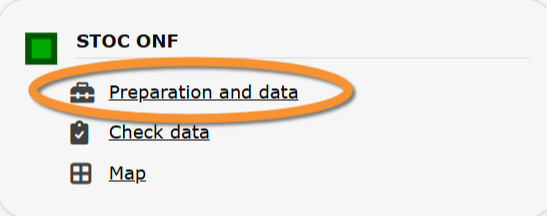
STOC_ONF Preparation and data
Lists all sites available to the current profile and allows entering observations, downloading printable maps and seeing results.
If your site is not ready yet, you will be asked to complete before you can enter observations.

Preparing the study site.
1. Validate one of the draws of the map
2. View draw on the map
3. Start drawing the counting
4. Download map
You may be asked:
1. Validate one of the draws of the map : Go back to the drawing process and select one of the squares.
2. View draw on the map : See a map with the study area and the two random squares.
3. Start drawing the counting : Once selected the square, design study points.
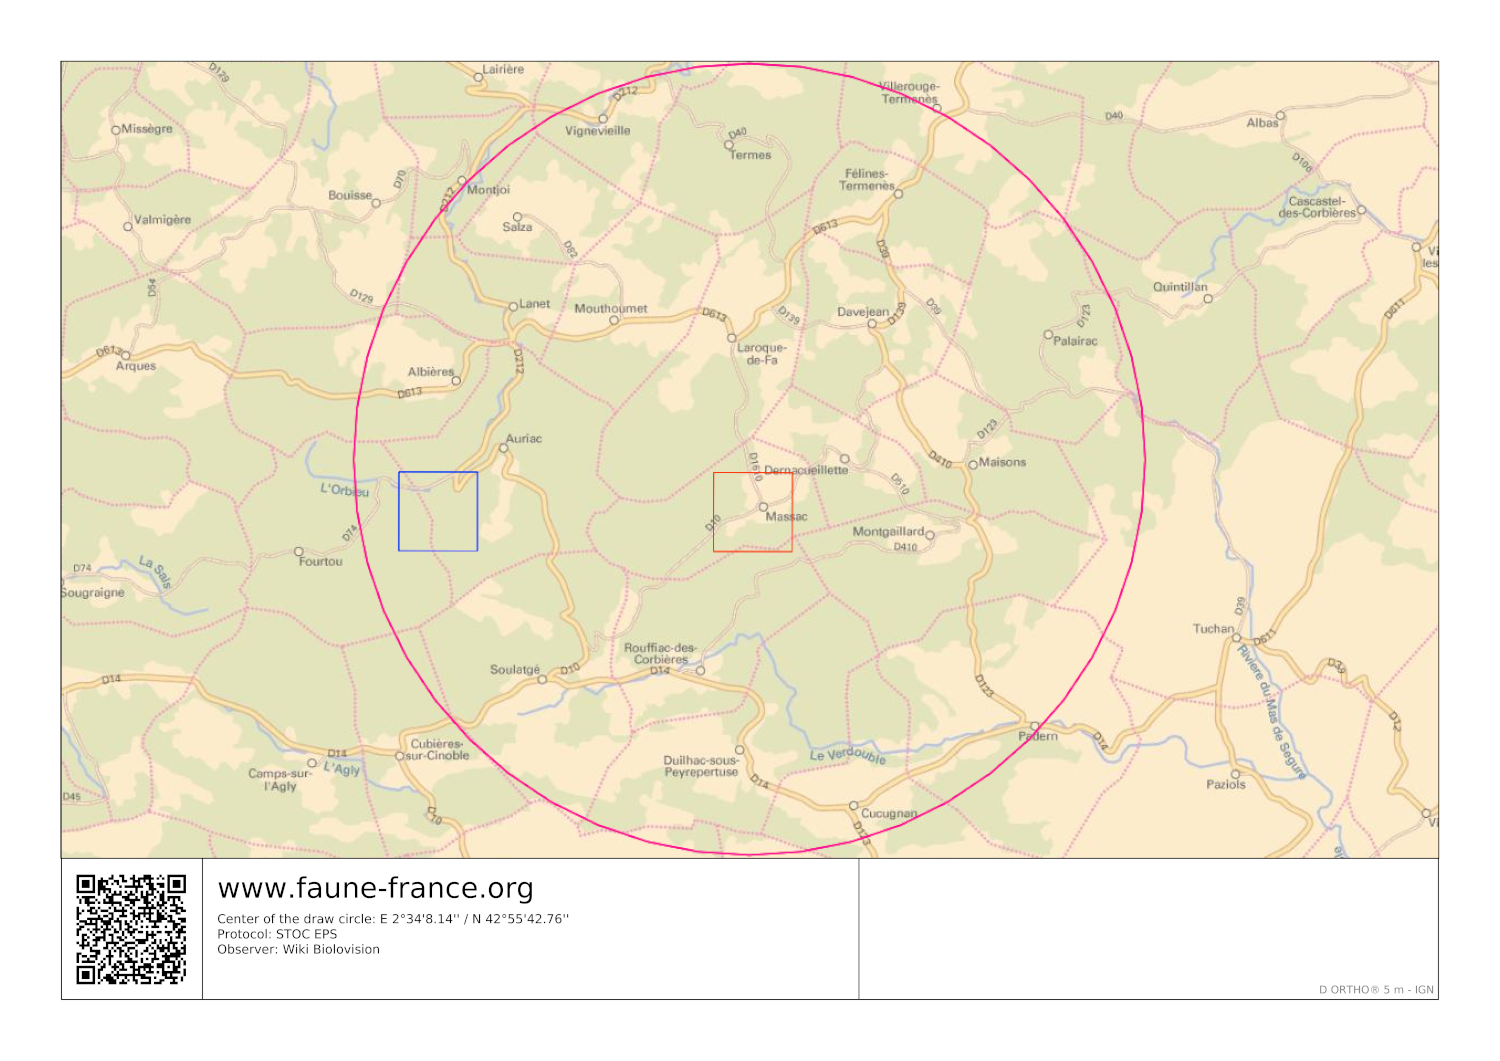
4. Download map : Download a pdf file with your study area (see examples below). Change base layer on the expandable menu.
|
Study area. |
Square 1. |
Square 2. |
Once your site is ready, you will gain access to enter data and to usual functions:
STOC ONF. Preparation and data.
36.2 STOC ONF
-
36.2.1 Add observations
- 36.2.1.1 Starting the protocol
36.2.1.2 Entering observations
36.2.1.3 Ending the protocol
- 36.2.2 Results
36.2.3 Display on map
36.2.4 Modify the protocol
36.2.5 Census results
36.2.6 Download map
STOC_ONF Add observations
Click on Add observations (see image below) in the site you need to enter data to.

STOC ONF. Add observations.
1: Click on add data for this census: opens the list of the points for the study site.
2: Choose point to count.

STOC ONF. Entering data to a Protocol census.
1. Add data.
2. Select point.
STOC_ONF Starting the protocol
Before entering observations, it is required to enter general parameters regarding the protocol. Parameters are protocol specific. Fields marked with an asterisk are mandatory.
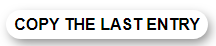
If this is not the first point you enter, you will see a summary of the information already entered on top (see image below). Click COPY THE LAST ENTRY to copy information you entered on the previous point registered. Note date and time also duplicate and you may need to correct.
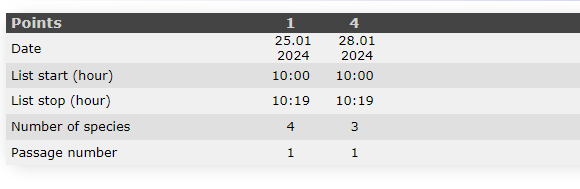
Summary of already entered points. Example.
See wiki section Web interface > Protocols > Preparation and data > Add observations > Starting the protocol for details on how to fill in the form.
When done, click one of the options.
NEXT: to continue entering observations.
ENTRY WITH LIST OF SPECIES ALREADY OBSERVED: to continue entering observations aided with a list of species already observed.
ENTRY WITH LIST OF THE MOST FREQUENT SPECIES: to continue entering observations aided a list of frequent species.
BLANK DAILY FORM:
NO SPECIES WERE SEEN (NEXT STEP SKIPPED): to indicate the census was done was no species were observed.
CENSUS NOT DONE: to indicate this point, transect or polygon was not surveyed.
STOC_ONF Entering observations
Enter observations as if entering a list. Interface differs depending on your choice on the previous screen.
See wiki section Web interface > Protocols > Preparation and data > Add observations > Entering observations for details.
Use the -/+ signs to open/close the additional information panel (see image below).

STOC ONF. Additional information panel.
1. Open/close additional information panel
2. Enter additional information if necessary.
Number: Enter number of individuals observed. Total numbers add up automatically.
Comment: Type a comment if necessary. Choose between a public and a private panel on the tabs.
Time: Choose from the expandable menu the time of the observation.
Hidden data: Check if you want to keep the observation hidden.
The animal is dead or wounded: Check if the individual is dead or wounded.
Atlas code: Choose from the expandable menu the corresponding atlas code. An explanation will show underneath once selected.
Singing: Check the cell with a musical note to indicate the individual was singing.
STOC_ONF Ending the protocol
Click on I RECORDED ALL SPECIES OF THE PROGRAME (=FULL OBSERVATION LIST) to indicate you recorded all species observed included or not on the protocol.
A green badge at the top will indicate your data has been saved. If there is some problem with your data, an error message will prevent you from continuing.
See wiki section Web interface > Protocols > Preparation and data > Add observations > Ending the protocol for more information.
[Top to Add observations]
[Top to Preparation and data]
[Back to STOC ONF]
STOC_ONF Results

STOC ONF. Results.
See some statistics about your surveys results.
Visit wiki section Web interface > Protocols > Preparation and data > Results for details.
STOC_ONF Display on map
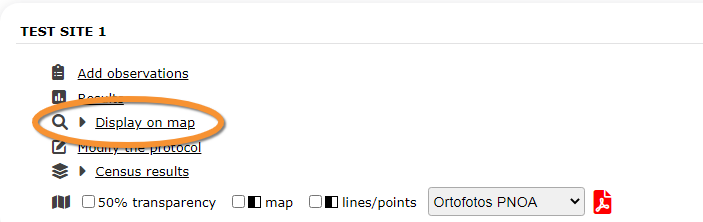
STOC ONF. Display on map.
For the selected site, see the area to survey on a map. To know how to navigate the map, refer to wiki section Web interface > Navigating the map.
Visit wiki section Web interface > Protocols > Preparation and data > Display on map for details.
STOC_ONF Modify the protocol

STOC ONF. Modify the protocol.
Modify the site to survey.
Visit wiki section Web interface > Protocols > Preparation and data > Modify the protocol for details.
STOC_ONF Census results

STOC ONF. Census results.
Click on Census results to see all available years with data for this site (see image Protocol. Selecting year to visualise). Select the one to visualise.
Visit wiki section Web interface > Protocols > Preparation and data > Census protocol for details.
STOC_ONF Download map

STOC ONF. Download map.
Download maps ready to print.
Visit wiki section Web interface > Protocols > Preparation and data > Download map for details.
[Top to Preparation and data]
[Back to STOC ONF]
STOC_ONF Check data
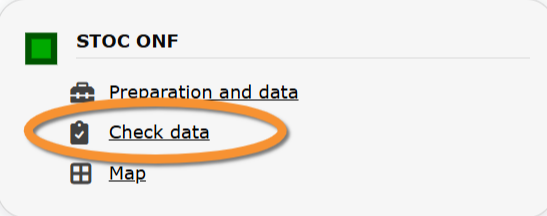
STOC ONF. Check data.
Calendar showing visits to different sites and number of species detected.
Visit wiki section Web interface > Protocols > Preparation and data > Check data for details.
STOC_ONF Map
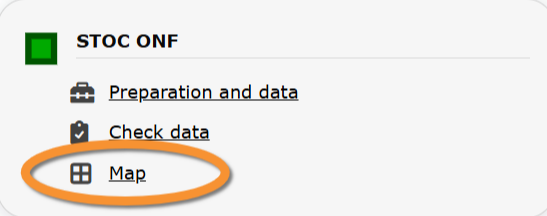
STOC ONF. Map.
Map and statistics for site.
Visit wiki section Web interface > Protocols > Preparation and data > Map for details.