Submitting records
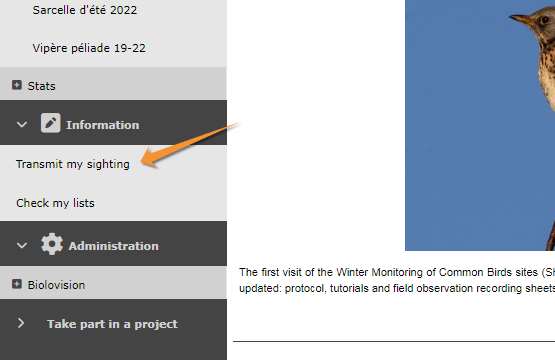
In order to enter observations, first you need an account (see section 2. Getting started Registration). Once logged in (see section 2. Getting started Logging in) click on Submit (see image 8) or access through the left hand menu under Information > Transmit my sighting (image 9). The process will follow three stages: approximate choice of a site, precise location and enter an observation.
Step 1/3: Approximate choice of a site
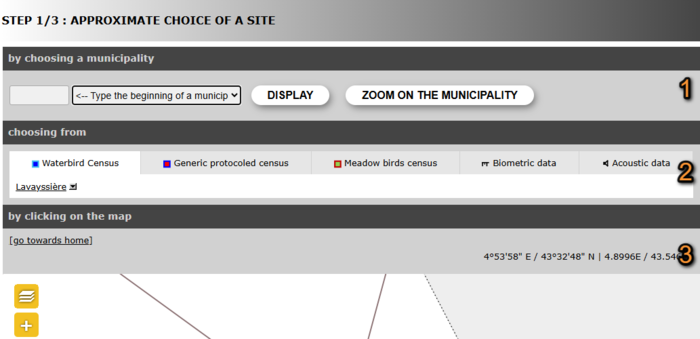
There are different ways to locate your observation (see image 10).
By typing text
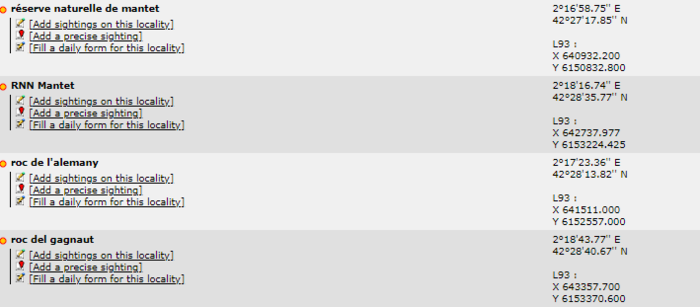
Search for a place by typing its name. You will be taken to Step 2/3: Precise site choice. If you typed a very general name (ex. Mantet), you will access a list with all possible precise locations (see image 12); but if you typed a predetermined precise location (ex. Roc de l’Alemany), you will only access options for that location.
By geographic coordinates
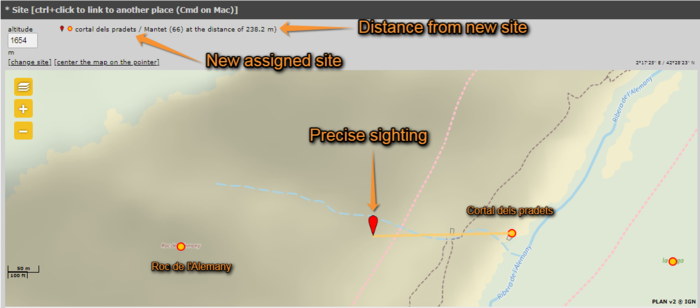
Coordinates should follow the WGS 84 datum, either in degrees, minutes and second (example 2°17'23.36 E 42°28'13.82 N) or in decimal degrees (exemple E002.28982° N42.47051°). The system will automatically detect if you are using degrees, minutes and seconds or decimal degrees. Use negative coordinates for Western longitudes. You will be taken to Step 3/3: Transmitting my sightings (see subsection below) with the format as if you added a precise sighting (see Step 2/3: Precise site choice > Add a precise sighting below, Image 13). Your record will be listed under the closest pre-determined site, as shown by the yellow line (see image 13), but your coordinates will only be visible to you and to administrators.
By choosing a municipality
It is also possible to enter a municipality. Type the beginning of the municipality name and select from the panel. If clicking Display, you will go to a form asking more precise location (see Step 2/3: Precise site choice). If choosing Zoom on the municipality you can select from the map below a more precise location (see By clicking on the map below).
Choosing from
Choose from the proposed sites based on your previous records. You can see up to 5 of the most visited sites during the last 6 months. Click on any of these sites to access an expandable menu as in image 11. In Choosing from you have the option to Attach to map. This will display in the map below the area you are looking for, and it is especially useful to approach a site you know is nearby.
By clicking on the map
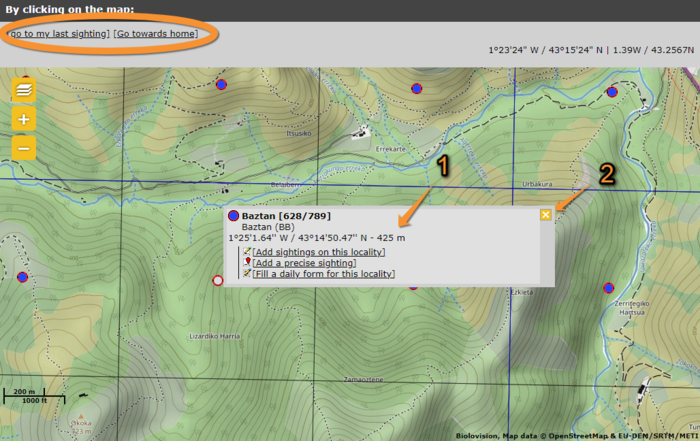
Or one can select from the map below. Locations are represented with a dot. Click on a dot to see options for this location (see image 11, and Step2/3: Precise site location). By clicking at any other point of the map, you can only add a precise sighting (see step 2/3: precise site choice). You can centre on your last location by clicking on go to my last sighting at the top left corner; or centre at your location by going to go towards home (see image 11 encircled). You can change you location at website customisation (see section 2. Getting started > Customise website).
Step 2/3: Precise site choice
If accessed from By choosing a municipality > Display it returns a list with all possible sites for this municipality, and all options for each of them (see image 12).
If accessed from By clicking on the map, it returns on the same map a menu with all possible actions to this location (see image 11 on previous section).
Options are:
Add sightings on this locality
It will take you to Step 3/3: Transmitting my sightings > If accessed from add sightings on location or Add precise location (see next section).
Add a precise sighting
It still takes us to Step 3/3: Transmitting my sittings but adds a section at the top in which to click the position of the individual (see image 13. Note how your observation got associated to a new precise location –yellow line on the map). The system associates this record automatically with the closest location and will show the observation linked to that site. If you want to change to which point it gets associated to, hold CTRL and click on the new predetermined site. Exact coordinates will only be visible for you and for the administrators. Adding a precise sighting is especially useful when we know the exact point of the observation but cannot work out to which predetermined location it belongs to; or for studies that require exact positions, for example when mapping nests or territories.
Both Add Sightings to this location and Add a precise sighting are most useful for partial lists and occasional recordings of some species. To make list with more scientific value, see next subsection Fill a daily form for this locality.
Fill a daily form for this locality
It will take you to Step 1/3: Transmit sighting > If accessed from a list (fill a daily form) (see next section).
This is the preferred option to record lists of observations. It requires more detailed information than if using add sightings on this location or add a precise sighting, but while it takes longer to submit, it also has more scientific value. You will be asked to enter date and time, number of individuals, breeding status, among others. Introducing an atlas code is mandatory if entering observations with that option.

