Private territory mapping (NL)
OTHER_MAPPING
4 Private territory mapping
-
4.1 Start of list
4.2 Entering records
- 4.2.1 Place
4.2.2 Species
4.2.3 Additional information
|
|
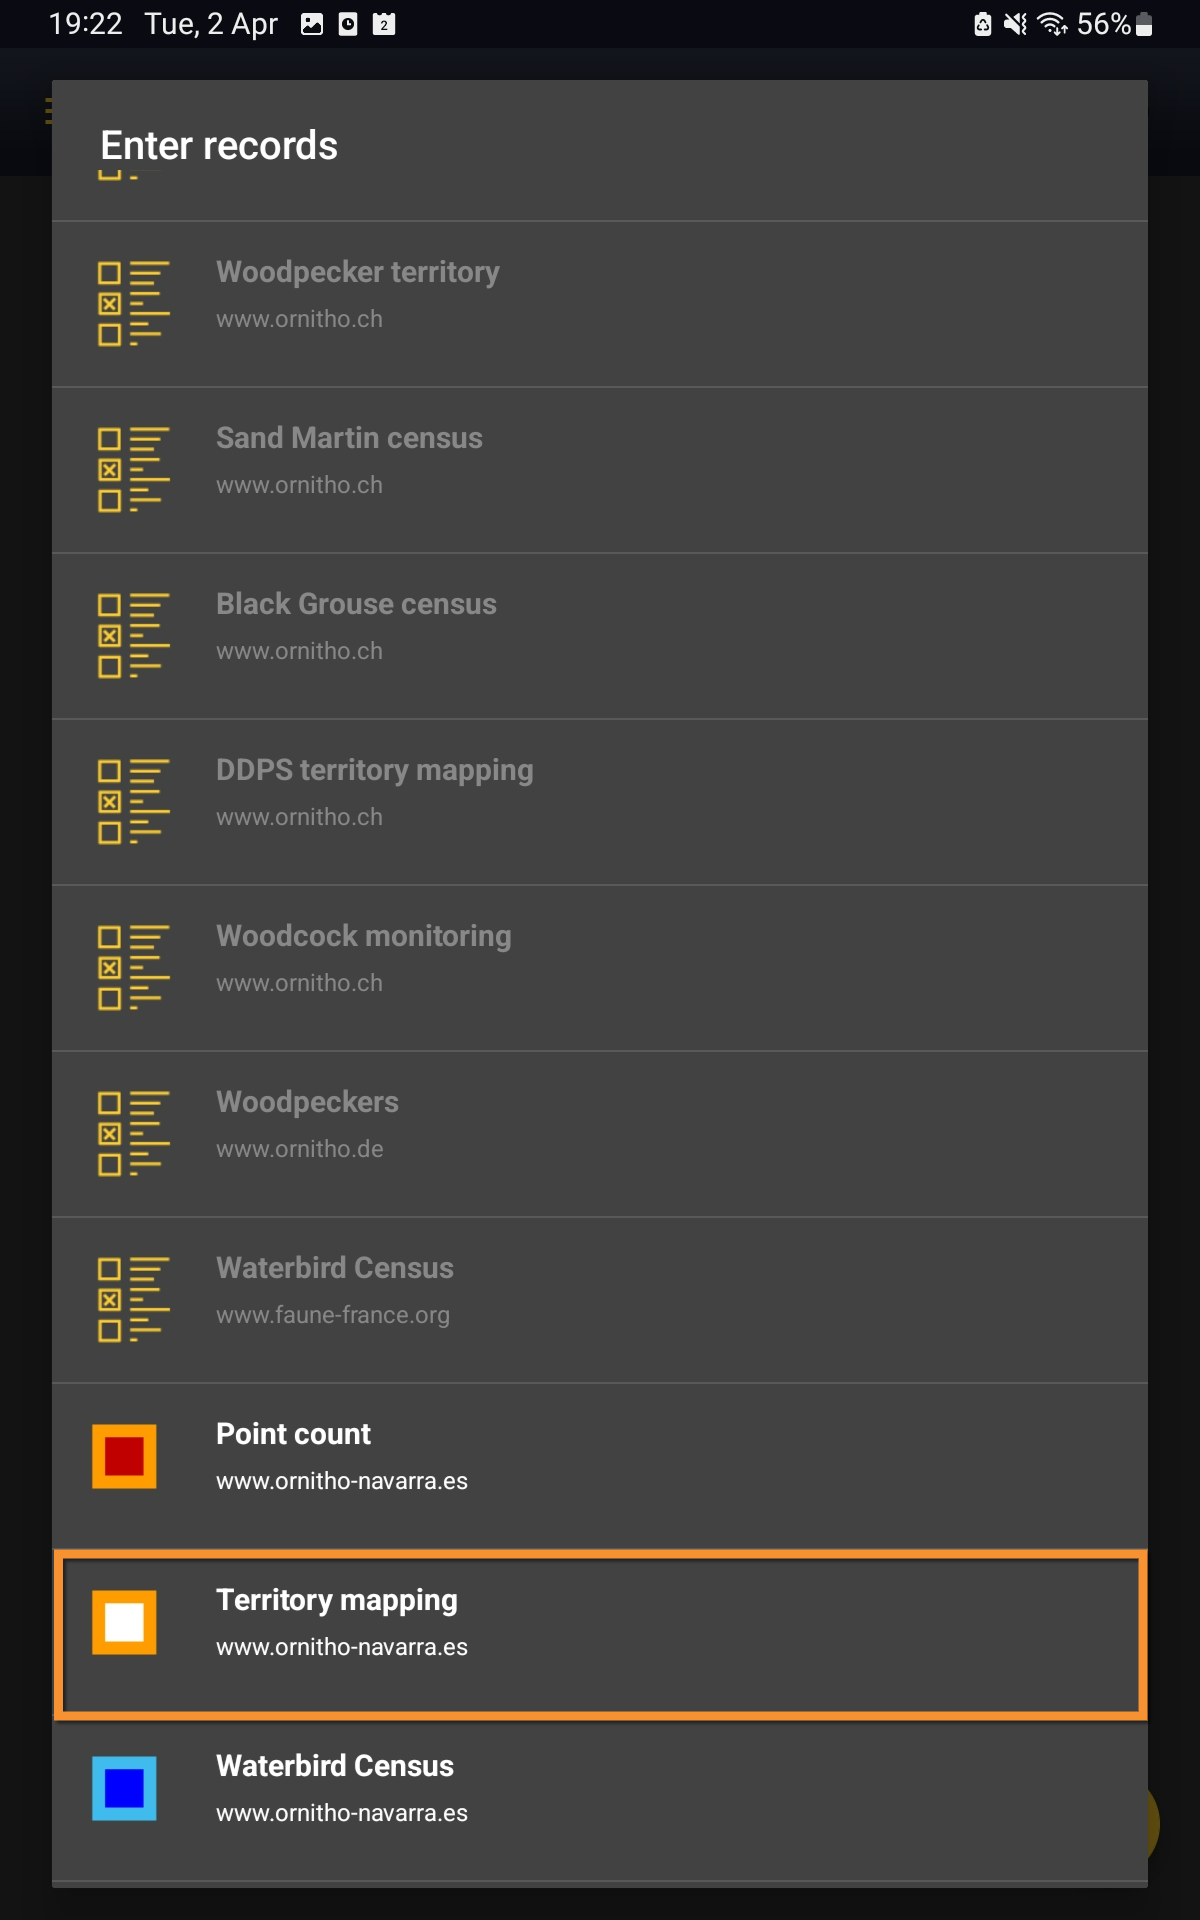
Open the menu as for Submitting records and choose Private territory mapping (see image below).

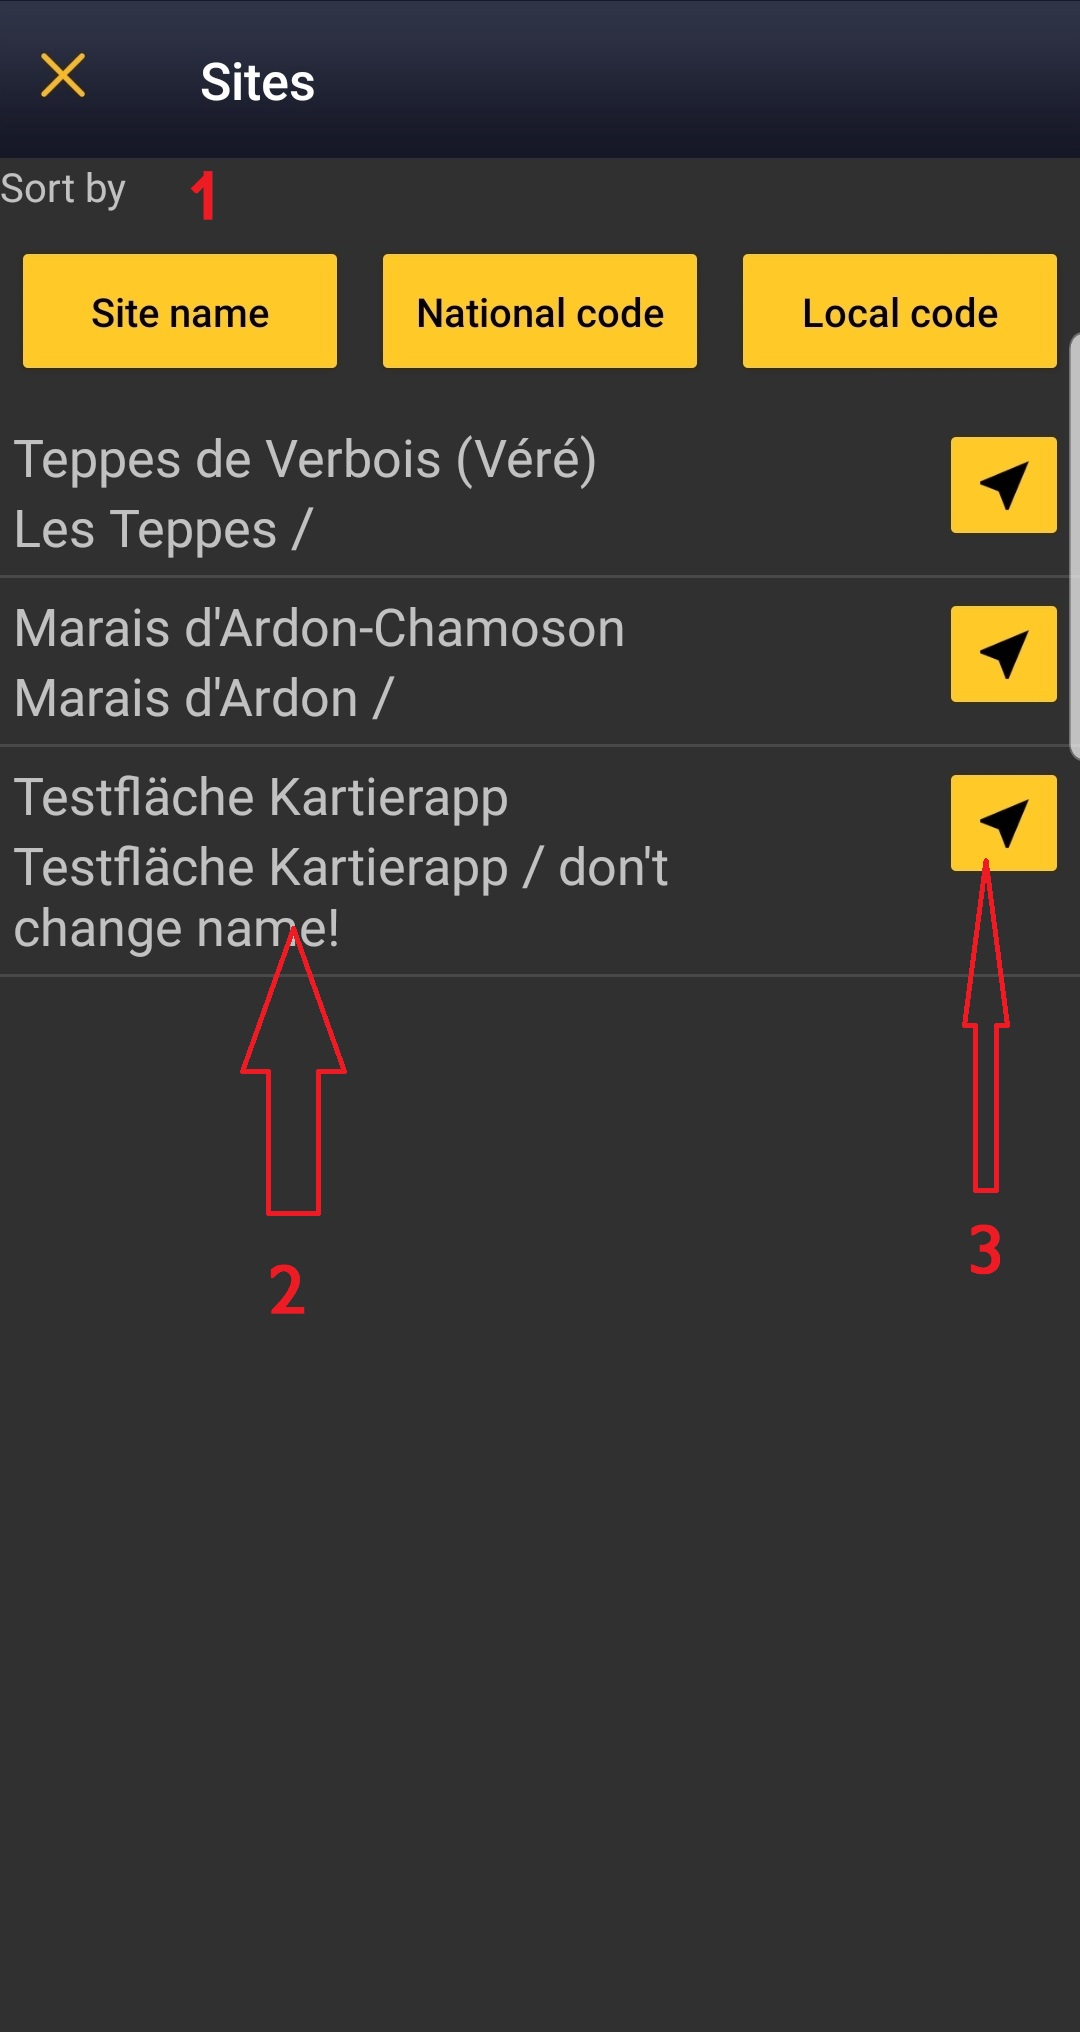
Choose the site you want to count at as explained in wiki section Mobile interface > Protocols > Enter data.
OTHER MAPPING Start of list
Enter general information before starting the count. Fields are protocol dependent and may change from country to country.
Visit wiki section Mobile interface > Protocols > Enter data > Start of list for details.
Click Next when done.
OTHER MAPPING Entering records
Screen layout will automatically become horizontal if using a tablet, which the map section on the right, and the species section on the left (see image below).
Enter observations as if in a list in the field.

Image title.
1. Enlarge: click to enlarge image. It will hide/unhide general information about your phone on the top line.
2. Unlock: click on lock icon to unlock screen and be able to enter species. The screens locks automatically to prevent entering unreal data while in the field.
3. Map section
4. Species section
- Place
Place your observation within the study area.
See wiki section Mobile interface > Protocols > Enter data > Entering observations > Place on how to interpret the map and place your observation.
- Species
Enter species name.
See wiki section Mobile interface > Protocols > Enter data > Entering observations > Species on how to enter the species name. Use shortcuts if necessary.
- Number of individuals
Enter number of individuals using a counter.
OTHER MAPPING Additional information
Enter number of individuals and atlas code.

- 4. Species: Registered species.
- 4. Species: Registered species.
- 5. Edit: Click to go to previous screen and change species name.
- 5. Edit: Click to go to previous screen and change species name.
- 6. Counter: Type number of individuls or use quick keys to add or substract individuals. See wiki section Mobile interface > Submitting records > Directly in the field > Number of individuals to know how to use a counter, if necessary.
- 6. Counter: Type number of individuls or use quick keys to add or substract individuals. See wiki section Mobile interface > Submitting records > Directly in the field > Number of individuals to know how to use a counter, if necessary.
- 7. Atlas code: Click on an icon to indicate the main behaviour for individuals registered in this entry.
- 7. Atlas code: Click on an icon to indicate the main behaviour for individuals registered in this entry.

 |
Singing, drumming or displaying male present in breeding season in possible nesting habitat. |
 |
Unidentified individual in breeding season in possible nesting habitat. |
 |
Male in breeding season in possible nesting habitat. |
 |
Female in breeding season in possible nesting habitat. |
 |
Pair observed in suitable nesting habitat in breeding season. |
 |
Agitated behaviour or anxiety calls from adults, indicating a nest or young nearby. |
 |
Recently fledged young (nidicolous species) or downy young (nidifugous species) observed. |
 |
Nest-building or excavating of nest-hole observed. |
 |
Adult carrying faecal sac or food. |
 |
Nest containing eggs or young. |
 |
No atlas code. |
 |
Flying direction. Press, hold and drag to indicate flying direction. If the individual is moving around without a clear direction, press icon but do not indicate flight direction. It will be represented with concentric circles (ie. single male in image below).This information can be combined with others in the list (see example below), but should be introduced first. |

To see how it will show in the web site, visit Web interface > Local portals > Protocols > Private territory mapping > Census results > Observations section.
- Relationship between individuals: When two similar individuals are recorded nearby (ie. two singing males of the same species), click on both records to open relationship options (see image below).
- Relationship between individuals: When two similar individuals are recorded nearby (ie. two singing males of the same species), click on both records to open relationship options (see image below).

|
|
Both sightings correspond to the same individual. It is probably the same territory. It is reflected as a green line in the map. |
|
|
It is unknown if both records correspond to the same individual/s. It is reflected as an orange line in the map. |
|
|
Both records correspond to different individuals. It may define two different territories. It is reflected as a blue line in the map. |
- Click
- Save to save and continue entering data, or
- X to close panel and continue entering data without indicating relationship.
- Save to save and continue entering data, or
- Click
To see how it will show in the web site, visit Web interface > Local portals > Protocols > Private territory mapping > Census results > Observations section.
OTHER MAPPING Ending the list
To finish the survey,
1. Stop recording,
2. Adjust time, if necessary,
3. Fill in/modify details, and
4. Choose type of list.
- Which species list did you count?:
- I recorded all species of the programme: You counted only the species of interest to the protocol, but you counted them all.
- All species where reported (=complete list): You counted all species seen within the polygon.
- I recorded all species of the programme: You counted only the species of interest to the protocol, but you counted them all.
Visit wiki section Mobile interface > Enter data > Ending the list for details, if necessary.
Remember to synchronise your data as soon as possible after entering to avoid loosing it.
OTHER MAPPING Editing records and/or protocols
To edit records within a protocol, or to edit the protocol's general parameters, visit wiki section Mobile interface > Editing records > Editing protocols.
OTHER MAPPING Deleting records and/or protocols
To delete records within a protocol, or to delete the whole protocol, visit wiki section Mobile interface > Editing records > Deleting protocols.
OTHER MAPPING Browsing records
See your protocoled records:
- Before synchronisation
- In the phone. See more details in wiki section Accessing your own records.
- Before synchronisation
- After synchronisation
- In Mine. See more details in wiki section Accessing records' details.
- After synchronisation
- In Under verification (only if any data of the protocol needs more information)
- In Under verification (only if any data of the protocol needs more information)
- In the local portal. Go to the corresponding local portal, Menu > Explore > All my observations.
- In the local portal. Go to the corresponding local portal, Menu > Explore > All my observations.