Reproductor de sonido
Siempre que una grabación de sonido se ha adjuntado a una observación, existe un sonograma asociado a esta observación. Se puede
- escuchar todo el sonograma,
- seleccionar una parte de la grabación para escuchar,
- validar la grabación, si eres Verificador.
Acceso a grabaciones
- consultando observaciones desde últimas observaciones en la columna de la derecha de la página de inicio.
- consultando observaciones desde los últimmos 5/15 dias en la columna de la izquierda de la página de inicio.
- consultando tus propias observaciones en Todas mis observaciones,
- usando el Motor de búsqueda,
- en la Galería,
- en el panel de verificación (si eres verificador).
Clica en un sonograma (ver imagen Seleccionar un sonograma) para abrir la herramienta de reproductor de sonido (ver imagen Visión general del reproductor de sonido). Nota que si el fichero es tuyo, tendrás opciones adicionales (ver imagen Visión general del reproductor de sonido. Fichero propio).

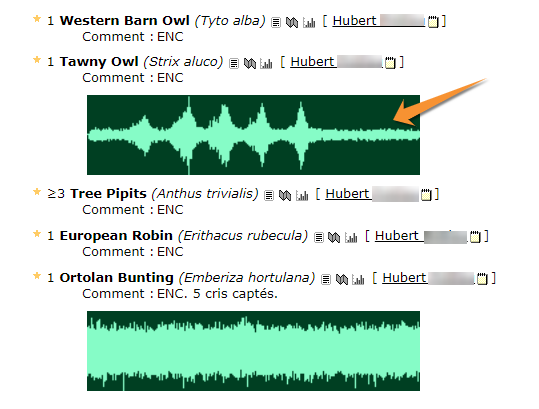
Seleccionar un sonograma.
Utiliza el botón gris de reproducción para reproducir el sonograma completo, o
crea una nueva ventana de reproducción para reproducir la parte del sonograma seleccionada (consulta la sub sección 8. Nueva ventana de reproducción para saber más).
- 1. Seleccionar el fichero
Todos los ficheros asociados a la observación (imágenes y sonido). Selecciona cualquier fichero de sonido para visualizarlo. Fíjate en el recuadro amarillo en el fichero activo.

Visión general del reproductor de sonido. Fichero propio.
1. Seleccionar el fichero
2. Mostrar/Ocultar
3. Eliminar el fichero
4. Descargar
5. Añadir a favoritos
- 2. Mostrar/Ocultar
Clica en mostrar/ocultar el fichero de sonido al público general. Sólo puedes hacerlo con tus propias observaciones, Si estás consultando las observaciones de otras personas, no se te mostrará el icono.
- 3. Eliminar el fichero
Clica para eliminar el fichero. Sólo podrás eliminar tus ficheros. Si estás consultando las observaciones de otros, no se te mostrará el icono,
- 4. Descargar
Clica para descargar el sonograma. Sólo puedes descargar tus propios ficheros. Si estás consultando las observaciones de otros, no se te mostrará el icono,
- 5. Añadir a favoritos
Clica para guardar el fichero de sonido en tus favoritos. Cuando la marca es verde, el fichero está guardado. Clica en la marca verde para eliminar el fichero de tus favoritos. Consulta tus sonidos e imágenes favoritos en la Galería. Esta función se muestra a todos los usuarios registrados.

Visión general del reproductor de sonido.
6. Sonograma completo.
7. Área detallada del sonograma.
8. Nueva ventana de reproducción.
A. Ir al fichero anterior.
B. Ir al fichero siguiente.
C. Ver la observación asociada.
6. Sonograma completo
Se representa todo el largo del sonograma. Un cuadrado amarillo indica que parte de éste se representa en este momento en el área detallada del sonograma (número 7 en la imagen Visión general del reproductor de sonido). Por defecto, son 10 segundos.

Sonograma completo.
9. Onda activa
10. Cambiar tamaño
11. Mover
12. Guía de sonido
- 9. Onda activa
La onda activa se muestra en azul. Cuando está inactiva se muestra en gris.
- 10. Cambiar el tamaño
Utiliza las flechas azules de los lados para cambiar el tamaño del área seleccionada. Fíjate como la imagen del área detallada del sonograma (número 7 en la imagen Vista general del reproductor de sonido) cambia a la vez.
- 11. Mover
Utiliza las flechas azules en la base para mover el área seleccionada (7) por el sonograma. Fíjate como la imagen en el área detallada del sonograma cambia a la vez.
NOTE
Blue icons Resize and Move refer to the full sonogram detail display (7).
Red icons Resize and Move refer to the active sonogram area (see Detailed sonogram area and New playback window below for details).
- 12. Sound guide
Red line indicating which part of the recording is playing. It moves along the sonogram as the playing progresses. See a similar line also appears in the detailed sonogram area below (number 7 in image Sound player general view) indicating which part is sounding. Move it along the sonogram with your mouse to start playing from a different point on the recording.
7. Detailed sonogram area
It is a representation of the highlighted area in the full sonogram (number 6 in image Sound player general view). The red line indicates which bit of it is playing and it moves along the recording as it plays.

Detailed sonogram.
13. Play/Pause
14. Continuous playing
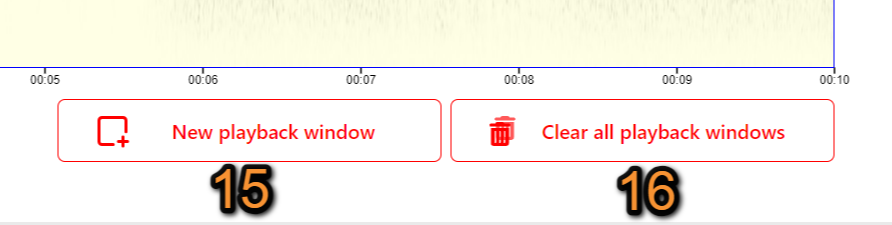
15. New playback window
16. Clear all playback windows
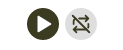
- 13. Play/Pause (full sonogram)
Click Play/Stop button to start playing or stop it when needed. This function applies to the full sonogram.
- 14. Continuous playing
By default it is set on continuous playing (black icon). Click on the icon to play the recording only once (grey icon).
NOTE
Icons Play/Pause and Continuous playing apply to the full sonogram.
Red icons Play/Stop and Delete apply to the new playback window. See New playback window below for details.
8. New playback window
Click on New playback window to select part of the sonogram (see image below). This allows to focus on special frequencies when there is noise. Click more than once to create several boxes. Close all windows by clicking on Clear all playback windows.
NOTE: for the moment, the New playback window automatically disapear if you leave the webpage or choose another sound to play.

Open/close playback windows.
15. New playback window: Open a new playback window.
16. Close all playback windows: Close all playback windows. To close only one window use the bustbin icon (see number 20 in image Media:New playback window.png).
Clicking on New playback window will immediately show a new red framed box on the detailed sonogram area (see image below). Note the the full sonogram at the top (number 6 in image Sound player general view) also contains the red boxes.

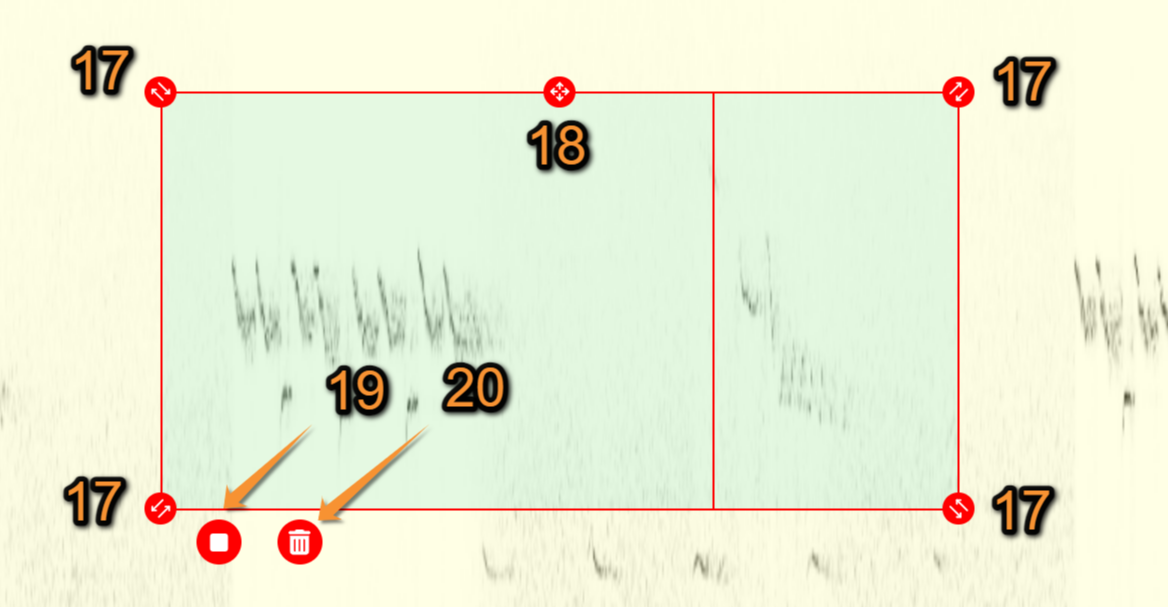
New playback window.
17. Resize
18. Move
19. Play/Stop
20. Delete
- 17. Resize
Use red arrows on corners to enlarge or decrease the area you want to play. It works both up and down and to the sides, allowing selecting sounds higher or lower in the diagram or further to right or left. It is possible to adjust the red box also while the recording is playing.
- 18. Move
Use red arrow at the middle top to move the red box to a different part of the detailed sonogram area. It is possible to move the red box also while the recording is playing.
NOTE
Blue icons Resize and Move refer to the full sonogram.
Red icons Resize and Move refer to the active Detailed sonogram area and New playback window.
- 19. Play/Stop (selected part)
Play/Stop the sound within the red box. Note when playing the recording through the red button, it will only reproduce the sounds represented within this box. If there are more than one box, you can decide which one to play. To play all sounds in the sonogram, use the general play button (number 8 in image Sound player general view).
- 20. Delete
Delete red box. No area will be selected when there is no red box in the detailed sonogram area and the recording will play in full. This button will only remove the red box it applies to. All other red boxes will remain on the detailed sonogram area. To remove all boxes at once, use the Unselect button (number 11 on image Sound player general view).
NOTE
Icons Play/Pause and Continuous playing apply to the full sonogram.
Red icons Play/Stop and Delete apply to the new playback window. See New playback window for details.
Nota: las imágenes y los ejemplos de esta wiki están sacados de la página francesa Faune-France. El diseño y la posición de algunas de las funciones pude variar según la página. Puedes consultar la lista de todas las páginas locales en la sección wiki Páginas locales y entidades colaboradoras. |