Lecteur de son avec sonogramme
Lorsqu'un enregistrement sonore a été attaché à une donnée, il y a un sonogramme associé à la donnée. Il est possible de
- écouter l'enregistrement complet,
- sélectionner une partie de l'enregistrement à écouter (plage de temps et/ou fréquence),
- vérifier la donnée si vous êtes un validateur.
Accéder aux enregistrements
- afficher les données depuis les observations récentes dans la colonne de droite sur la page d'accueil,
- afficher les données depuis consulter les 2/5/15 derniers jours dans le menu gauche de la page d'accueil,
- en consultant vos propres données Toutes mes données,
- en utilisant l'outil de recherche,
- dans la galerie Galerie,
- dans l'interface de vérification (seulement disponible pour les validateurs).
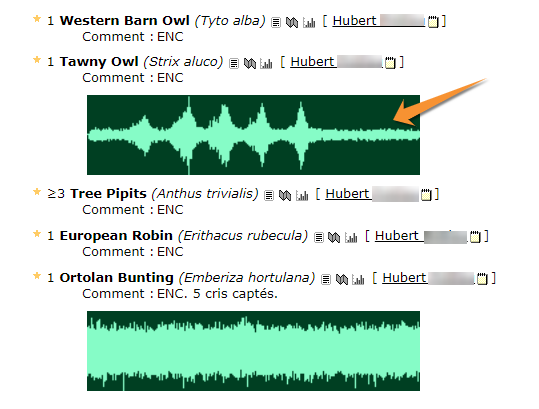
Cliquer sur un sonogramme (image Sélectionner un sonogramme ci-dessous) pour ouvrir l'outil de lecture des sons ( image Vue générale du lecteur de son). Notez que si il s'agit de l'un de vos son, vous aurez plus de possibilités ( image Vue générale du lecteur de son. Avec vos propres fichiers).

Selectionner un sonogramme.
Utilisez le bouton gris "play" pour jouer le son entier, ou
créez une Nouvelle fenêtre de lecture pour jouer seulement une partie du sonogramme (voire la sous section 8. Fenêtre de lecture pour en savoir plus).
- 1. Selectionner le fichier
Tous les fichiers attachés à la donnée (images et sons). Sélectionnez-en un pour le visualiser en détail dessous. Notez le cadre jaune qui indique le fichier sélectionné.

Vue générale du lecteur de son. Avec vos propres fichiers.
1. Selection du fichier
2. Cacher/Rendre visible
3. Supprimer
4. Télécharger
5. Favoris
- 2. Cacher/Rendre visible
Cliquer pour cacher/rendre visible le fichier son pour le rendre publique ou le cacher. Cette action est seulement possible avec vos propres enregistrements, si vous consultez les sons de quelqu'un d'autre, vous ne verrez pas cet icone.
- 3. Effacer le fichier
Cliquer pour effacer le fichier. Vous pouvez seulement supprimer vos propres fichiers. Si vous consultez les données d'autrui, vous ne verrez pas l'icone.
- 4. Télécharger
Cliquer pour télécharger le fichier. Il est seulement possible de télécharger ses propres fichier, si vous consultez les données d'autrui, vous ne verrez pas l'icone.
- 5. Favoris
Cliquer pour mettre le son dans vos favoris. Quand le vu est vert, l'enregistrement fait partie de votre galerie de favoris. Cliquer sur le vu vert pour retirer l'enregistrement de vos favoris. Retrouvez vos son et images favoris sous Galerie. Cette fonction est disponible pour tous les utilisateurs enregistrés.

Vue générale du lecteur de son.
6. Sonogramme entier.
7. Zone détaillée du sonogramme.
8. Nouvelle fenêtre de lecture.
A. Aller au fichier précédent.
B. Aller au fichier suivant.
C. Voire la donnée associée.
6. Full sonogram
The full length of the sonogram is represented. A yellow square indicates which part of it is currently represented in the detailed sonogram area (number 7 in image Sound player general view). By default, it is 10 seconds.

Full sonogram.
9. Active waveform
10. Resize
11. Move
12. Sound guide
- 9. Active waveform
The active waveform is highlighted in blue; otherwise, it is grey.
- 10. Resize
Use blue arrows on the side to enlarge or decrease the size of the selected area. Note the image on the detailed area of the sonogram (number 7 in image Sound player general view) changes accordingly.
- 11. Move
Use the blue arrows at the bottom to move the selected area to display in detail (7) along the sonogram. Note the image on the detailed area of the sonogram changes accordingly.
NOTE
Blue icons Resize and Move refer to the full sonogram detail display (7).
Red icons Resize and Move refer to the active sonogram area (see Detailed sonogram area and New playback window below for details).
- 12. Sound guide
Red line indicating which part of the recording is playing. It moves along the sonogram as the playing progresses. See a similar line also appears in the detailed sonogram area below (number 7 in image Sound player general view) indicating which part is sounding. Move it along the sonogram with your mouse to start playing from a different point on the recording.
7. Detailed sonogram area
It is a representation of the highlighted area in the full sonogram (number 6 in image Sound player general view). The red line indicates which bit of it is playing and it moves along the recording as it plays.

Detailed sonogram.
13. Play/Pause
14. Continuous playing
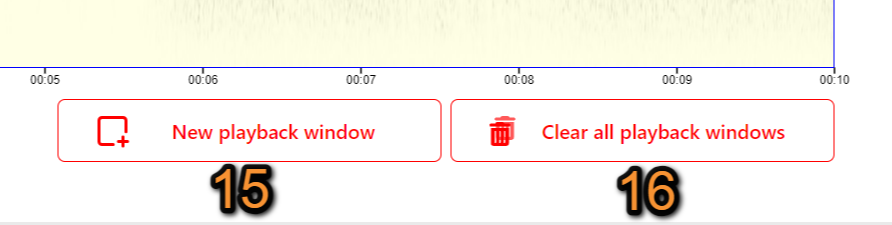
15. New playback window
16. Clear all playback windows
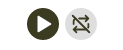
- 13. Play/Pause (full sonogram)
Click Play/Stop button to start playing or stop it when needed. This function applies to the full sonogram.
- 14. Continuous playing
By default it is set on continuous playing (black icon). Click on the icon to play the recording only once (grey icon).
NOTE
Icons Play/Pause and Continuous playing apply to the full sonogram.
Red icons Play/Stop and Delete apply to the new playback window. See New playback window below for details.
8. New playback window
Click on New playback window to select part of the sonogram (see image below). This allows to focus on special frequencies when there is noise. Click more than once to create several boxes. Close all windows by clicking on Clear all playback windows.
NOTE: for the moment, the New playback window automatically disapear if you leave the webpage or choose another sound to play.

Open/close playback windows.
15. New playback window: Open a new playback window.
16. Close all playback windows: Close all playback windows. To close only one window use the bustbin icon (see number 20 in image Media:New playback window.png).
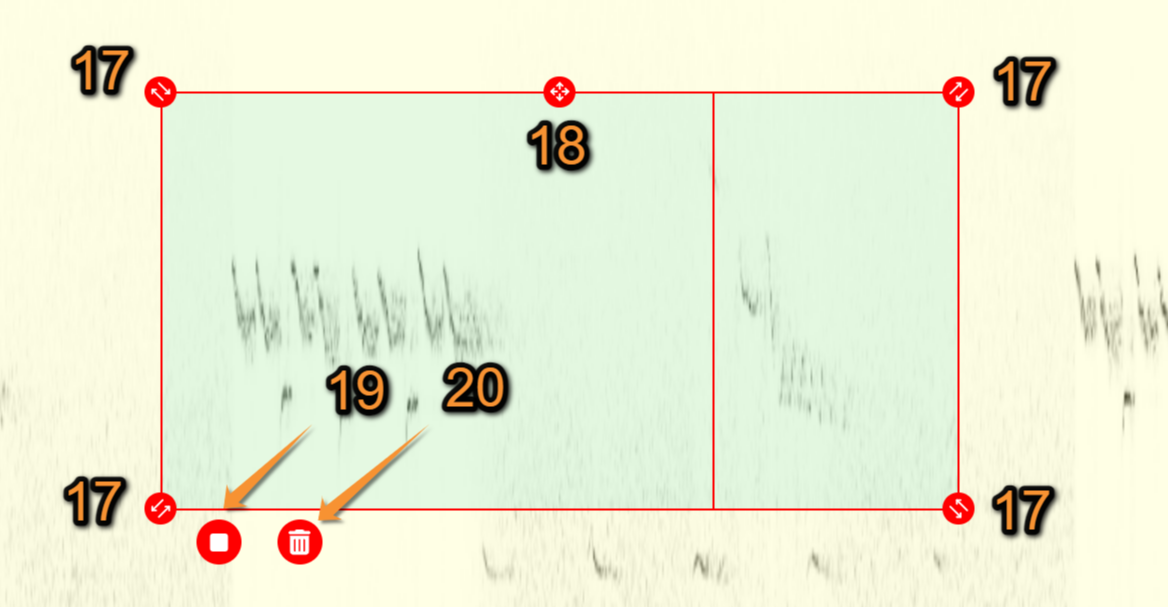
Clicking on New playback window will immediately show a new red framed box on the detailed sonogram area (see image below). Note the the full sonogram at the top (number 6 in image Sound player general view) also contains the red boxes.

New playback window.
17. Resize
18. Move
19. Play/Stop
20. Delete
- 17. Resize
Use red arrows on corners to enlarge or decrease the area you want to play. It works both up and down and to the sides, allowing selecting sounds higher or lower in the diagram or further to right or left. It is possible to adjust the red box also while the recording is playing.
- 18. Move
Use red arrow at the middle top to move the red box to a different part of the detailed sonogram area. It is possible to move the red box also while the recording is playing.
NOTE
Blue icons Resize and Move refer to the full sonogram.
Red icons Resize and Move refer to the active Detailed sonogram area and New playback window.
- 19. Play/Stop (selected part)
Play/Stop the sound within the red box. Note when playing the recording through the red button, it will only reproduce the sounds represented within this box. If there are more than one box, you can decide which one to play. To play all sounds in the sonogram, use the general play button (number 8 in image Sound player general view).
- 20. Delete
Delete red box. No area will be selected when there is no red box in the detailed sonogram area and the recording will play in full. This button will only remove the red box it applies to. All other red boxes will remain on the detailed sonogram area. To remove all boxes at once, use the Unselect button (number 11 on image Sound player general view).
NOTE
Icons Play/Pause and Continuous playing apply to the full sonogram.
Red icons Play/Stop and Delete apply to the new playback window. See New playback window for details.
Remarque : : les images et les exemples sont tirés du portail français Faune-France. La conception et la position de certains outils peuvent varier légèrement d'un portail à l'autre. Pour voir la liste des portails, consultez la section Partenaires locaux et partenaires |