Protocols web: Difference between revisions
| (624 intermediate revisions by 3 users not shown) | |||
| Line 1: | Line 1: | ||
<languages /> | |||
<translate> | |||
<!--T:1--> | |||
Protocols are standardised ways of collecting data linked to a geometry (points, transects or polygons), taxonomic group and observation pressure. | |||
< | |||
< | |||
<!--T:2--> | |||
The methodology to follow depends on the study's goal (see summary on [[Protocol management#Protocol table|Protocols' summary table]]). | |||
<!--T:3--> | |||
A country administrator will grant you access if you meet certain criteria. | |||
< | <!--T:4--> | ||
Not all protocols are available in all countries. <br /> | |||
<br /> | |||
<br /> | <br /> | ||
<!--T:31--> | |||
<div class="toc" style="width:450px;margin-bottom:0px;margin-top:0px;border-bottom:0px solid white;"> <!-- La llargada s'ha de canviar aquí --> | |||
<div class="mw-collapsible mw-collapsed" data-expandtext="Show" data-collapsetext="Hide" style="width:350px;margin-bottom:0px;margin-top:0px;"> | |||
'''Contents''' | |||
<div class="mw-collapsible-content" style="width:450px;margin-bottom:0px;margin-top:0px;"> <!-- I també cal canviar la llargada aquí --> | |||
<ol> | |||
1 [[Protocols_web#Accessing_protocols|Accessing protocols]]<br/> | |||
2 [[Protocols_web#Square selection|Selection of study site]] <br/> | |||
3 [[Protocols_web#Preparation and data|Preparation and data]]<br/> | |||
<ol> 3.1 [[Protocols_web#Add_observations|Add observations]]<br/> | |||
<ol> 3.1.1 [[Protocols_web#Starting_the_protocol|Starting the protocol]]<br/> | |||
3.1.2 [[Protocols_web#Entering_observations|Entering observations]]<br/> | |||
3.1.3 [[Protocols_web#Ending_the_protocol|Ending the protocol]]<br/></ol></ol></ol> | |||
<ol><ol> | |||
3.2 [[Protocols_web#Results|Results]]<br/> | |||
<ol> 3.2.1 [[Protocols_web#Graphs|Graph]]<br/> | |||
3.2.2 [[Protocols_web#Statistics_and_results_of_recorded_species|Statistics and results of recorded species]]<br/></ol></ol></ol> | |||
<ol><ol> | |||
3.3 [[Protocols_web#Display_on_map|Display on map]]<br/> | |||
3.4 [[Protocols_web#Modify_the_protocol|Modify the protocol]]<br/> | |||
3.5 [[Protocols_web#Census_results|Census results]]<br/> | |||
<ol> 3.5.1 [[Protocols_web#Protocol_section|Protocol section]]<br/> | |||
3.5.2 [[Protocols_web#Observations_section|Observations section]]<br/> | |||
3.5.3 [[Protocols_web#Map_section|Map section]]<br/></ol></ol></ol> | |||
<ol><ol> | |||
3.6 [[Protocols_web#Download_map|Download map]]<br/></ol></ol> | |||
<ol> | |||
4 [[Protocols_web#Check_data|Check data]]<br/> | |||
5 [[Protocols_web#Map|Map]]<br/></ol> | |||
</div> | |||
</div> | |||
</div> | |||
<div class="toc" style="width:450px;margin-bottom:0px;margin-top:0px;border-top: 0px solid white;"> <!-- La llargada s'ha de canviar aquí --> | |||
<div class="mw-collapsible mw-collapsed" data-expandtext="Show" data-collapsetext="Hide" style="width:350px;margin-bottom:0px;margin-top:0px;"> | |||
'''Protocols''' | |||
<div class="mw-collapsible-content" style="width:450px;margin-bottom:0px;margin-top:0px;"> <!-- I també cal canviar la llargada aquí --> | |||
<ol> | |||
<span style="color: #000000; margin-left: 5px;"><b>· </b> [[Acoustic data|Acoustic data]]<br/> | |||
<span style="color: #000000; margin-left: 5px;"><b>· </b> [[Bee eater|Bee-eater]]<br/> | |||
<span style="color: #000000; margin-left: 5px;"><b>· </b> [[Bewick's Swan|Bewick's Swan]]<br/> | |||
<span style="color: #000000; margin-left: 5px;"><b>· </b> [[Birds of prey|Birds of prey]]<br/> | |||
<span style="color: #000000; margin-left: 5px;"><b>· </b> [[Black Grouse protocol|Black Grouse protocol]]<br/> | |||
<span style="color: #000000; margin-left: 5px;"><b>· </b> [[CBBS|CBBS in Protected areas]]<br/> | |||
<span style="color: #000000; margin-left: 5px;"><b>· </b> [[Cirl Bunting|Cirl Bunting]]<br/> | |||
<span style="color: #000000; margin-left: 5px;"><b>· </b> [[CoBiMo|CoBiMo]]<br/> | |||
<span style="color: #000000; margin-left: 5px;"><b>· </b> [[Corncrake|Corncrake]]<br/> | |||
<span style="color: #000000; margin-left: 5px;"><b>· </b> [[Grey Partridge|Grey Partridge]]<br/> | |||
<span style="color: #000000; margin-left: 5px;"><b>· </b> [[Jackdaw|Jackdaw]]<br/> | |||
<span style="color: #000000; margin-left: 5px;"><b>· </b> [[Meadow birds|Meadow birds]]<br/> | |||
<span style="color: #000000; margin-left: 5px;"><b>· </b> [[MF|MF (Monitoring of breeding birds in wetlands)]]<br/> | |||
<span style="color: #000000; margin-left: 5px;"><b>· </b> [[MHB & BDM|MHB & BDM (Monitoring of common breeding birds Monitoring of biodiversity in Switzerland)*]]<br/> | |||
<span style="color: #000000; margin-left: 5px;"><b>· </b> [[Other territory mapping|Other territory mapping]]<br/> | |||
<span style="color: #000000; margin-left: 5px;"><b>· </b> [[Point_count|Point count]]<br/> | |||
<span style="color: #000000; margin-left: 5px;"><b>· </b> [[Private_territory_mapping|Private territory mapping]]<br/> | |||
<span style="color: #000000; margin-left: 5px;"><b>· </b> [[Protocoled census|Protocoled census]]<br/> | |||
<span style="color: #000000; margin-left: 5px;"><b>· </b> [[Rock Ptarmigans protocol|Rock Ptarmigans protocol]]<br/> | |||
<span style="color: #000000; margin-left: 5px;"><b>· </b> [[Rook|Rook]]<br/> | |||
<span style="color: #000000; margin-left: 5px;"><b>· </b> [[Sand Martin|Sand Martin]]<br/> | |||
<span style="color: #000000; margin-left: 5px;"><b>· </b> [[SHOC|SHOC]]<br/> | |||
<span style="color: #000000; margin-left: 5px;"><b>· </b> [[Single nesting species|Single nesting species (SNSP)]]<br/> | |||
<span style="color: #000000; margin-left: 5px;"><b>· </b> [[SOCC|SOCC]]<br/> | |||
<span style="color: #000000; margin-left: 5px;"><b>· </b> [[STOC EPS|STOC EPS]]<br/> | |||
<span style="color: #000000; margin-left: 5px;"><b>· </b> [[STOC Montagne|STOC Montagne]]<br/> | |||
<span style="color: #000000; margin-left: 5px;"><b>· </b> [[STOC ONF|STOC ONF]]<br/> | |||
<span style="color: #000000; margin-left: 5px;"><b>· </b> [[STOC Sites RNF|STOC Sites RNF]]<br/> | |||
<span style="color: #000000; margin-left: 5px;"><b>· </b> [[STOC Sites|STOC Sites]]<br/> | |||
<span style="color: #000000; margin-left: 5px;"><b>· </b> [[VBS|VBS (Monitoring of breeding birds on military training areas)]]<br/> | |||
<span style="color: #000000; margin-left: 5px;"><b>· </b> [[Waterbird_census_Protocol|Waterbird census protocol]]<br/> | |||
<span style="color: #000000; margin-left: 5px;"><b>· </b> [[Woodcock monitoring|Woodcock monitoring]]<br/> | |||
<span style="color: #000000; margin-left: 5px;"><b>· </b> [[Woodpeckers|Woodpeckers]]<br/> | |||
<span style="color: #000000; margin-left: 5px;"><b>· </b> [[Woodpecker territory|Woodpecker territory]]<br/> | |||
</div> | |||
</div> | |||
</div> | |||
<br/> | <br/> | ||
<!--T:32--> | |||
__NOTOC__ | __NOTOC__ | ||
= | <!--T:33--> | ||
=Accessing protocols= | |||
<br/> | <br/> | ||
<br/> | <br/> | ||
<div class="contenetip" style="width:625px"> <!-- ajustar la mida --> | |||
<div class="contenetipima" style="min-width: 43px;max-width: 43px;"> <!-- no canviar les mides --> | |||
</div> | |||
<div class="contenetiptext"> | |||
<hr class="contenetiplinia"> | |||
< | <b> Access protocols from</b> <br/> | ||
Menu > Take part > [[Media:Accessing protocols on the web (1).png|All my protocols]] for an easy access to all functions you are allowed access to. | |||
</div> | |||
</div> | |||
< | |||
< | |||
< | |||
< | |||
< | |||
</ | |||
<br /> | <br /> | ||
<br/> | <br/> | ||
<!--T:38--> | |||
The easier way to access all functions of a protocol is through the protocol panel. Go to Menu > Take part > All my protocols. It lists all protocols you have access to in this local portal (see image below). Depending on your rights you could also access the protocol panel through the Administration section: Menu > Administration > Protocol administration > [[Media:Protocol administration.png|Protocol administration]]. Options vary depending on your rights (administrators have access to more functions).<br/> | |||
<br/> | <br/> | ||
[[File: | <!--T:39--> | ||
< | <center> | ||
<div class="toc" style="border-radius:5px;background-color:#ffffff;width:700px;padding-left:8px;padding-right:8px;padding-bottom:8px;"> | |||
[[File:Accessing protocols on the web (1).png|700px|link=https://help.biolovision.net/images/8/8c/Accessing_protocols_on_the_web_%281%29.png]] | |||
<div class="toc" style="border-radius:5px;width:685px;padding-left:15px;text-align:left; font-size:12px"> | |||
'''Accessing protocols.''' | |||
</div> | |||
</div> | |||
</center> | |||
<!--T:40--> | |||
<br/> | <br/> | ||
<br/> | <br/> | ||
<!--T:41--> | |||
However, there are other ways that in certain conditions may give access to some of the functions (see following sections). <br/> | |||
<br/> | <br/> | ||
: | <!--T:42--> | ||
====Entering data==== | |||
<br/> | <br/> | ||
: | <!--T:43--> | ||
Enter data to a protocol from the protocol panel (see [[Protocols_web#Accessing protocols|above]]) or as if submitting records. <br/> | |||
<br/> | <br/> | ||
: | <!--T:44--> | ||
To enter data as if submitting records, <br/> | |||
<br/> | |||
:''' | <!--T:45--> | ||
1. access the page [[Submitting_records#Step_1/3:_Approximate_choice_of_a_site|'''STEP 1/3 : Approximate choice of a site''']] either from main menu or from '''Submit''' button. <br/> | |||
<br/> | <br/> | ||
: | <!--T:46--> | ||
<center> | |||
<div class="toc" style="border-radius:5px;background-color:#ffffff;width:700px;padding-left:8px;padding-right:8px;padding-bottom:8px;"> | |||
::: | [[File:Enter_data_as_if_subitting_records.png|700px|center|link=https://help.biolovision.net/images/9/9b/Enter_data_as_if_subitting_records.png]] | ||
::: | <div class="toc" style="border-radius:5px;width:685px;padding-left:15px;text-align:left; font-size:12px"> | ||
'''Entering data on a protocol as if submitting records.''' | |||
</div> | |||
</div> | |||
</center> | |||
<br/> | <br/> | ||
<br/> | <br/> | ||
: | <!--T:48--> | ||
2. Choose between:<br/> | |||
<br/> | <br/> | ||
::: | <!--T:49--> | ||
< | <span style="color: #000000; margin-left: 25px;"><b>· </b> '''choosing from'''<br/> | ||
<br /> | |||
::: | <!--T:50--> | ||
::: Only available if you have already entered data on this protocol and study site. <br/> | |||
::: Select a protocol, and a site (if there is more than one option for this protocol). <br/> | |||
::: | |||
<br/> | <br/> | ||
:::''' | <!--T:51--> | ||
<center> | |||
<div class="toc" style="border-radius:5px;background-color:#ffffff;width:700px;padding-left:8px;padding-right:8px;padding-bottom:8px;"> | |||
[[File:Enter data on protocol through choosing from.png|700px|center|link=https://help.biolovision.net/images/a/a3/Enter_data_on_protocol_through_choosing_from.png]] | |||
<div class="toc" style="border-radius:5px;width:685px;padding-left:15px;text-align:left; font-size:12px"> | |||
'''Entering data on a protocol choosing from.''' | |||
</div> | |||
<p style="color:black;font-size:12px;padding-left:5px;text-align:left;column-count:1;padding-right:5px;"> | |||
'''1.''' Select a protocol from those you already entered data before into. <br/> | |||
'''2.''' Select a study site from those available to you at the selected protocol.<br/> | |||
</p> | |||
</div> | |||
</center> | |||
<br/> | <br/> | ||
<!--T:53--> | |||
< | <span style="color: #000000; margin-left: 25px;"><b>· </b> '''by clicking on the map'''.<br/> | ||
< | |||
< | |||
<br /> | |||
<!--T:54--> | |||
::: click anywhere within the polygon if you want to enter data on a protocol using polygons, or <br/> | |||
<br /> | ::: click on the protocol dot if you want to enter data on a protocol using dots. <br/> | ||
::: | |||
<br/> | <br/> | ||
:: | <!--T:55--> | ||
NOTE: Show / hide polygons clicking on the layers icon on the top left corner of the map, and check the cell polygons (see image below). Polygons will be shown in yellow.<br/> | |||
<br/> | <br/> | ||
:::''' | <!--T:56--> | ||
<center> | |||
<div class="toc" style="border-radius:5px;background-color:#ffffff;width:300px;padding-left:8px;padding-right:8px;padding-bottom:8px;"> | |||
[[File:Activate polygons on map.png|300px|center|link=https://help.biolovision.net/images/8/87/Activate_polygons_on_map.png]] | |||
<div class="toc" style="border-radius:5px;width:285px;padding-left:15px;text-align:left; font-size:12px"> | |||
'''Showing polygons on the map.''' | |||
</div> | |||
<p style="color:black;font-size:12px;padding-left:5px;text-align:left;column-count:1;padding-right:5px;"> | |||
'''1.''' Open layers menu. <br/> | |||
'''2.''' Check '''Polygons''' cell to show polygons.<br/> | |||
</p> | |||
</div> | |||
</center> | |||
<br/> | <br/> | ||
::: | <!--T:58--> | ||
<br/> | <span style="color: #000000; margin-left: 25px;"><b>· </b> Other options (by typing text, by choosing a municipality). <br/> | ||
::: | <!--T:59--> | ||
::: Access to [[Submitting_records#Step_2/3:_Precise_site_choice|Step 2/3: Precise site choice]]. Scroll to your study site.<br/> | |||
<br/> | <br/> | ||
:::''' | <!--T:60--> | ||
<center> | |||
<div class="toc" style="border-radius:5px;background-color:#ffffff;width:500px;padding-left:8px;padding-right:8px;padding-bottom:8px;"> | |||
[[File:Step_2_3_add_obervations_to_protocol.png|500px|center|link=https://help.biolovision.net/images/3/36/Step_2_3_add_obervations_to_protocol.png]] | |||
<div class="toc" style="border-radius:5px;width:485px;padding-left:15px;text-align:left; font-size:12px"> | |||
'''Step 2/3: Adding observations to a protocol.''' | |||
</div> | |||
</div> | |||
</center> | |||
<br/> | <br/> | ||
: | <!--T:62--> | ||
3. Select '''Add observations''' on the new window (see image below).<br/> | |||
<br/> | <br/> | ||
:::''' | <!--T:63--> | ||
< | <center> | ||
<div class="toc" style="border-radius:5px;background-color:#ffffff;width:500px;padding-left:8px;padding-right:8px;padding-bottom:8px;"> | |||
[[File:Add observations by clicking on the map.png|500px|center|link=https://help.biolovision.net/images/e/e5/Add_observations_by_clicking_on_the_map.png]] | |||
<div class="toc" style="border-radius:5px;width:485px;padding-left:15px;text-align:left; font-size:12px"> | |||
'''Adding observations to a protocol.''' | |||
</div> | |||
</div> | |||
</center> | |||
<br/> | <br/> | ||
<br/> | <br/> | ||
<br/> | <br/> | ||
<!--T:65--> | |||
<center> | <center> | ||
< | <div class="toc" style="border-radius:5px;background-color:#ffffff;width:500px;padding-left:8px;padding-right:8px;padding-bottom:8px;"> | ||
[[File:Add_data_to_protocol_scheme.png|500px|center|link=https://help.biolovision.net/images/c/c7/Add_data_to_protocol_scheme.png]] | |||
<div class="toc" style="border-radius:5px;width:485px;padding-left:15px;text-align:left; font-size:12px"> | |||
< | '''Pathway to enter data to protocols as if Submitting records.''' | ||
</div> | |||
</div> | |||
</ | |||
</center> | </center> | ||
<br/> | <br/> | ||
<br/> | <br/> | ||
[[Protocols web#Accessing protocols|[Top to Accessing protocols]]] <br/> | |||
[[#top|[Back to Protocols]]] <br/> | |||
<br/> | <br/> | ||
====Modify protocol==== | |||
<br/> | <br/> | ||
: | <!--T:68--> | ||
Modify protocols from <br/> | |||
<br/> | <br/> | ||
::: | <!--T:69--> | ||
<span style="color: #000000; margin-left: 25px;"><b>· </b> [[Media:Accessing protocols on the web (1).png|the protocol panel]]. Go to Menu > Taking part > All my protocols > "Name of the protocol" > Preparation and data > [[Media:2023-05-09 WBC Modify the protocol.png|Modify the protocol]]. See wiki section above, Local portal > Protocols > [[Protocols_web#Accessing protocols|Accessing protocols]].<br/> | |||
<br/> | <br/> | ||
::: | <!--T:70--> | ||
<span style="color: #000000; margin-left: 25px;"><b>· </b> submitting records. <br/> | |||
<br/> | <br/> | ||
:::''' | <!--T:71--> | ||
:::1. Access the page [[Submitting_records#Step_1/3:_Approximate_choice_of_a_site|'''STEP 1/3 : Approximate choice of a site''']] either from Main menu > '''Taking part''' or from '''Submit''' button (see [[Media:Enter data as if subitting records.png|image as an example]]). <br/> | |||
<br/> | |||
<!--T:72--> | |||
<br/> | :::2. Scroll down to '''choosing from''' if you have already entered data at the site you want to modify; or '''by clicking on the map''' to select the site from the map. <br/> | ||
[[ | <!--T:73--> | ||
<br/> | :::3. Click on the site to modify and select [[Media:Modification of a protocoled census.png|'''Modification of a protocoled census''']] if you accessed from choosing from; or [[Media:Modify protocol from the map.png|'''Modify the protocol''']] if accessed from the map.<br/> | ||
<!--T:74--> | |||
: | :::NOTE: If the protocol you want to modify works with polygons, activate polygons from the layers icon at the top left corner (see image [[Media:Activate polygons on map.png|Showing polygons on the map]]) before clicking on the study site.<br/> | ||
<br/> | <br/> | ||
[[Protocols web#Accessing protocols|[Top to Accessing protocols]]] <br/> | |||
[[#top|[Back to Protocols]]] <br/> | |||
<br/> | <br/> | ||
=== | ====Create protocol==== | ||
<br/> | <br/> | ||
<!--T:76--> | |||
Create a new area to survey. <br/> | |||
<br/> | <br/> | ||
<!--T:77--> | |||
Not all users have access to this function. It depends on the protocol, your local portal and your rights. If you do, access the map as if entering observations and click anywhere on the map (except on a dot or polygon). Click on '''Create a protocoled census'''. If you are allowed to create a new study site in more than one protocol, all options will be listed (see image below). <br/> | |||
<br/> | <br/> | ||
<!--T:78--> | |||
< | <center> | ||
<div class="toc" style="border-radius:5px;background-color:#ffffff;width:500px;padding-left:8px;padding-right:8px;padding-bottom:8px;"> | |||
[[File: | [[File:Create a new protocoled census.png|500px|center|link=https://help.biolovision.net/images/d/d0/Create_a_new_protocoled_census.png]] | ||
< | <div class="toc" style="border-radius:5px;width:485px;padding-left:15px;text-align:left; font-size:12px"> | ||
'''Create a protocoled census.''' | |||
</div> | |||
</div> | |||
</center> | |||
<br/> | <br/> | ||
<br/> | <br/> | ||
<div class="contenesummary" style="width:800px"> <!-- ajustar la mida --> | |||
<div class="contenesummaryima" style="min-width: 43px;max-width: 43px;"> <!-- no canviar les mides --> | |||
</div> | |||
<div class="contenesummarytext"> | |||
<hr class="contenesummarylinia"> | |||
<b>Enter data</b> <br/> | |||
=== | <span style="color: #000000; margin-left: 15px;"><b>· </b> Menu > Taking part > All my protocol > Preparation and data > [[Media:2023-05-09 WBC Add observations.png|Add observations]]. <br /> | ||
<span style="color: #000000; margin-left: 15px;"><b>· </b> Menu > Administration > Protocol administration > [[Media:2023-10-17 selecting protocol.png|Protocol administration]]. <br/> | |||
<span style="color: #000000; margin-left: 15px;"><b>· </b> Dashboard > Submit > Choosing from > "Name of the protocol" > "Site" > [[Media:Add observations by clicking on the map.png|Add observations]]. <br/> | |||
<span style="color: #000000; margin-left: 15px;"><b>· </b> Dashboard > Submit > By clicking on the map > [[Media:Add observations by clicking on the map.png|Add observations]]. <br/> | |||
<span style="color: #000000; margin-left: 15px;"><b>· </b> Menu > Taking part > Transmit my sighting > Choosing from > "Name of the protocol" > "Site" > [[Media:Add observations by clicking on the map.png|Add observations]]. <br/> | |||
<span style="color: #000000; margin-left: 15px;"><b>· </b> Menu > Taking part > Transmit my sighting > By clicking on the map > [[Media:Add observations by clicking on the map.png|Add observations]]. | |||
<br/> | <br/> | ||
<br/> | <br/> | ||
<b>Modify protocol</b> <br/> | |||
< | |||
: | <span style="color: #000000; margin-left: 15px;"><b>· </b> Menu > Taking part > All my protocol > Preparation and data > [[Media:2023-05-09 WBC Modify the protocol.png|Modify the protocol]]. <br /> | ||
<span style="color: #000000; margin-left: 15px;"><b>· </b> Dashboard > Submit > Choosing from > "Name of the protocol" > "Site" > [[Media:Modification of a protocoled census.png|Modification of a protocoled census]] . <br/> | |||
< | <span style="color: #000000; margin-left: 15px;"><b>· </b> Dashboard > Submit > By clicking on the map > [[Media:Modify protocol from the map.png|Modify the protocol]]. <br/> | ||
<span style="color: #000000; margin-left: 15px;"><b>· </b> Menu > Taking part > Transmit my sighting > Choosing from > "Name of the protocol" > "Site" > [[Media:Modification of a protocoled census.png|Modification of a protocoled census]]. <br/> | |||
<span style="color: #000000; margin-left: 15px;"><b>· </b> Menu > Taking part > Transmit my sighting > By clicking on the map > [[Media:Modify protocol from the map.png|Modify the protocol]]. | |||
<b>Create a new protocol</b> | |||
< | |||
[[ | <span style="color: #000000; margin-left: 15px;"><b>· </b> Dashboard > Submit > By clicking on the map > [[Media:Create a new protocoled census.png|Create a protocoled census]]. <br/> | ||
< | <span style="color: #000000; margin-left: 15px;"><b>· </b> Menu > Taking part > Transmit my sighting > By clicking on the map > [[Media:Create a new protocoled census.png|Create a protocoled census]]. | ||
</div> | |||
</div> | |||
<br /> | |||
<br/> | <br/> | ||
[[ | [[Protocols web#Accessing protocols|[Top to Accessing protocols]]] <br/> | ||
[[#top|[Back to Protocols]]] <br/> | |||
<br/> | <br/> | ||
= | <span id="Square selection"></span> | ||
< | |||
=Selection of study site= | |||
<br/> | <br/> | ||
Some protocols create two random squares within a selected area. Users and/or administrators can then select one of the squares to survey on. <br/> | |||
Observers can be assigned a study site by the administrator or can be allowed to select one by themselves. <br/> | |||
<br/> | <br/> | ||
<br/> | <br/> | ||
=== | <div class="contenesummary" style="width:350px"> <!-- ajustar la mida --> | ||
< | <div class="contenesummaryima" style="min-width: 43px;max-width: 43px;"> <!-- no canviar les mides --> | ||
</div> | |||
<div class="contenesummarytext"> | |||
<hr class="contenesummarylinia"> | |||
[[ | <b>Protocols with random square selection</b><br/> | ||
< | <span style="color: #000000; margin-left: 25px;"><b>· </b>[[SHOC|SHOC]] <br/> | ||
<span style="color: #000000; margin-left: 25px;"><b>· </b>[[STOC EPS|STOC EPS]] <br/> | |||
<span style="color: #000000; margin-left: 25px;"><b>· </b>[[STOC ONF|STOC ONF]] <br/> | |||
</p> | |||
</div> | |||
<br/> | </div> | ||
<br /> | |||
: | <b>To select your study site:</b> <br/> | ||
1. Go to Menu > Take part > [[Media:Sending observations 2.png|Transmit my sighting]], or <br/> | |||
:Press [[Media:Sending observations 1.png|Submit]] button on home page. <br/> | |||
2. Scroll down to "by clicking on the map" and zoom in until you see the [[Media:map w locations.png|locations]]. <br/> | |||
3. Select a place to create the protocol at and click on [[Media:Select point.png|"Create a protocoled census -'name of protocol'"]], as explained in wiki section Administration > Protocol management > [[Protocol_management#create site|Site]]. <br/> | |||
<span id="select square"></span> | |||
<span id="Validate"></span>4. Select one of the two squares created randomly by the system within an radius of 10 km from the selected point (see image below). You will receive an [[Media: email instructions.png|email with instructions]]. Either: <br/> | |||
:: Accept square, or <br/> | |||
:: Reject square. <br/> | |||
<br/> | <br/> | ||
[[File: | <span id="Random selection"></span> | ||
< | <center> | ||
''' | <div class="toc" style="border-radius:5px;background-color:#ffffff;padding-left:8px;padding-right:8px; padding-bottom:8px;width:600px;"> | ||
[[File:Random selection.png|600px|link=https://help.biolovision.net/images/0/09/Random_selection.png]] | |||
<div class="toc" style="border-radius:5px;padding-left:15px;text-align:left; font-size:12px;width:575px;"> | |||
</ | '''Randomly created survey squares.''' | ||
</div> | |||
<p style="color:black;font-size:12px;padding-left:30px;text-align:left;column-count:2;"> | |||
<b>1.</b> Limit of a 10 km radius <br /> | |||
<b>2.</b> Randomly created survey squares <br/> | |||
</p> | |||
</div> | |||
</center> | |||
<br/> | <br/> | ||
<br/> | <br/> | ||
<center> | |||
<div class="toc" style="border-radius: 5px; padding: 25px; text-align: left; font-family: sans-serif; color: black; width: 600px; background-color: hsl(201, 100%, 89%)"> | |||
<!-- GREEN BOX (Tips): hsl(157, 74%, 80%) | |||
YELLOW BOX (Summaries): #ffffdb" | |||
BLUE BOX (Information): hsl(201, 100%, 89%) | |||
RED BOX (Warnings): hsl(0, 77%, 78%) --> | |||
<p> | |||
<b>NOTE</b><br/> | |||
< | . Random squares are created only once. It is not possible to close and enter again to change the random selection. <br/> | ||
. The observer should [[Media: email instructions.png|select one of the squares]]. If both squares are rejected, [[Media: rejection reason.png|an explanation]] is required and needs to be [[Media:sq validation.png|validated by an administrator]]. Meanwhile, it is possible to create another study site at a different place.<br/> | |||
</p> | |||
</div> | |||
< | </center> | ||
<br /> | |||
Once a square is accepted, <br/> | |||
3. Name the new survey site as explained in wiki section Administration > Protocol management > [[Protocol_management#name site|Site]]. <br/> | |||
<br/> | <br/> | ||
[[File: | <center> | ||
<div class="toc" style="border-radius:5px;background-color:#ffffff;padding-left:8px;padding-right:8px;width:600px;"> | |||
[[File:Name new site.png|600px|link=https://help.biolovision.net/images/4/46/Name_new_site.png]] | |||
<div class="toc" style="border-radius:5px;padding-left:15px;text-align:left; font-size:12px;width:575px;"> | |||
'''Name the new study area.''' | |||
</div> | |||
<p style="color:black;font-size:12px;padding-left:5px;text-align:left;column-count:1;padding-right:5px;"> | |||
'''1. Name of reference locality:''' Location name under which all observations of the protocol will be associated to. <br/> | |||
'''2. Reference name:''' Name/Code automatically assigned to the square. <br/> | |||
'''3. Custom name:''' Additional name to the site if known. This name can be changed afterwards. <br/> | |||
</p> | |||
</div> | |||
</center> | |||
<br/> | <br/> | ||
<br/> | <br/> | ||
[[ | <span id="drawing square"></span> | ||
4. Start drawing your site. Visit wiki section Web interface > [[Geometry editor|Geometry editor]] for more information on using the drawing tools. Remember you can also [[Media:2023-03-14 Importing a plygon shapefile.png|import a shapefile]].<br/> | |||
<br/> | <br/> | ||
<center> | |||
<div class="toc" style="border-radius:5px;background-color:#ffffff;padding-left:8px;padding-right:8px; padding-bottom:8px;width:600px;"> | |||
[[File:draw squares.png|600px|link=https://help.biolovision.net/images/c/cc/Draw_squares.png]] | |||
<div class="toc" style="border-radius:5px;padding-left:15px;text-align:left; font-size:12px;width:575px;"> | |||
'''Drawing geometry.''' | |||
</div> | |||
<p style="color:black;font-size:12px;padding-left:30px;text-align:left;column-count:2;"> | |||
<b>1.</b> Drawing tools <br /> | |||
<b>2.</b> Study area <br/> | |||
<b>3.</b> Survey points <br /> | |||
</p> | |||
</div> | |||
</center> | |||
<br/> | <br/> | ||
<br/> | <br/> | ||
5. When done, choose between: <br/> | |||
:::<b> SAVE AND STAY:</b> Save the site and remain on the page. <br/> | |||
:::<b> SAVE AND CREATE A NEW:</b> Save the site and create another. <br/> | |||
:::<b> SAVE AND ADD A RECORD:</b> Save the site and start entering data. <br/> | |||
<br/> | <br/> | ||
[[ | [[STOC EPS#Selection of study site|[Top to selection of study site]]] <br/> | ||
< | [[#top|[Back to STOC EPS protocol]]]<br/> | ||
<br/> | <br/> | ||
=Preparation and data = <!--T:87--> | |||
: | <!--T:88--> | ||
<br /> | |||
<br/> | <br /> | ||
[[File:2023- | <!--T:89--> | ||
< | <center> | ||
''' | <div class="toc" style="border-radius:5px;background-color:#ffffff;width:400px;padding-left:8px;padding-right:8px;padding-bottom:8px;"> | ||
''' | [[File:2023-05-08 WBC Preparation and data.png|400px|link=https://help.biolovision.net/images/a/a5/2023-05-08_WBC_Preparation_and_data.png]] | ||
<div class="toc" style="border-radius:5px;width:385px;padding-left:15px;text-align:left; font-size:12px"> | |||
< | '''Protocol. Preparation and data.''' | ||
</div> | |||
</div> | |||
</center> | |||
: | <!--T:90--> | ||
<br /> | |||
<br/> | <br /> | ||
: | <!--T:91--> | ||
Click on Preparation and data lists all sites available to the current profile and allows access to the functions listed hereafter for each place: <br/> | |||
: | <!--T:92--> | ||
<br /> | |||
<br/> | <br/> | ||
:::''' | <!--T:93--> | ||
< | <center> | ||
<div class="toc" style="border-radius:5px;background-color:#ffffff;width:700px;padding-left:8px;padding-right:8px;"> | |||
[[File:2023-05-09 WBC select site.png|700px|link=https://help.biolovision.net/images/5/5f/2023-05-09_WBC_select_site.png]] | |||
<div class="toc" style="border-radius:5px;width:685px;padding-left:15px;text-align:left; font-size:12px;"> | |||
'''Protocol. Select site.''' | |||
</div> | |||
<p style="color:black;font-size:12px;padding-left:5px;text-align:left;column-count:1;padding-right:5px;"> | |||
'''1.''' Change protocol by clicking on the active protocol name and selecting from the expandable menu. <br/> | |||
'''2.''' Move to other sections within the protocol by selecting from the tabs above.<br/> | |||
'''3.''' List of all sites you have access to under the selected protocol (number 1). When you do not have access to any site under the selected protocol, you will see [[Media:2023-05-18 yellow banner.png|a message "no count available"]].<br/> | |||
</p> | |||
</div> | |||
</center> | |||
<!--T:94--> | |||
<br/> | <br/> | ||
<br/> | <br/> | ||
<!--T:95--> | |||
<div class="toc" style="width:400px;"> <!-- La llargada s'ha de canviar aquí --> | |||
<div class="mw-collapsible mw-collapsed" data-expandtext="Show" data-collapsetext="Hide" style="width:350px;margin-bottom:0px;margin-top:0px;background-color:#f7f7f7;"> | |||
'''2 Preparation and data''' | |||
<div class="mw-collapsible-content" style="width:400px;background-color:#f7f7f7;"> <!-- I també cal canviar la llargada aquí --> | |||
<ol> | |||
2.1 [[Protocols_web#Add_observations|Add observations]]<br/> | |||
<ol>2.1.1 [[Protocols_web#Starting_the_protocol|Starting the protocol]]<br/> | |||
2.1.2 [[Protocols_web#Entering_observations|Entering observations]]<br/> | |||
2.1.3 [[Protocols_web#Ending_the_protocol|Ending the protocol]]<br/></ol></ol> | |||
<ol> | |||
2.2 [[Protocols_web#Results|Results]]<br/> | |||
<ol>2.2.1 [[Protocols_web#Graphs|Graph]]<br/> | |||
2.2.2 [[Protocols_web#Statistics_and_results_of_recorded_species|Statistics and results of recorded species]]<br/></ol></ol> | |||
<ol> | |||
2.3 [[Protocols_web#Display_on_map|Display on map]]<br/> | |||
2.4 [[Protocols_web#Modify_the_protocol|Modify the protocol]]<br/> | |||
2.5 [[Protocols_web#Census_results|Census results]]<br/> | |||
<ol>2.5.1 [[Protocols_web#Protocol_section|Protocol section]]<br/> | |||
2.5.2 [[Protocols_web#Observations_section|Observations section]]<br/></ol></ol> | |||
<ol> | |||
2.6 [[Protocols_web#Download_map|Download map]] <br/> | |||
</div> | |||
</div> | |||
</div> | |||
<br/> | <br/> | ||
: | <!--T:96--> | ||
==Add observations== | |||
<br/> | <br/> | ||
:''' | <!--T:97--> | ||
Click on '''Add observations''' (see image below) in the site you need to enter data to. | |||
<!--T:98--> | |||
<br/> | <br/> | ||
<br/> | <br/> | ||
:''' | <!--T:99--> | ||
<center> | |||
< | <div class="toc" style="border-radius:5px;background-color:#ffffff;width:700px;padding-left:8px;padding-right:8px;padding-bottom:8px;"> | ||
[[File:2023-05-09 WBC Add observations.png|700px|link=https://help.biolovision.net/images/a/ae/2023-05-09_WBC_Add_observations.png]] | |||
<div class="toc" style="border-radius:5px;width:685px;padding-left:15px;text-align:left; font-size:12px"> | |||
'''Protocol. Add observations.''' | |||
</div> | |||
</div> | |||
</center> | |||
<!--T:100--> | |||
<br /> | |||
<br /> | |||
: | <!--T:101--> | ||
====Starting the protocol==== | |||
<br/> | <br/> | ||
<!--T:102--> | |||
Before entering observations, it is required to enter general parameters regarding the protocol.<br/> | |||
<br/> | <br/> | ||
<!--T:103--> | |||
<center> | <center> | ||
< | <div class="toc" style="border-radius:5px;background-color:#ffffff;width:600px;padding-left:8px;padding-right:8px;padding-bottom:8px;"> | ||
[[File:Starting the protocol.png|600px|link=https://help.biolovision.net/images/5/56/Starting_the_protocol.png|Click image to enlarge]] | |||
< | <div class="toc" style="border-radius:5px;width:585px;padding-left:15px;text-align:left; font-size:12px"> | ||
< | '''Starting the protocol.''' | ||
</div> | |||
<p style="color:black;font-size:12px;padding-left:30px;text-align:left;column-count:2;"> | |||
<b>1.</b> [[Protocols web#Site|Site]] <br /> | |||
<b>2.</b> [[Protocols web#Date|Date]] <br/> | |||
< | <b>3.</b> [[Protocols web#Starting|Starting time]] <br /> | ||
< | <b>4.</b> [[Protocols web#Ending|Ending time]] <br /> | ||
<b>5.</b> [[Protocols web#Comments|Comments]] <br/> | |||
<br/> | <b>6.</b> [[Protocols web#Hide|Hide records from the public]] <br/> | ||
<b>7.</b> [[Protocols web#Visits|Location and visits]] <br/> | |||
<br/> | <b>8.</b> [[Protocols web#parameters|Parameters]] <br/> | ||
< | </p> | ||
</div> | |||
</ | |||
</center> | </center> | ||
<br/> | <br /> | ||
<br/> | <br /> | ||
: | <!--T:105--> | ||
<span id="Site"></span> | |||
=====1. Select site===== | |||
<br/> | <br/> | ||
<!--T:106--> | |||
If necessary, change site by selecting from the tabs. The active site is highlighted in yellow (see image above).<br/> | |||
<br/> | <br/> | ||
<!--T:107--> | |||
=====Choose date===== | |||
<br/> | <br/> | ||
< | <!--T:108--> | ||
''' | <center> | ||
<div class="toc" style="border-radius:5px;background-color:#ffffff;padding-left:8px;padding-right:8px;padding-bottom:8px;width:600px;"> | |||
[[File:Choose date.png|600px|link=https://help.biolovision.net/images/4/48/Choose_date.png|Click image to enlarge]] | |||
<div class="toc" style="border-radius:5px;padding-left:15px;text-align:left; font-size:12px;width:585px;"> | |||
'''Choose date.''' | |||
</div> | |||
</div> | |||
</center> | |||
<br/> | <br/> | ||
<br/> | <br/> | ||
''' | <!--T:109--> | ||
<span id="Date"></span> | |||
:'''2. Enter date''' <br/> | |||
Choose from the expandable menu the date the survey took place.<br/> | |||
<br/> | <br/> | ||
''' | <!--T:110--> | ||
<span id="Starting"></span> | |||
:'''3. Enter starting time''' <br/> | |||
Type the time the census started.<br/> | |||
<br/> | <br/> | ||
<!--T:111--> | |||
<span id="Ending"></span> | |||
< | :'''4. Ending time''' <br/> | ||
Type the time the census ended.<br/> | |||
<br/> | <br/> | ||
< | <!--T:112--> | ||
''' | <span id="Comments"></span> | ||
<br/> | :'''5. Enter comments'''<br/> | ||
Choose one option from the tabs on top (5a) and type a comment (5b). Note the number of tabs and the information required may differ from country to country:<br/> | |||
<!--T:113--> | |||
<span style="color: #000000; margin-left: 25px;"><b>· Comment:</b> if the comment will refer to a general observation, <br/> | |||
<span style="color: #000000; margin-left: 25px;"><b>· Additional observer:</b> if you name other observer/s participating in the census,<br/> | |||
<span style="color: #000000; margin-left: 25px;"><b>· Important changes:</b> to note important changes from your previous visit, like noise, pollution or construction work,<br/> | |||
<span style="color: #000000; margin-left: 25px;"><b>· Impacts:</b> record any impact taking place during the survey,<br/> | |||
<span style="color: #000000; margin-left: 25px;"><b>· Incidents:</b> report any incident that may have happened during the count.<br/> | |||
<br/> | <br/> | ||
''' | <!--T:114--> | ||
<span id="Hide"></span> | |||
:'''6. Hide all records from the public'''<br/> | |||
Check if you do not want other users to see your records.<br/> | |||
<br/> | <br/> | ||
=====Location and visits===== | |||
<br/> | <br/> | ||
<!--T:116--> | |||
<center> | <center> | ||
< | <div class="toc" style="border-radius:5px;background-color:#ffffff;padding-left:8px;padding-right:8px;padding-bottom:8px;width:600px;"> | ||
[[File:Location and visits.png|600px|link=https://help.biolovision.net/images/e/ea/Location_and_visits.png]] | |||
< | <div class="toc" style="border-radius:5px;padding-left:15px;text-align:left; font-size:12px;width:585px;"> | ||
'''Location and visits.''' | |||
</div> | |||
</div> | |||
</ | |||
</center> | </center> | ||
<br/> | <br/> | ||
<br/> | <br/> | ||
= | <!--T:117--> | ||
<span id="Visits"></span> | |||
:'''7. Count number''' <br/> | |||
Some protocols have certain restrictions regarding the number or dates to conduct surveys. If the protocol requires it, select from the expandable menu which visit your data corresponds to. If the protocol does not require this field, you will only see '''Reference name''' and '''Reference locality'''.<br/> | |||
<br/> | <br/> | ||
<!--T:118--> | |||
<span id="parameters"></span> | |||
=====8. Parameters===== | |||
<br/> | <br/> | ||
<!--T:120--> | |||
<center> | |||
<div class="toc" style="border-radius:5px;background-color:#ffffff;padding-left:8px;padding-right:8px;padding-bottom:8px;width:600px;"> | |||
[[File:Parameters exemple.png|600px|link=https://help.biolovision.net/images/c/c0/Parameters_exemple.png]] | |||
<div class="toc" style="border-radius:5px;padding-left:15px;text-align:left; font-size:12px;width:585px;"> | |||
'''Parameters. Example.''' | |||
</div> | |||
</div> | |||
</center> | |||
<br/> | <br/> | ||
<br/> | <br/> | ||
: | <!--T:121--> | ||
Enter parameters required for your polygon. Note fields and the order in which they appear may differ from country to country. You may not encounter all possible fields described underneath. Expand the table below to see all possibilities. <br/> | |||
<br/> | <br/> | ||
: | <!--T:122--> | ||
Fields marked with an asterisk are mandatory. <br/> | |||
<br/> | <br/> | ||
:''' | <!--T:123--> | ||
<center> | |||
< | <table class="wikitable sortable mw-collapsible mw-collapsed" style="border:1px solid black;" width="85%" align="center" ; #customers tr="hover background-color: #ddd;}> | ||
<th colspan="11" style="background-color:white;">''' Parameters '''</th> | |||
<tr style="padding: 25px; text-align: center; font-size: 16px; font-family: sans serif; "> | |||
<th width="25%">Name</th> | |||
<th width="75%">Description</th> | |||
</tr> | |||
<tr style="padding: 25px; text-align: center; font-size: 16px; font-family: sans serif; "> | |||
< | <td style="text-align: center">'''Acoustic number'''</td> | ||
<td style="text-align:left">Indicate the acoustic number. This information will be asked when entering data.</td> | |||
</tr> | |||
== | <tr style="padding: 25px; text-align: center; font-size: 16px; font-family: sans serif; "> | ||
< | <td style="text-align: center">'''Acoustic number detail'''</td> | ||
<td style="text-align:left">Provide details about the acoustic number. This information will be asked when entering data.</td> | |||
</tr> | |||
<tr style="padding: 25px; text-align: center; font-size: 16px; font-family: sans serif; "> | |||
< | <td style="text-align: center">'''Activity of the individual'''</td> | ||
<td style="text-align:left">Indicate the activity of the individual. This information will be asked when entering data.</td> | |||
</tr> | |||
<!--T:124--> | |||
< | <tr style="padding: 25px; text-align: center; font-size: 16px; font-family: sans serif; "> | ||
<td style="text-align: center">'''Additional observer'''</td> | |||
<td style="text-align:left">Indicate if you are accompanied by someone whose observations are also recorded.</td> | |||
</tr> | |||
<tr style="padding: 25px; text-align: center; font-size: 16px; font-family: sans serif; "> | |||
< | <td style="text-align: center">'''Appearance of udders'''</td> | ||
<td style="text-align:left">Indicate the appearance of udders.</td> | |||
</tr> | |||
:''' | <tr style="padding: 25px; text-align: center; font-size: 16px; font-family: sans serif; "> | ||
<td style="text-align: center">'''Calcar'''</td> | |||
< | <td style="text-align:left">Enter information about the calcar.</td> | ||
</tr> | |||
:''' | <tr style="padding: 25px; text-align: center; font-size: 16px; font-family: sans serif; "> | ||
<td style="text-align: center">'''Capture method'''</td> | |||
< | <td style="text-align:left">Indicate how the animal was caught.</td> | ||
</tr> | |||
::: | <!--T:125--> | ||
<tr style="padding: 25px; text-align: center; font-size: 16px; font-family: sans serif; "> | |||
< | <td style="text-align: center">'''Census not done'''</td> | ||
<td style="text-align:left">Press at the end of the page if the census did not take place. Leave a reason in Comments.</td> | |||
</tr> | |||
<tr style="padding: 25px; text-align: center; font-size: 16px; font-family: sans serif; "> | |||
< | <td style="text-align: center">'''Chin pad (Plecotus)'''</td> | ||
<td style="text-align:left">Indicate the hair colour.</td> | |||
</tr> | |||
::: | <tr style="padding: 25px; text-align: center; font-size: 16px; font-family: sans serif; "> | ||
<td style="text-align: center">'''Cloud cover'''</td> | |||
< | <td style="text-align:left">Indicate if there were clouds.</td> | ||
</tr> | |||
<tr style="padding: 25px; text-align: center; font-size: 16px; font-family: sans serif; "> | |||
< | <td style="text-align: center">'''Cm3 (mm)'''</td> | ||
''' | <td style="text-align:left">Indicate the length of cm3.</td> | ||
</tr> | |||
</ | |||
<tr style="padding: 25px; text-align: center; font-size: 16px; font-family: sans serif; "> | |||
<td style="text-align: center">'''Color of oral glands'''</td> | |||
<td style="text-align:left">Indicate the colour of oral glands.</td> | |||
</tr> | |||
:''' | <!--T:126--> | ||
<tr style="padding: 25px; text-align: center; font-size: 16px; font-family: sans serif; "> | |||
<td style="text-align: center">'''Comment'''</td> | |||
< | <td style="text-align:left">You may enter a comment if you find it appropriate.</td> | ||
</tr> | |||
<!--T:127--> | |||
< | <tr style="padding: 25px; text-align: center; font-size: 16px; font-family: sans serif; "> | ||
<td style="text-align: center">'''Conditions in general'''</td> | |||
<td style="text-align:left">Choose how are surveying conditions overall regarding weather and disturbances, and may be asked to indicate on next section the reason if surveying conditions are not good.</td> | |||
</tr> | |||
<!--T:128--> | |||
< | <tr style="padding: 25px; text-align: center; font-size: 16px; font-family: sans serif; "> | ||
<td style="text-align: center">'''Conditions (notes)'''</td> | |||
<td style="text-align:left">Leave a note regarding conditions if necessary.</td> | |||
</tr> | |||
:::''' | <!--T:129--> | ||
: | <tr style="padding: 25px; text-align: center; font-size: 16px; font-family: sans serif; "> | ||
< | <td style="text-align: center">'''Count method'''</td> | ||
<td style="text-align:left">Indicate if you are surveying from the ground, the air, the water, a different way, or if it is unknown.</td> | |||
</tr> | |||
:::: ''' | <!--<tr style="padding: 25px; text-align: center; font-size: 16px; font-family: sans serif; "> | ||
< | <td style="text-align: center">'''Count number'''</td> | ||
<td style="text-align:left">Select from the expandable menu which visit your data corresponds to.</td> | |||
</tr>--> | |||
:::: ''' | <!--T:130--> | ||
< | <tr style="padding: 25px; text-align: center; font-size: 16px; font-family: sans serif; "> | ||
<td style="text-align: center">'''Count paid'''</td> | |||
<td style="text-align:left">Indicate if the count is paid for or not.</td> | |||
</tr> | |||
:::: ''' | <!--T:131--> | ||
< | <tr style="padding: 25px; text-align: center; font-size: 16px; font-family: sans serif; "> | ||
<td style="text-align: center">'''Count type'''</td> | |||
<td style="text-align:left">Tick '''roost count''' if you are counting roosting birds, or '''during day''' otherwise.</td> | |||
</tr> | |||
<!--T:132--> | |||
< | <tr style="padding: 25px; text-align: center; font-size: 16px; font-family: sans serif; "> | ||
<td style="text-align: center">'''Counting mammals?'''</td> | |||
<td style="text-align:left">Indicate if besides the compulsory taxonomic group, you also counted mammals.</td> | |||
</tr> | |||
:::: ''' | <!--T:133--> | ||
< | <tr style="padding: 25px; text-align: center; font-size: 16px; font-family: sans serif; "> | ||
<td style="text-align: center">'''Coverage'''</td> | |||
<td style="text-align:left">Indicate how much of the designated survey area is covered in the survey.</td> | |||
</tr> | |||
:::: ''' | <!--T:134--> | ||
< | <tr style="padding: 25px; text-align: center; font-size: 16px; font-family: sans serif; "> | ||
<td style="text-align: center">'''Coverage (notes)'''</td> | |||
<td style="text-align:left">Leave any comment regarding the coverage.</td> | |||
</tr> | |||
:::: ''' | <tr style="padding: 25px; text-align: center; font-size: 16px; font-family: sans serif; "> | ||
< | <td style="text-align: center">'''Determination methods'''</td> | ||
<td style="text-align:left">Indicate the determination method used. This information will be asked when entering data.</td> | |||
</tr> | |||
:::''' | <!--T:135--> | ||
: | <tr style="padding: 25px; text-align: center; font-size: 16px; font-family: sans serif; "> | ||
<td style="text-align: center">'''Drone used'''</td> | |||
< | <td style="text-align:left">Indicate if drones were used during the survey.</td> | ||
</tr> | |||
<tr style="padding: 25px; text-align: center; font-size: 16px; font-family: sans serif; "> | |||
<td style="text-align: center">'''Ear'''</td> | |||
<td style="text-align:left">Enter information about the ear.</td> | |||
</tr> | |||
= | <tr style="padding: 25px; text-align: center; font-size: 16px; font-family: sans serif; "> | ||
< | <td style="text-align: center">'''Ear width (mm)'''</td> | ||
<td style="text-align:left">Type the width of the ear in millimeters.</td> | |||
</tr> | |||
<tr style="padding: 25px; text-align: center; font-size: 16px; font-family: sans serif; "> | |||
< | <td style="text-align: center">'''Foot'''</td> | ||
<td style="text-align:left">Enter information about the foot.</td> | |||
</tr> | |||
<tr style="padding: 25px; text-align: center; font-size: 16px; font-family: sans serif; "> | |||
< | <td style="text-align: center">'''Foot hair (Plecotus)'''</td> | ||
<td style="text-align:left">Indicate the presence of hairs on the foot.</td> | |||
</tr> | |||
<tr style="padding: 25px; text-align: center; font-size: 16px; font-family: sans serif; "> | |||
< | <td style="text-align: center">'''Forearm (mm)'''</td> | ||
<td style="text-align:left">Type the length of the forearm in millimeters.</td> | |||
</tr> | |||
<tr style="padding: 25px; text-align: center; font-size: 16px; font-family: sans serif; "> | |||
<td style="text-align: center">'''Fused wing cells (Pipistrellus)'''</td> | |||
<tr | <td style="text-align:left">Merge the information from wing cells.</td> | ||
</tr> | |||
< | |||
< | <tr style="padding: 25px; text-align: center; font-size: 16px; font-family: sans serif; "> | ||
< | <td style="text-align: center">'''Habitat'''</td> | ||
< | <td style="text-align:left">Choose the most accurate habitat from the expandable menu.</td> | ||
< | </tr> | ||
<tr style="padding: 25px; text-align: center; font-size: 16px; font-family: sans serif; "> | |||
< | <td style="text-align: center">'''Hair color'''</td> | ||
<td style="text-align:left">Indicate the hair colour.</td> | |||
</tr> | |||
<!--T:136--> | |||
<tr style="padding: 25px; text-align: center; font-size: 16px; font-family: sans serif; "> | |||
< | <td style="text-align: center">'''Ice'''</td> | ||
<td style="text-align:left">Indicate the percentage of water surface that is frozen.</td> | |||
</tr> | |||
<!--T:137--> | |||
<tr style="padding: 25px; text-align: center; font-size: 16px; font-family: sans serif; "> | |||
< | <td style="text-align: center">'''Important changes'''</td> | ||
</ | <td style="text-align:left">Indicate if there have been major changes since your last visit.</td> | ||
</tr> | |||
< | <!--T:138--> | ||
</ | <tr style="padding: 25px; text-align: center; font-size: 16px; font-family: sans serif; color: black"> | ||
< | <td style="text-align: center">'''Intact nests'''</td> | ||
< | <td style="text-align: left">Type number of intact nests. <br/> This information will be asked when entering data.</td> | ||
</tr> | |||
<!--T:139--> | |||
< | <tr style="padding: 25px; text-align: center; font-size: 16px; font-family: sans serif; color: black"> | ||
<td style="text-align: center">'''Means of transport'''</td> | |||
<td style="text-align: left"></td> | |||
</tr> | |||
< | <tr style="padding: 25px; text-align: center; font-size: 16px; font-family: sans serif; color: black"> | ||
< | <td style="text-align: center">'''Mowing/Harvest'''</td> | ||
<td style=" | <td style="text-align: left">Indicate the surface that has been harvested or mown.</td> | ||
</tr> | |||
< | <tr style="padding: 25px; text-align: center; font-size: 16px; font-family: sans serif; "> | ||
<td style="text-align: center">'''Nasal leaf length'''</td> | |||
<td style="text-align:left">Indicate the length of the nasal leaf.</td> | |||
</tr> | |||
< | |||
< | |||
</ | <!--T:141--> | ||
<tr style="padding: 25px; text-align: center; font-size: 16px; font-family: sans serif; color: black"> | |||
<td style="text-align: center">'''Nest location'''</td> | |||
<td style="text-align: left">Select from the expandable menu the location of the nest.</td> | |||
</tr> | |||
</td>< | <tr style="padding: 25px; text-align: center; font-size: 16px; font-family: sans serif; "> | ||
< | <td style="text-align: center">'''Net / harp-trap detail'''</td> | ||
<td style="text-align:left">Add details on certain types of traps: Nets and harp-traps.</td> | |||
</tr> | |||
<!--T:140--> | |||
<tr style="padding: 25px; text-align: center; font-size: 16px; font-family: sans serif; "> | |||
<td style="text-align: center">'''Neutralised time'''</td> | |||
<td style="text-align:left">Time to be removed from the official census time (like a pause)</td> | |||
</tr> | |||
== | <!--T:142--> | ||
< | <tr style="padding: 25px; text-align: center; font-size: 16px; font-family: sans serif; "> | ||
<td style="text-align: center">'''Number of canoes/kayaks'''</td> | |||
<td style="text-align:left">Enter number.</td> | |||
</tr> | |||
<!--T:143--> | |||
< | <tr style="padding: 25px; text-align: center; font-size: 16px; font-family: sans serif; "> | ||
<td style="text-align: center">'''Number of fishing boats'''</td> | |||
<td style="text-align:left">Enter number.</td> | |||
</tr> | |||
<!--T:145--> | |||
< | <tr style="padding: 25px; text-align: center; font-size: 16px; font-family: sans serif; "> | ||
<td style="text-align: center">'''Number of motor boats'''</td> | |||
<td style="text-align:left">Enter number.</td> | |||
</tr> | |||
<!--T:146--> | |||
< | <tr style="padding: 25px; text-align: center; font-size: 16px; font-family: sans serif; color: black"> | ||
''' | <td style="text-align: center">'''Number of nests occupied by other species'''</td> | ||
<td style="text-align: left">Type number of nests occupied by species other than the ones counted in the current protocol. <br/> This information will be asked when entering data.</td> | |||
< | </tr> | ||
< | |||
< | <!--T:147--> | ||
<tr | <tr style="padding: 25px; text-align: center; font-size: 16px; font-family: sans serif; "> | ||
<td style="text-align: center">'''Number of persons on shore'''</td> | |||
<td style="text-align:left">Enter number.</td> | |||
</tr> | |||
< | <!--T:148--> | ||
<tr style="padding: 25px; text-align: center; font-size: 16px; font-family: sans serif; "> | |||
<td style="text-align: center">'''Number of rowing boats'''</td> | |||
<td style="text-align:left">Enter number.</td> | |||
< | </tr> | ||
< | |||
< | |||
</ | <!--T:149--> | ||
<tr style="padding: 25px; text-align: center; font-size: 16px; font-family: sans serif; "> | |||
<td style="text-align: center">'''Number of sailing boats'''</td> | |||
<td style="text-align:left">Enter number.</td> | |||
</tr> | |||
</td>< | <!--T:150--> | ||
< | <tr style="padding: 25px; text-align: center; font-size: 16px; font-family: sans serif; "> | ||
<td style="text-align: center">'''Number of sports divers'''</td> | |||
<td style="text-align:left">Enter number.</td> | |||
</tr> | |||
<!--T:151--> | |||
<tr style="padding: 25px; text-align: center; font-size: 16px; font-family: sans serif; "> | |||
<td style="text-align: center">'''Number of stand up paddlers'''</td> | |||
<td style="text-align:left">Enter number.</td> | |||
</tr> | |||
=== | <!--T:152--> | ||
< | <tr style="padding: 25px; text-align: center; font-size: 16px; font-family: sans serif; "> | ||
<td style="text-align: center">'''Number of surfers'''</td> | |||
<td style="text-align:left">Enter number.</td> | |||
</tr> | |||
<!--T:153--> | |||
< | <tr style="padding: 25px; text-align: center; font-size: 16px; font-family: sans serif; color: black"> | ||
<td style="text-align: center">'''Occupied nests'''</td> | |||
<td style="text-align: left">Type number of occupied nests. <br/> This information will be asked when entering data.</td> | |||
</tr> | |||
<!--T:154--> | |||
< | <tr style="padding: 25px; text-align: center; font-size: 16px; font-family: sans serif; "> | ||
<td style="text-align: center">'''Optical equipment'''</td> | |||
<td style="text-align:left">Indicate which equipment you are using for the survey, if any. Note you can only choose one option.</td> | |||
</tr> | |||
=== | <tr style="padding: 25px; text-align: center; font-size: 16px; font-family: sans serif; "> | ||
< | <td style="text-align: center">'''Ossification level of the epiphyses at the joint of the phalanges'''</td> | ||
<td style="text-align:left">Indicate the level of ossification of the epiphyses at the joint of the phalanges.</td> | |||
</tr> | |||
<!--T:155--> | |||
< | <tr style="padding: 25px; text-align: center; font-size: 16px; font-family: sans serif; "> | ||
<td style="text-align: center">'''Playback'''</td> | |||
<td style="text-align:left">Check the species names for which playback will be played during the survey.</td> | |||
</tr> | |||
<!--T:156--> | |||
< | <tr style="padding: 25px; text-align: center; font-size: 16px; font-family: sans serif; color: black"> | ||
<td style="text-align: center">'''Potential breeding pairs'''</td> | |||
<td style="text-align: left">Type the number of breeding pairs. <br/> This information will be asked when entering data.</td> | |||
</tr> | |||
:''' | <!--T:157--> | ||
<tr style="padding: 25px; text-align: center; font-size: 16px; font-family: sans serif; "> | |||
< | <td style="text-align: center">'''Rain'''</td> | ||
<td style="text-align:left">Indicate if there was any rain.</td> | |||
</tr> | |||
:''' | <!--T:158--> | ||
<tr style="padding: 25px; text-align: center; font-size: 16px; font-family: sans serif; "> | |||
< | <td style="text-align: center">'''Reason(s) for moderate / bad conditions'''</td> | ||
<td style="text-align:left">If general conditions indicated above are not good, open the [[Media:Bad condicions.png|expandable menu]] and choose the reason (see image below). Only one option is possible: choose the one that is closest to the reality. </td> | |||
</tr> | |||
:''' | <tr style="padding: 25px; text-align: center; font-size: 16px; font-family: sans serif; "> | ||
<td style="text-align: center">'''Size of the epididymis'''</td> | |||
< | <td style="text-align:left">Indicate the size of the epididymis.</td> | ||
</tr> | |||
:''' | <tr style="padding: 25px; text-align: center; font-size: 16px; font-family: sans serif; "> | ||
<td style="text-align: center">'''Size of oral glands'''</td> | |||
< | <td style="text-align:left">Indicate the size of the oral glands.</td> | ||
</tr> | |||
:''' | <tr style="padding: 25px; text-align: center; font-size: 16px; font-family: sans serif; "> | ||
<td style="text-align: center">'''Social vocalisation type'''</td> | |||
<td style="text-align:left">Indicate the type of vocalisation. This information will be asked when entering data.</td> | |||
</tr> | |||
::: | <!--T:159--> | ||
: | <tr style="padding: 25px; text-align: center; font-size: 16px; font-family: sans serif; "> | ||
: | <td style="text-align: center">'''Snow/Snow coverage'''</td> | ||
< | <td style="text-align:left">Indicate the proportion of snow cover.</td> | ||
</tr> | |||
:''' | <!--T:160--> | ||
<tr style="padding: 25px; text-align: center; font-size: 16px; font-family: sans serif; color: black"> | |||
< | <td style="text-align: center">'''Sound played'''</td> | ||
<td style="text-align: left">Indicate if you used playback to detect the species by sliding the mark on/off.</td> | |||
</tr> | |||
:''' | <!--T:161--> | ||
<tr style="padding: 25px; text-align: center; font-size: 16px; font-family: sans serif; color: black"> | |||
< | <td style="text-align: center">'''Suspected nests'''</td> | ||
<td style="text-align: left">Type number of suspected nests. <br/> This information will be asked when entering data.</td> | |||
</tr> | |||
:::''' | <tr style="padding: 25px; text-align: center; font-size: 16px; font-family: sans serif; "> | ||
< | <td style="text-align: center">'''Tail'''</td> | ||
<td style="text-align:left">Enter information about the tail.</td> | |||
</tr> | |||
:::''' | <!--T:162--> | ||
< | <tr style="padding: 25px; text-align: center; font-size: 16px; font-family: sans serif; "> | ||
<td style="text-align: center">'''Temperature'''</td> | |||
<td style="text-align:left">Indicate approximate temperature.</td> | |||
</tr> | |||
:::''' | <!--T:163--> | ||
< | <tr style="padding: 25px; text-align: center; font-size: 16px; font-family: sans serif; color: black"> | ||
<td style="text-align: center">'''Temporary shallow water bodies'''</td> | |||
<td style="text-align: left">Indicate the frequency of water bodies.</td> | |||
</tr> | |||
::: | <tr style="padding: 25px; text-align: center; font-size: 16px; font-family: sans serif; "> | ||
< | <td style="text-align: center">'''Testicles size'''</td> | ||
<td style="text-align:left">Indicate the size of the testicles.</td> | |||
</tr> | |||
< | |||
: | |||
< | |||
:::''' | <tr style="padding: 25px; text-align: center; font-size: 16px; font-family: sans serif; "> | ||
< | <td style="text-align: center">'''Thumb'''</td> | ||
<td style="text-align:left">Enter information about the thumb.</td> | |||
</tr> | |||
:::''' | <tr style="padding: 25px; text-align: center; font-size: 16px; font-family: sans serif; "> | ||
< | <td style="text-align: center">'''Tibia'''</td> | ||
<td style="text-align:left">Enter information about the tibia.</td> | |||
</tr> | |||
:::''' | <tr style="padding: 25px; text-align: center; font-size: 16px; font-family: sans serif; "> | ||
< | <td style="text-align: center">'''Tragus'''</td> | ||
<td style="text-align:left">Enter information about the tragus.</td> | |||
</tr> | |||
:::''' | <tr style="padding: 25px; text-align: center; font-size: 16px; font-family: sans serif; "> | ||
< | <td style="text-align: center">'''Tragus widht (mm)'''</td> | ||
<td style="text-align:left">Indicate the width of the tragus.</td> | |||
</tr> | |||
:::''' | <tr style="padding: 25px; text-align: center; font-size: 16px; font-family: sans serif; "> | ||
< | <td style="text-align: center">'''Vaginal tunic color'''</td> | ||
<td style="text-align:left">Indicate the colour of the vaginal tunic.</td> | |||
</tr> | |||
:::''' | <!--T:164--> | ||
< | <tr style="padding: 25px; text-align: center; font-size: 16px; font-family: sans serif; "> | ||
<td style="text-align: center">'''Visibility'''</td> | |||
<td style="text-align:left">Indicate the approximate distance within which it is possible to identify species, or an overall description.</td> | |||
</tr> | |||
:::''' | <!--T:165--> | ||
< | <tr style="padding: 25px; text-align: center; font-size: 16px; font-family: sans serif; "> | ||
<td style="text-align: center">'''Water level'''</td> | |||
<td style="text-align:left">Indicate the water level.</td> | |||
</tr> | |||
<!--T:166--> | |||
< | <tr style="padding: 25px; text-align: center; font-size: 16px; font-family: sans serif; "> | ||
< | <td style="text-align: center">'''Waves'''</td> | ||
<td style="text-align:left">Indicate how the waves are.</td> | |||
</tr> | |||
:::''' | <tr style="padding: 25px; text-align: center; font-size: 16px; font-family: sans serif; "> | ||
< | <td style="text-align: center">'''Weight (g)'''</td> | ||
<td style="text-align:left">Enter the weight of the animal.</td> | |||
</tr> | |||
:::''' | <!--T:167--> | ||
< | <tr style="padding: 25px; text-align: center; font-size: 16px; font-family: sans serif; "> | ||
<td style="text-align: center">'''Wind'''</td> | |||
<td style="text-align:left">Indicate if there was any wind.</td> | |||
</tr> | |||
:::''' | <tr style="padding: 25px; text-align: center; font-size: 16px; font-family: sans serif; color: black"> | ||
< | <td style="text-align: center">'''1P3D'''</td> | ||
<td style="text-align: left">Enter information about 1P3D.</td> | |||
</tr> | |||
:::''' | <tr style="padding: 25px; text-align: center; font-size: 16px; font-family: sans serif; color: black"> | ||
< | <td style="text-align: center">'''1P4D'''</td> | ||
<td style="text-align: left">Enter information about 1P4D.</td> | |||
</tr> | |||
:::''' | <tr style="padding: 25px; text-align: center; font-size: 16px; font-family: sans serif; color: black"> | ||
< | <td style="text-align: center">'''1P5D'''</td> | ||
<td style="text-align: left">Enter information about 1P5D.</td> | |||
</tr> | |||
:::''' | <tr style="padding: 25px; text-align: center; font-size: 16px; font-family: sans serif; color: black"> | ||
< | <td style="text-align: center">'''2nd finger'''</td> | ||
<td style="text-align: left">Enter information about the second finger.</td> | |||
</tr> | |||
:::''' | <tr style="padding: 25px; text-align: center; font-size: 16px; font-family: sans serif; color: black"> | ||
< | <td style="text-align: center">'''2nd metacarpus'''</td> | ||
<td style="text-align: left">Enter information about the second metacarpus.</td> | |||
</tr> | |||
:::''' | <tr style="padding: 25px; text-align: center; font-size: 16px; font-family: sans serif; color: black"> | ||
< | <td style="text-align: center">'''2P3D'''</td> | ||
<td style="text-align: left">Enter information about 2P3D.</td> | |||
</tr> | |||
:::''' | <tr style="padding: 25px; text-align: center; font-size: 16px; font-family: sans serif; color: black"> | ||
< | <td style="text-align: center">'''2P4D'''</td> | ||
< | <td style="text-align: left">Enter information about 2P4D.</td> | ||
</tr> | |||
<tr style="padding: 25px; text-align: center; font-size: 16px; font-family: sans serif; color: black"> | |||
< | <td style="text-align: center">'''2P5D'''</td> | ||
<td style="text-align: left">Enter information about 2P5D.</td> | |||
</tr> | |||
:''' | <tr style="padding: 25px; text-align: center; font-size: 16px; font-family: sans serif; color: black"> | ||
<td style="text-align: center">'''3rd finger'''</td> | |||
< | <td style="text-align: left">Enter information about the third finger.</td> | ||
</tr> | |||
:''' | <tr style="padding: 25px; text-align: center; font-size: 16px; font-family: sans serif; color: black"> | ||
<td style="text-align: center">'''3rd metacarpus'''</td> | |||
<td style="text-align: left">Enter information about the third metacarpus.</td> | |||
</tr> | |||
<tr style="padding: 25px; text-align: center; font-size: 16px; font-family: sans serif; color: black"> | |||
< | <td style="text-align: center">'''4th finger'''</td> | ||
<td style="text-align: left">Enter information about the fourth finger.</td> | |||
</tr> | |||
:''' | <tr style="padding: 25px; text-align: center; font-size: 16px; font-family: sans serif; color: black"> | ||
<td style="text-align: center">'''4th metacarpus'''</td> | |||
<td style="text-align: left">Enter information about the fourth metacarpus.</td> | |||
</tr> | |||
<tr style="padding: 25px; text-align: center; font-size: 16px; font-family: sans serif; color: black"> | |||
< | <td style="text-align: center">'''5th finger'''</td> | ||
< | <td style="text-align: left">Enter information about the fifth finger.</td> | ||
</tr> | |||
<tr style="padding: 25px; text-align: center; font-size: 16px; font-family: sans serif; color: black"> | |||
<td style="text-align: center">'''5th metacarpus'''</td> | |||
<tr | <td style="text-align: left">Enter information about the fifth metacarpus.</td> | ||
</tr> | |||
< | |||
< | <!--T:168--> | ||
</table> | |||
</center> | </center> | ||
<br/> | <br/> | ||
<br/> | <br/> | ||
==== | =====9. Start entering data===== | ||
<br/> | <br/> | ||
[[File: | <!--T:170--> | ||
<center> | |||
<div class="toc" style="border-radius:5px;background-color:#ffffff;padding-left:8px;padding-right:8px;padding-bottom:8px;width:600px;"> | |||
[[File:Choosing list.png|600px|link=https://help.biolovision.net/images/b/bd/Choosing_list.png]] | |||
<div class="toc" style="border-radius:5px;padding-left:15px;text-align:left; font-size:12px;width:585px;"> | |||
'''Choosing list. Example..''' | |||
</div> | |||
</div> | |||
</center> | |||
<br/> | <br/> | ||
<br/> | <br/> | ||
<!--T:171--> | |||
Options may differ from protocol to protocol but can be summarised as:<br/> | |||
<br/> | <br/> | ||
<!--T:172--> | |||
:::'''NEXT''': Continue entering data normally. <br/> | |||
<br/> | <br/> | ||
[[ | <!--T:173--> | ||
:::'''CHOOSE A LIST TO ENTER DATA''': Some protocols make a distinction between a Basic and an Extended list (see image [[Media:End starting protocol.png|Continue to enter data]] as an example).<br/> | |||
<br/> | <br/> | ||
See | <!--T:174--> | ||
:::::::[[Glossary#Basic_list:|'''BASIC LIST''']]: Select to load a pre configured species list strictly related to the protocol (ie. waterbirds). It will facilitate entering data. See an example of how it may look like in image [[Media:2023-05-20 Example of a basic list.png|Example of a basic list]] compared to an [[Media:2023-05-20 example of extended WBC list.png|Example of extended list]]. Which species belong to a basic list is determined by each local portal and may differ from one to another.<br/> | |||
<br/> | <br/> | ||
<!--T:175--> | |||
:::::::[[Glossary#Extended_list:|'''EXTENDED LIST''']]: Select to load a pre configured species list strictly related to the protocol (ie. waterbirds) along with other related ones (ie. reed-living species). It will facilitate entering data. See an example of how it may look like in image [[Media:2023-05-20 example of extended WBC list.png|Example of extended list]]. Species included in a basic list and an extended list are determined by each local portal and may differ from country to country.<br/> | |||
<br/> | <br/> | ||
<!--T:176--> | |||
:::::::''If the administrator of the protocol did not prepare any pre configured list for this protocol, you will not be given any list of species to enter from; but you will still have to choose a list option in this section.''<br/> | |||
<br/> | <br/> | ||
: ''' | <!--T:177--> | ||
:::'''NO SPECIES / INDIVIDUALS WERE SEEN''': Indicate if your survey did not provide any data. You will be taken to directly to end the protocol. Surveys with no species are also important results! It means you followed the established methodology, and therefore your survey is valid, but no birds were present. They can indicate major population changes and are of extreme importance for conservation purposes. <br /> | |||
<br /> | |||
:::'''ENTRY WITH LIST OF SPECIES ALREADY SEEN''': Select to load a list with species previously recorded for this protocol at this study site. <br/> | |||
<br/> | <br/> | ||
:''' | :::'''ENTRY WITH LIST OF THE MOST FREQUENT SPECIES''': Select to load a list with species recorded frequently for this protocol at this study site. <br/> | ||
<br/> | <br/> | ||
:::'''CENSUS NOT DONE''': Indicate if you did not survey a certain point, transect or polygon for the protocol, but you did survey another points of the same protocol.<br/> | |||
<br/> | <br/> | ||
<!--T:178--> | |||
<br/> | <br/> | ||
<div class="conteneinfo" style="width:700px"> <!-- ajustar la mida --> | |||
<div class="conteneinfoima" style="min-width: 43px;max-width: 43px;"> <!-- no canviar les mides --> | |||
</div> | |||
<div class="conteneinfotext"> | |||
<hr class="conteneinfolinia"> | |||
"<i><b>My survey did not provide any data</b></i>" <br /> | |||
Surveys with no species are also important results! Please submit them. <br /> It means you followed the established methodology but no birds were present. It can be due to methodology, disturbance, pollution or other major population changes and may be of extreme importance for conservation purposes.<br /> | |||
</div> | |||
</div> | |||
<br /> | |||
[[ | [[Protocols web#Add observations|[Top to Add observations]]] <br/> | ||
[[Protocols web#Preparation and data|[Top to Preparation and data]]] <br/> | |||
[[#top|[Back to Protocols]]] <br/> | |||
<br/> | |||
[[ | |||
<br/> | <br/> | ||
====Entering observations==== | |||
<br/> | <br/> | ||
According to the protocol, there are different ways to enter observations to the protocol. <br/> | |||
Click on the protocol that most resemble your protocol to see details. <br/> | |||
<br/> | <br/> | ||
=== | All existing models can be grouped in: <br/> | ||
<span style="color: #000000; margin-left: 25px;"><b>·[[Protocols web#Number of individuals|Number of individuals</b>]]: those requiring to enter only the number of individuals of each species observed. <br/> | |||
<span style="color: #000000; margin-left: 25px;"><b>·[[Protocols web#Distance sampling|Distance of individuals</b>]]: those which besides the number of individuals, need to be grouped according to the distance to the observer. <br/> | |||
<span style="color: #000000; margin-left: 25px;"><b>·[[Protocols web#Position on a map|Position of individuals</b>]]: those that require positioning the individual on a map. <br/> | |||
<span style="color: #000000; margin-left: 25px;"><b>·[[Protocols web#Acoustic data|Acoustic data</b>]]: it is special and only available for Acoustic data protocol. <br/> | |||
<span style="color: #000000; margin-left: 25px;"><b>·[[Protocols web#Number of passages|Number of passages</b>]]: those that group the observations according to the census. <br/> | |||
<span style="color: #000000; margin-left: 25px;"><b>·[[Protocols web#Sections|Count per sections</b>]]: those in which the study area (transect) is separated in sections. <br/> | |||
<br/> | <br/> | ||
<br/> | <br/> | ||
Additional information can always be entered besides the minimum requirements: <br/> | |||
<span style="color: #000000; margin-left: 25px;"><b>·</b>Use [[File:Open panel.png|frameless|20px|link=]] to open [[Media: Example add info panel.png|additional information panel]]. <br/> | |||
<span style="color: #000000; margin-left: 25px;"><b>·</b>See Web interface > Local portal > Step 3: Transmit my sighting > If accessed from add sightings on this locality or add precise location > [[Submitting_records#2._Additional_information|Additional information]] for more information. <br/> | |||
<br/> | <br/> | ||
<br/> | <br/> | ||
=== | <center> | ||
<div class="toc" style="border-radius:5px; border-color:white; background-color:#ffffff;padding-left:8px;padding-right:8px; padding-bottom:8px;width:99%;"> | |||
<center> | |||
<table border="1" class="wikitable" width="90%" ;> | |||
<tr style="padding: 25px; text-align: center; font-size: 16px; font-family: sans serif; "> | |||
< | <th>Type of protocol</th> | ||
<th>Description</th> | |||
<th>Protocol</th> | |||
</tr> | |||
<tr style="padding: 25px; text-align: center; font-size: 16px; font-family: sans serif; "> | |||
< | <td style="text-align: center">[[File: Given a list.png|frameless|link=https://help.biolovision.net/images/3/37/Given_a_list.png|Click image to enlarge]]</td> | ||
<td style="text-align:left">[[Protocols web#Number of individuals|Number of individuals]]</td> | |||
<td style="text-align:left">Point count, Protocoled census, Waterbird census</td> | |||
</tr> | |||
[[File: | <tr style="padding: 25px; text-align: center; font-size: 16px; font-family: sans serif; "> | ||
< | <td style="text-align: center">[[File:Distance sampling.png|frameless|link=https://help.biolovision.net/images/f/f2/Distance_sampling.png|Click image to enlarge]]</td> | ||
<td style="text-align:left">[[Protocols web#Distance sampling|Distance of individuals]]</td> | |||
</ | <td style="text-align:left">SHOC, SHOC Sites, SHOC Sites RNF, STOC EPS, STOC Montagne, STOC ONF, STOC Sites, STOC Sites RNF</td> | ||
</tr> | |||
: | <tr style="padding: 25px; text-align: center; font-size: 16px; font-family: sans serif; "> | ||
<td style="text-align: center">[[File:Position on a map.png|frameless|link=https://help.biolovision.net/images/d/d5/Position_on_a_map.png|Click image to enlarge]]</td> | |||
< | <td style="text-align:left">[[Protocols web#Position on a map|Position of individuals]]</td> | ||
<td style="text-align:left">Bee-eater, Black Grouse, Cirl Bunting, Corncrake, Jackdaw, Meadow birds, Rock Ptarmigans, Rook, Sand Martin, Woodpeckers, Woodpecker territory</td> | |||
</tr> | |||
[[File: | <tr style="padding: 25px; text-align: center; font-size: 16px; font-family: sans serif; "> | ||
< | <td style="text-align: center">[[File:Accoustic data.png|frameless|link=https://help.biolovision.net/images/5/52/Accoustic_data.png|Click image to enlarge]]</td> | ||
<td style="text-align:left">[[Protocols web#Acoustic data|Acoustic data]]</td> | |||
</ | <td style="text-align:left">Acoustic data</td> | ||
</tr> | |||
: | <tr style="padding: 25px; text-align: center; font-size: 16px; font-family: sans serif; "> | ||
<td style="text-align: center">[[File:Number passages.png|frameless|link=https://help.biolovision.net/images/a/af/Number_passages.png|Click image to enlarge]]</td> | |||
< | <td style="text-align:left">[[Protocols web#Number of passages|Number of passages]]</td> | ||
<td style="text-align:left">Woodcock</td> | |||
</tr> | |||
[[File: | <tr style="padding: 25px; text-align: center; font-size: 16px; font-family: sans serif; "> | ||
< | <td style="text-align: center">[[File:Count per sections.png|frameless|link=https://help.biolovision.net/images/d/d1/Count_per_sections.png|Click image to enlarge]]</td> | ||
<td style="text-align:left">[[Protocols web#Sections|Count per sections]]</td> | |||
</ | <td style="text-align:left">SOCC</td> | ||
</tr> | |||
</table> | |||
</center> | |||
<p style="color:black;font-size:12px;padding-left:63px;text-align:left;column-count:1;padding-right:5px;"> | |||
<p style=" | If the protocol you are looking for is not on the table, it may not allow entering observation via local portal. Use NaturaList instead. <br/> | ||
</p> | |||
</center> | |||
<br/> | <br/> | ||
<br/> | <br/> | ||
<span id="Number of individuals"></span> | |||
< | =====Number of individuals===== | ||
=== | <span style="color: #000000; margin-left: 25px;"><b>· </b>Requires entering species and number of individuals. <br/> | ||
<span style="color: #000000; margin-left: 25px;"><b>· </b>It may also require [[Media: Count precision PC protocol.png|Count precision]], depending on the protocol. <br/> | |||
<span style="color: #000000; margin-left: 25px;"><b>· </b>It may also require Atlas code, depending on local portal, species and time of year. <br/> | |||
<br/> | <br/> | ||
<br/> | <br/> | ||
Click | <center> | ||
<div class="toc" style="border-radius:5px;background-color:#ffffff;padding-left:8px;padding-right:8px;width:600px;"> | |||
[[File:Number of individuals model.png|600px|link=https://help.biolovision.net/images/d/d2/Number_of_individuals_model.png|Click image to enlarge]] | |||
<div class="toc" style="border-radius:5px;padding-left:15px;text-align:left; font-size:12px;width:575px;"> | |||
'''Number of individuals model.''' | |||
</div> | |||
<p style="color:black;font-size:12px;padding-left:5px;text-align:left;column-count:1;padding-right:5px;"> | |||
'''1.''' Select precision count from the expandable menu. <br/> | |||
'''2.''' Type number of individuals of the selected species. <br/> | |||
'''3.''' Select Atlas code from the expandable menu. <br/> | |||
'''4.''' Open the [[Media: Example add info panel.png|additional information panel]]. <br/> | |||
'''5.''' Report a new species not on the list: Type the species name or part of it on the left, and select species name on the expandable menu on the right. <br/> | |||
</p> | |||
</div> | |||
</center> | |||
<br/> | <br/> | ||
<br/> | <br/> | ||
A | <span style="color: #000000; margin-left: 25px;"><b>· </b>A list may be already given or the observer needs to indicate the species, depending on the protocol and the local portal. Select the option on previous screen: <br/> | ||
<span style="color: #000000; margin-left: 65px;"><b>· </b>CONTINUE WITH THE [[Glossary#Basic list|BASIC LIST]]: Contains only species relevant to the protocol.<br/> | |||
<span style="color: #000000; margin-left: 65px;"><b>· </b>CONTINUE WITH THE [[Glossary#Extended list|EXTENDED LIST]]: Contains species relevant to the protocol and other related ones.<br/> | |||
<br/> | <br/> | ||
= | <span style="color: #000000; margin-left: 25px;"><b>· </b>Open the additional information panel to provide more information. <br/> | ||
<br/> | <br/> | ||
<span id="Distance sampling"></span> | |||
< | =====Distance of individuals===== | ||
<span style="color: #000000; margin-left: 25px;"><b>· </b>Requires indicating number of individuals of each species at its distance (in range) from observer. <br/> | |||
< | <span style="color: #000000; margin-left: 25px;"><b>· </b>It may also require Atlas code depending on the local portal, the species and the time of year.<br/> | ||
<br/> | <br/> | ||
:'''1. | <center> | ||
<div class="toc" style="border-radius:5px;background-color:#ffffff;padding-left:8px;padding-right:8px;width:600px;"> | |||
[[File: SHOC entering obs.png|600px|link=https://help.biolovision.net/images/1/11/SHOC_entering_obs.png|Click image to enlarge]] | |||
<div class="toc" style="border-radius:5px;padding-left:15px;text-align:left; font-size:12px;width:575px;"> | |||
'''SHOC. Entering observations.''' | |||
</div> | |||
<p style="color:black;font-size:12px;padding-left:5px;text-align:left;column-count:1;padding-right:5px;"> | |||
'''1.''' Select species if not on a list. <br/> | |||
'''2.''' Type number of individuals in the corresponding distance class. <br/> | |||
'''3.''' Enter atlas code. <br/> | |||
</p> | |||
</div> | |||
</center> | |||
<br/> | <br/> | ||
<br/> | <br/> | ||
<span style="color: #000000; margin-left: 25px;"><b>· </b>A list may be already given or the observer needs to indicate the species, depending on the protocol and the local portal. Select the option on previous screen: <br/> | |||
< | <span style="color: #000000; margin-left: 65px;"><b>· </b>NEXT: Empty list. The observer types all species names.<br/> | ||
<span style="color: #000000; margin-left: 65px;"><b>· </b>ENTRY WITH LIST OF SPECIES ALREADY OBSERVED: The list given contains all species the observer has reported in previous visits of this protocol.<br/> | |||
<span style="color: #000000; margin-left: 65px;"><b>· </b>ENTRY WITH LIST OF THE MOST FREQUENT SPECIES: The list given contains only the most frequent species reported by the observer on this protocol.<br/> | |||
<span style="color: #000000; margin-left: 65px;"><b>· </b>BLANK DAILY FORM: No list is given. The observer types all species names.<br/> | |||
<br/> | <br/> | ||
: | <span style="color: #000000; margin-left: 25px;"><b>· </b>Open the additional information panel to provide more information. <br/> | ||
<br/> | <br/> | ||
<span id="Position on a map"></span> | |||
=====Position of individuals===== | |||
: | <span style="color: #000000; margin-left: 25px;"><b>· </b>Requires positioning the individual on a map before entering any other data. <br/> | ||
<span style="color: #000000; margin-left: 55px;">1. Select the species from the tabs above, when more than one species is given. <br/> | |||
<span style="color: #000000; margin-left: 55px;">2. Select behaviour of the individual/s. Its corresponding Atlas code will automatically load. <br/> | |||
<span style="color: #000000; margin-left: 65px;">See Mobile interface > Additional information panel > Entering records > [[Entering_records#icons|Entering additional information on mapping protocols]] for more information. <br/> | |||
<span style="color: #000000; margin-left: 55px;">3. Place observation on the map. <br/> | |||
<span style="color: #000000; margin-left: 65px;">See Web interface > Local portals > [[Navigating_the_map|Navigating the map]] if necessary for more on navigating the map. <br/> | |||
<br/> | <br/> | ||
:: | <span style="color: #000000; margin-left: 25px;"><b>· </b>Depending on the protocol, the map can include a radius around the observer. <br/> | ||
<span style="color: #000000; margin-left: 55px;">See Mobile interface > Navigating the map > [[Navigating_the_map_NaturaList#Radius|Radius]] to know more about radius. <br/> | |||
<br/> | <br/> | ||
[[File: | <center> | ||
<div class="toc" style="border-radius:5px;background-color:#ffffff;padding-left:8px;padding-right:8px; padding-bottom:8px;width:600px;"> | |||
[[File:Position model.png|600px|link=https://help.biolovision.net/images/1/16/Position_model.png|Click image to enlarge]] | |||
<div class="toc" style="border-radius:5px;padding-left:15px;text-align:left; font-size:12px;width:575px;"> | |||
'''Position of individuals model.''' | |||
</div> | |||
<p style="color:black;font-size:12px;padding-left:30px;text-align:left;column-count:2;"> | |||
<b>1.</b> Select species. <br /> | |||
<b>2.</b> Select behaviour. <br/> | |||
<b>3.</b> Place observation. <br /> | |||
</p> | |||
</div> | |||
</center> | |||
<br/> | |||
<br/> | <br/> | ||
::: | <span style="color: #000000; margin-left: 55px;">4. Fill in information under the map. <br/> | ||
<span style="color: #000000; margin-left: 55px;">Note the dot colour on the top right corner matches the colour of observation on the map. <br/> | |||
<span style="color: #000000; margin-left: 55px;">Use [[File: Delete obs.png|20px|frameless|link=]] to delete observation. <br/> | |||
<br/> | <br/> | ||
[[File: | <center> | ||
<div class="toc" style="border-radius:5px;background-color:#ffffff;padding-left:8px;padding-right:8px; padding-bottom:8px;width:600px;"> | |||
[[File:Position add info.png|600px|link=https://help.biolovision.net/images/2/21/Position_add_info.png|Click image to enlarge]] | |||
<div class="toc" style="border-radius:5px;padding-left:15px;text-align:left; font-size:12px;width:575px;"> | |||
'''Filling information. Position of individuals model. Example.''' | |||
</div> | |||
<p style="color:black;font-size:12px;padding-left:30px;text-align:left;column-count:2;"> | |||
<b>1.</b> Open extended panel. <br /> | |||
<b>2.</b> Delete age/sex class. <br /> | |||
<b>3.</b> Delete observation. <br /> | |||
<b>4.</b> Additional information panel. <br /> | |||
</p> | |||
</div> | |||
</center> | |||
<br/> | <br/> | ||
<br/> | <br/> | ||
: | <span style="color: #000000; margin-left: 55px;"> Design differs from protocol to protocol but can include: <br/> | ||
<br/> | <span style="color: #000000; margin-left: 85px;"><b>· </b> number of individuals at the selected position <br/> | ||
<br/> | <span style="color: #000000; margin-left: 85px;"><b>· </b> age and sex classes of observation <br/> | ||
<span style="color: #000000; margin-left: 85px;"><b>· </b> atlas code <br/> | |||
<span style="color: #000000; margin-left: 85px;"><b>· </b> altitude <br/> | |||
<span style="color: #000000; margin-left: 85px;"><b>· </b> Nest information <br/> | |||
==== | <center> | ||
<table class="wikitable" style="border:1px solid black; background-color:white"; width="55%" align="center"; > | |||
<tr style="padding: 25px; text-align: center; font-size: 16px; font-family: sans serif; "> | |||
< | <td style="text-align: center">Intact nests</td> | ||
<td style="text-align:left">Type number of intact nests.</td> | |||
</tr> | |||
: | <tr style="padding: 25px; text-align: center; font-size: 16px; font-family: sans serif; "> | ||
<td style="text-align: center">Nest location</td> | |||
< | <td style="text-align:left">Select next position from the expandable menu.</td> | ||
</tr> | |||
<tr style="padding: 25px; text-align: center; font-size: 16px; font-family: sans serif; "> | |||
< | <td style="text-align: center">Occupied nests</td> | ||
<td style="text-align:left">Type number of occupied nests.</td> | |||
</tr> | |||
</ | |||
: | <tr style="padding: 25px; text-align: center; font-size: 16px; font-family: sans serif; "> | ||
<td style="text-align: center">Potential breeding pairs</td> | |||
< | <td style="text-align:left">Type number of breeding pairs.</td> | ||
</tr> | |||
</table> | |||
</center> | |||
<br/> | <br/> | ||
<br/> | <br/> | ||
<center> | <center> | ||
< | <div class="toc" style="border-radius:5px;background-color:#ffffff;padding-left:8px;padding-right:8px;width:600px;"> | ||
[[File:Short add info panel details.png|600px|link=https://help.biolovision.net/images/b/b0/Short_add_info_panel_details.png|Click image to enlarge]] | |||
< | <div class="toc" style="border-radius:5px;padding-left:15px;text-align:left; font-size:12px;width:575px;"> | ||
< | '''Short additional information panel. Details.''' | ||
</div> | |||
<p style="color:black;font-size:12px;padding-left:5px;text-align:left;column-count:1;padding-right:5px;"> | |||
'''1. Enter number of individuals:''' Type number on the left and select count precision from the expandable menu on the right. <br/> | |||
'''2. Altitude:''' Type new altitud if necessary.<br/> | |||
< | '''3. Atlas code:''' Select a new atlas code from the expandable menu. Meaning of the selected code is indicated by the field side.<br/> | ||
< | '''4. [[Submitting_records#Sex_and_age_of_individuals|Age/sex classes]]:''' Type number of individuals on the left hand field and select from the expandable menus age and sex of typed individuals. Select circumstances (behaviour) from the expandable menu, when asked (not available in all protocols). <br/> | ||
</p> | |||
</div> | |||
</center> | |||
<br/> | <br/> | ||
<br/> | <br/> | ||
< | <span style="color: #000000; margin-left: 25px;"><b>· </b>Open the additional information panel to provide more information. <br/> | ||
</ | |||
<br/> | |||
<br/> | <br/> | ||
: | <span id="Acoustic data"></span> | ||
=====Acoustic data===== | |||
<span style="color: #000000; margin-left: 25px;"><b>· </b>Specific for Acoustic data protocol. <br/> | |||
<span style="color: #000000; margin-left: 25px;"><b>· </b>No other protocol follows this model. <br/> | |||
<span style="color: #000000; margin-left: 25px;"><b>· </b>See [[Acoustic_data#Entering_observations|Acoustic data protocol]] for details. <br/> | |||
<br/> | <br/> | ||
<span id="Number of passages"></span> | |||
=====Number of passages===== | |||
<span style="color: #000000; margin-left: 25px;"><b>· </b>Requires entering information about individuals flying over. <br/> | |||
<span style="color: #000000; margin-left: 35px;">Use [[File: Delete obs.png|20px|frameless]] to delete observation. <br/> | |||
<br/> | <br/> | ||
[[File:2023- | <center> | ||
<div class="toc" style="border-radius:5px;background-color:#ffffff;padding-left:8px;padding-right:8px;padding-bottom:8px;width:700px;"> | |||
[[File:2023-11-14 WC enter data.png|700px|link=https://help.biolovision.net/images/f/f0/2023-11-14_WC_enter_data.png]] | |||
<div class="toc" style="border-radius:5px;padding-left:15px;text-align:left; font-size:12px;width:685px;"> | |||
'''Number of passages model. Example.''' | |||
</div> | |||
<p style="color:black;font-size:12px;padding-left:30px;text-align:left;column-count:2;"> | |||
'''1.''' Add a new passage. <br/> | |||
'''2.''' Select time of passage. <br/> | |||
'''3.''' Number of individuals flying over. <br/> | |||
'''4.''' Delete entry. | |||
</p> | |||
</div> | |||
</center> | |||
<br/> | <br/> | ||
<br/> | <br/> | ||
<span id="Sections"></span> | |||
=====Count per sections===== | |||
<span style="color: #000000; margin-left: 25px;"><b>· </b>Requires separating the observations by transect section. <br/> | |||
<span style="color: #000000; margin-left: 55px;">1. Enter species name, or part of it, on the let, and select name from the expandable menu on the right. <br/> | |||
<span style="color: #000000; margin-left: 55px;">2. Type number of individuals of the selected species on the section of protocol that corresponds. <br/> | |||
<br/> | <br/> | ||
''' | <center> | ||
<div class="toc" style="border-radius:5px;background-color:#ffffff;padding-left:8px;padding-right:8px;padding-bottom:8px;width:700px;"> | |||
[[File:Sections_model.png|700px|link=https://help.biolovision.net/images/e/e3/Sections_model.png|Click image to enlarge]] | |||
<div class="toc" style="border-radius:5px;padding-left:15px;text-align:left; font-size:12px;width:685px;"> | |||
'''Count per sections. Example.''' | |||
</div> | |||
<p style="color:black;font-size:12px;padding-left:5px;text-align:left;column-count:1;padding-right:5px;"> | |||
'''1.''' Enter species name. <br/> | |||
'''2.''' Type number of individuals per section. <br/> | |||
</div> | |||
</center> | |||
<br/> | <br/> | ||
<br/> | <br/> | ||
[[Protocols web#Add observations|[Top to Add observations]]] <br/> | |||
[[Protocols web#Preparation and data|[Top to Preparation and data]]] <br/> | |||
[[#top|[Back to Protocols]]] <br/> | |||
<br/> | <br/> | ||
====Ending the protocol==== | |||
<br/> | <br /> | ||
<br /> | |||
[[File: | <!--T:193--> | ||
<br/> | <center> | ||
<div class="toc" style="border-radius:5px;background-color:#ffffff;width:700px;padding-left:8px;padding-right:8px;padding-bottom:8px;"> | |||
[[File:Ending list on WBC.png|700px|link=https://help.biolovision.net/images/d/d2/Ending_list_on_WBC.png]] | |||
<div class="toc" style="border-radius:5px;width:685px;padding-left:15px;text-align:left; font-size:12px"> | |||
'''Ending list. Example.''' | |||
</div> | |||
</div> | |||
</center> | |||
<br /> | |||
<br /> | |||
< | <!--T:195--> | ||
''' | When all species are recorded, indicate <br/> | ||
: '''1. I recorded all species of the program''' if you identified and recorded all species seen or heard that are of interest to the protocol, or<br/> | |||
: '''2. I recorded all species (=full observation list)''' if besides all species of interest to the protocol, you also identified and recorded all other species seen or heard. Note you can only record in this list species identified within the designated study area. Any species recorded outside of the study area should be submitted as an [[Submitting_records|individual record]].<br/> | |||
<br/> | <br/> | ||
<!--T:196--> | |||
Then, you will be taken to [[Protocols_web#Starting_the_protocol|set parameters]] to start a new protocol.<br/> | |||
<br/> | <br/> | ||
[[Protocols web#Add observations|[Top to Add observations]]] <br/> | |||
[[Protocols web#Preparation and data|[Top to Preparation and data]]] <br/> | |||
[[#top|[Back to Protocols]]] <br/> | |||
<br/> | <br/> | ||
===Results=== | |||
<br/> | <br /> | ||
<br /> | |||
''' | <!--T:198--> | ||
</ | <center> | ||
<div class="toc" style="border-radius:5px;background-color:#ffffff;width:700px;padding-left:8px;padding-right:8px;padding-bottom:8px;"> | |||
[[File:2023-05-09 WBC results.png|700px|link=https://help.biolovision.net/images/a/a8/2023-05-09_WBC_results.png]] | |||
<div class="toc" style="border-radius:5px;width:685px;padding-left:15px;text-align:left; font-size:12px"> | |||
'''Protocol. Results.''' | |||
</div> | |||
</div> | |||
</center> | |||
<br /> | |||
<br /> | |||
<!--T:200--> | |||
< | See some general statistics about your surveys results on a page by graphs, list and list plus percent of frequency occurrence . | ||
<!--T:201--> | |||
<br/> | To see specific counts results go to [[Protocols web#Census results|Census results]] or [[Protocols web#Display on map|Display on map]].<br /> | ||
<br /> | |||
<!--T:202--> | |||
<br/> | ====== Graphs '''Number of species and Total number''' : ====== | ||
<br /> | |||
<br /> | |||
[[File:2023-05- | <!--T:203--> | ||
<br/> | <center> | ||
<div class="toc" style="border-radius:5px;background-color:#ffffff;width:700px;padding-left:8px;padding-right:8px;padding-bottom:8px;"> | |||
[[File:2023-05-12 WBC results in graphs.png|700px|link=https://help.biolovision.net/images/e/e5/2023-05-12_WBC_results_in_graphs.png]] | |||
<div class="toc" style="border-radius:5px;width:685px;padding-left:15px;text-align:left; font-size:12px"> | |||
'''Protocol. Graphs.''' | |||
</div> | |||
</div> | |||
</center> | |||
<br /> | |||
<br /> | |||
:''' | <!--T:205--> | ||
'''Number of species''' <br /> | |||
<br/> | |||
: | <!--T:206--> | ||
Represents the number of species recorded during each visit. <br/> | |||
<br/> | |||
: | <!--T:207--> | ||
In the example in the image above, the user recorded 7 species during the first visit of 2021, 4 on the second visit, and 5 on each of the last two. Equally, no species were recorded in any of the 4 visits of 2023. <br/> | |||
<br/> | |||
Click on | <!--T:208--> | ||
<br/> | Click on the download icon (encircled in picture) to download the data as a .CVS file, that can be uploaded into R software. <br/> | ||
<br/>'''Total number''' <br /> | |||
<!--T:209--> | |||
<br/> | Represents the number of individuals recorded in each visit, pulling all species together. <br/> | ||
<!--T:210--> | |||
<br/> | From the example in the image above, the user recorded 53 individuals on the first visit of 2021, 14 on the second and so on, and none in any of the visits in 2023.<br/> | ||
<!--T:211--> | |||
Click on the download icon (encircled in picture) to download the data as a .CVS file, that can be uploaded into R software. <br/> | |||
<br/> | <br/> | ||
====== Statistics and results of recorded species: ====== | |||
<br/> | <br/> | ||
:''' | <!--T:213--> | ||
:'''Last visit''' <br/> | |||
<br/> | List of species recorded at the selected site during the last visit. Use arrows under titles to alternate between ascending and descending order (see [[Media:2023-03-27 example arrows.png|image as an example]]). Orange arrow in image indicates the date of last visit. | ||
<br /> | |||
<br /> | |||
:''' | <!--T:215--> | ||
<center> | |||
<br/> | <div class="toc" style="border-radius:5px;background-color:#ffffff;width:700px;padding-left:8px;padding-right:8px;"> | ||
[[File:2023-05-12 WBC Results last visit.png|700px|link=https://help.biolovision.net/images/8/87/2023-05-12_WBC_Results_last_visit.png]] | |||
<div class="toc" style="border-radius:5px;width:685px;padding-left:15px;text-align:left; font-size:12px;"> | |||
'''Protocol. Results last visit.''' | |||
</div> | |||
<p style="color:black;font-size:12px;padding-left:5px;text-align:left;column-count:1;padding-right:5px;"> | |||
'''Total numbers:''' Total number of individuals of the selected species recorded on the last visit only.<br/> | |||
</p> | |||
</div> | |||
</center> | |||
<br /> | |||
<br /> | |||
:: | <!--T:217--> | ||
:'''Species only reported during the last visit''' <br/> | |||
<br/> | List of species recorded only during the last visit and no other visit. Use arrows under titles to alternate between ascending and descending order (see [[Media:2023-03-27 example arrows.png|image as an example]]). Orange arrow in image indicates the date of the last visit. | ||
<br /> | |||
<br /> | |||
[[File:2023-05- | <!--T:219--> | ||
<br/> | <center> | ||
<div class="toc" style="border-radius:5px;background-color:#ffffff;width:700px;padding-left:8px;padding-right:8px;"> | |||
[[File:2023-05-12 WBC results only last visit.png|700px|link=https://help.biolovision.net/images/7/79/2023-05-12_WBC_results_only_last_visit.png]] | |||
<div class="toc" style="border-radius:5px;width:685px;padding-left:15px;text-align:left; font-size:12px;"> | |||
'''Protocol. Species only of last visit.''' | |||
</div> | |||
<p style="color:black;font-size:12px;padding-left:5px;text-align:left;column-count:1;padding-right:5px;"> | |||
'''Total numbers:''' Number of individuals of the selected species recorded during the last visit.<br/> | |||
</p> | |||
</div> | |||
</center> | |||
<br /> | |||
<br /> | |||
:: | <!--T:221--> | ||
:'''Species only reported during previous visits''' <br/> | |||
<br/> | List of species that were not reported during the last visit but were seen in one of the previous ones. Use arrows under titles to alternate between ascending and descending order (see [[Media:2023-03-27 example arrows.png|image as an example]]). Orange arrow in image indicates the date of last visit. | ||
<br /> | |||
<br /> | |||
[[File:2023-05- | <!--T:223--> | ||
<p style=" | <center> | ||
''' | <div class="toc" style="border-radius:5px;background-color:#ffffff;width:700px;padding-left:8px;padding-right:8px;"> | ||
''' | [[File:2023-05-12 WBC Resulst not last visit.png|700px|link=https://help.biolovision.net/images/4/43/2023-05-12_WBC_Resulst_not_last_visit.png]] | ||
</p><br/> | <div class="toc" style="border-radius:5px;width:685px;padding-left:15px;text-align:left; font-size:12px;"> | ||
'''Protocol. Species only of previous visit.''' | |||
</div> | |||
<p style="color:black;font-size:12px;padding-left:5px;text-align:left;column-count:1;padding-right:5px;"> | |||
'''Last date:''' Last date the selected species was recorded. <br/> | |||
'''Total numbers:''' Number of individuals recorded on the last date the species was seen. <br/> | |||
</p> | |||
</div> | |||
</center> | |||
<br /> | |||
<br /> | |||
<!--T:225--> | |||
:'''Species for all years''' <br/> | |||
List of all species reported by the user at this site, and the frequency of occurence. Use arrows under titles to alternate between ascending and descending order (see [[Media:2023-03-27 example arrows.png|image as an example]]). Orange arrow in image indicates the date of last visit. | |||
<br /> | |||
<br /> | |||
:''' | <!--T:227--> | ||
<center> | |||
<div class="toc" style="border-radius:5px;background-color:#ffffff;width:700px;padding-left:8px;padding-right:8px;"> | |||
[[File:2023-05-12 WBC results sp all years.png|700px|link=https://help.biolovision.net/images/7/76/2023-05-12_WBC_results_sp_all_years.png]] | |||
<div class="toc" style="border-radius:5px;width:685px;padding-left:15px;text-align:left; font-size:12px;"> | |||
'''Protocol. Results for all species.''' | |||
</div> | |||
<p style="color:black;font-size:12px;padding-left:5px;text-align:left;column-count:1;padding-right:5px;"> | |||
'''Average frequence of occurrence:''' Proportion of visits in which the species was recorded. <br/> | |||
<br/> | |||
<i>For example, </i>Anas platyrhynchos<i> has been recorded in all visits at this site, </i>Anas clypeata<i> has only been recorded in half of them, and </i>Anas acuta<i> only in a 12.5% of them.</i><br/> | |||
<br/> | <br/> | ||
'''Total numbers:''' Total number of recordings for the species across all visits and years for the site. | |||
</p> | |||
</div> | |||
</center> | |||
<br /> | |||
<br /> | |||
[[Protocols web#Results|[Top to Results]]] <br/> | |||
[[Protocols web#Preparation and data|[Top to Preparation and data]]] <br/> | |||
[[#top|[Back to Protocols]]] <br/> | |||
<br/> | <br/> | ||
===Display on map=== | |||
<br/> | <br /> | ||
<br /> | |||
:::''' | <!--T:230--> | ||
<center> | |||
<br/> | <div class="toc" style="border-radius:5px;background-color:#ffffff;width:700px;padding-left:8px;padding-right:8px;padding-bottom:8px;"> | ||
[[File:2023-05-09 WBC Display on map.png|700px|link=https://help.biolovision.net/images/f/fd/2023-05-09_WBC_Display_on_map.png]] | |||
<div class="toc" style="border-radius:5px;width:685px;padding-left:15px;text-align:left; font-size:12px"> | |||
'''Protocol. Display on map.''' | |||
</div> | |||
</div> | |||
</center> | |||
<br /> | |||
<br /> | |||
: | <!--T:232--> | ||
For the selected site, see the polygon, line or point to survey on a map. To know how to navigate the map, refer to wiki section Web interface > [[Navigating_the_map|Navigating the map]]. | |||
: | <!--T:233--> | ||
Here you can: | |||
: | <!--T:234--> | ||
<br/> | # Visualize your polygon/transect/point to count | ||
# [[Protocols web#Download map|Generate a printable map]] version of your census area <br /> <br /> | |||
<br /> | |||
<br /> | |||
[[File:2023- | <!--T:235--> | ||
<br/> | <center> | ||
<div class="toc" style="border-radius:5px;background-color:#ffffff;width:700px;padding-left:8px;padding-right:8px;padding-bottom:8px;"> | |||
[[File:2023-05-11 WBC Display map.png|700px|link=https://help.biolovision.net/images/7/78/2023-05-11_WBC_Display_map.png]] | |||
<div class="toc" style="border-radius:5px;width:685px;padding-left:15px;text-align:left; font-size:12px"> | |||
'''Protocol. Display polygon on a map.''' | |||
</div> | |||
</div> | |||
</center> | |||
<br /> | |||
<br /> | |||
[[Protocols web#Display on map|[Top to Display on map]]] <br/> | |||
[[Protocols web#Preparation and data|[Top to Preparation and data]]] <br/> | |||
[[#top|[Back to Protocols]]] <br/> | |||
<br/> | <br/> | ||
===Modify the protocol=== | |||
<br/> | <br /> | ||
<br /> | |||
:::: | <!--T:238--> | ||
<br/> | <center> | ||
<div class="toc" style="border-radius:5px;background-color:#ffffff;width:700px;padding-left:8px;padding-right:8px;padding-bottom:8px;"> | |||
[[File:2023-05-09 WBC Modify the protocol.png|700px|link=https://help.biolovision.net/images/7/7c/2023-05-09_WBC_Modify_the_protocol.png]] | |||
<div class="toc" style="border-radius:5px;width:685px;padding-left:15px;text-align:left; font-size:12px"> | |||
'''Protocol. Modify the protocol.''' | |||
</div> | |||
</div> | |||
</center> | |||
<br /> | |||
<br /> | |||
: | <!--T:240--> | ||
Modify the site to survey. Only users that have been granted this right will have access to the section. | |||
<br/> | <br /> | ||
<br/> | <br/> | ||
[[ | <!--T:242--> | ||
<center> | |||
<div class="toc" style="border-radius:5px;background-color:#ffffff;width:700px;padding-left:8px;padding-right:8px;"> | |||
[[File:Capture 2023-05-11 WBC Modify protocol.png|700px|link=https://help.biolovision.net/images/1/11/Capture_2023-05-11_WBC_Modify_protocol.png]] | |||
<div class="toc" style="border-radius:5px;width:685px;padding-left:15px;text-align:left; font-size:12px;"> | |||
'''Protocol. Modify protocol.''' | |||
</div> | |||
<p style="color:black;font-size:12px;padding-left:5px;text-align:left;column-count:1;padding-right:5px;"> | |||
'''Return:''' Go to previous screen without saving.<br/> | |||
'''Centre the map:''' Centre the map on the polygon, line or point.<br/> | |||
</p> | |||
</div> | |||
</center> | |||
<br/> | <br/> | ||
<br/> | <br/> | ||
<!--T:244--> | |||
:'''1. Modify name''' <br/> | |||
Add or amend site custom name. Site reference name can only be changed by administrators. | |||
<br /> | |||
<br/> | <br/> | ||
<!--T:246--> | |||
<center> | |||
<div class="toc" style="border-radius:5px;background-color:#ffffff;width:700px;padding-left:8px;padding-right:8px;"> | |||
[[File:2023-05-12 wbc modify protocol. name.png|700px|link=https://help.biolovision.net/images/9/9a/2023-05-12_wbc_modify_protocol._name.png]] | |||
<div class="toc" style="border-radius:5px;width:685px;padding-left:15px;text-align:left; font-size:12px;"> | |||
'''Protocol. Modify site name.''' | |||
</div> | |||
<p style="color:black;font-size:12px;padding-left:5px;text-align:left;column-count:1;padding-right:5px;"> | |||
'''Name of reference locality:''' Location under which all objects from the protocol are attached to. It is determined by administrators when creating the site and cannot be changed afterwards.<br/> | |||
'''Reference name:''' Site name officially defined for the protocol, can be a number, name or any other code. <br/> | |||
'''Custom name:''' Name under which the site is also known or name the observer wants to give to the site.<br/> | |||
</p> | |||
</div> | |||
</center> | |||
<br/> | <br/> | ||
<br/> | <br/> | ||
< | <!--T:248--> | ||
:'''2. Modify polygon, line or point''' <br/> | |||
Change the shape of the polygon, line or position of the point. See Web interface > [[Navigating the map|Navigating the map]] to know how to move around the map, and Web interface > [[Geometry_editor|Geometry editor]] to know how to draw or modify a polygon, line or point. | |||
<br /> | <br /> | ||
<br/> | <br/> | ||
[[File: | <!--T:250--> | ||
<center> | |||
<div class="toc" style="border-radius:5px;background-color:#ffffff;width:700px;padding-left:8px;padding-right:8px;"> | |||
[[File:Capture 2023-05-12 WBC Change polygon.png|700px|link=https://help.biolovision.net/images/d/d9/Capture_2023-05-12_WBC_Change_polygon.png]] | |||
<div class="toc" style="border-radius:5px;width:685px;padding-left:15px;text-align:left; font-size:12px;"> | |||
'''Protocol. Modify site polygon/transect/point.''' | |||
</div> | |||
<p style="color:black;font-size:12px;padding-left:5px;text-align:left;column-count:1;padding-right:5px;"> | |||
'''Centre the map:''' Centres the map to the site to survey. <br/> | |||
</p> | |||
</div> | |||
</center> | |||
<br/> | <br/> | ||
<br/> | <br/> | ||
<!--T:252--> | |||
:'''3. Download polygon, line or point''' <br/> | |||
Download the polygon, line or point as a shapefile, to use in the future or to modify it with an external GIS program. | |||
<br /> | |||
<br/> | <br/> | ||
[[File: | <!--T:254--> | ||
<center> | |||
<div class="toc" style="border-radius:5px;background-color:#ffffff;width:700px;padding-left:8px;padding-right:8px;"> | |||
[[File:2023-05-12 WBC Donwload polygon.png|700px|link=https://help.biolovision.net/images/c/c0/2023-05-12_WBC_Donwload_polygon.png]] | |||
<div class="toc" style="border-radius:5px;width:685px;padding-left:15px;text-align:left; font-size:12px;"> | |||
'''Protocol. Download polygon/transect/point.''' | |||
</div> | |||
<p style="color:black;font-size:12px;padding-left:5px;text-align:left;column-count:1;padding-right:5px;"> | |||
'''Polygon/transect/point number:''' indicates the site the entry represents in locations with more than one study site. It can be a polygon, a line or a point.<br/> | |||
'''Polygon/transect/point name:''' site name. It can be a polygon, a line or a point.<br/> | |||
'''Polygon area:''' area of the polygon. <br/> | |||
<br/> | <br/> | ||
<!--T:255--> | |||
'''5. Change geometry:''' Click to upload a new shapefile. It will open a menu identical to next subsection ([[Media:2023-05-12 WBC Change geometry.png|see image]]). <br/> | |||
'''6. Export:''' Click on the icon to download the corresponding polygon, line or point as a shapefile. Modify it on a GIS and upload (see next subsection to upload).<br/> | |||
</p> | |||
</div> | |||
</center> | |||
<br/> | <br/> | ||
<br/> | <br/> | ||
<!--T:257--> | |||
:'''4. Upload site''' <br/> | |||
Import an existing polygon, line or point. | |||
<br /> | |||
<br/> | <br/> | ||
<!--T:259--> | |||
<center> | |||
<div class="toc" style="border-radius:5px;background-color:#ffffff;width:700px;padding-left:8px;padding-right:8px;"> | |||
[[File:2023-05-12 WBC import polygon.png|700px|link=https://help.biolovision.net/images/2/2c/2023-05-12_WBC_import_polygon.png]] | |||
<div class="toc" style="border-radius:5px;width:685px;padding-left:15px;text-align:left; font-size:12px;"> | |||
'''Protocol. Upload polygon.''' | |||
</div> | |||
<p style="color:black;font-size:12px;padding-left:5px;text-align:left;column-count:1;padding-right:5px;"> | |||
'''The file to be imported:''' Click on '''Choose file''' to select the site from your computer. The file name will be displayed next to the button.<br/> | |||
'''SRID:''' Choose from the expandable menu the Datum the imported shapefile is on.<br/> | |||
'''IMPORT:''' Click to upload the site.<br/> | |||
</p> | |||
</div> | |||
</center> | |||
<br/> | <br/> | ||
<br/> | <br/> | ||
[[Protocols web#Modify the protocol|[Top to Modify the protocol]]] <br/> | |||
[[Protocols web#Preparation and data|[Top to Preparation and data]]] <br/> | |||
[[#top|[Back to Protocols]]] <br/> | |||
<br/> | <br/> | ||
=== | ===Census results=== | ||
<br/> | <br /> | ||
<br /> | |||
[[File: | <!--T:262--> | ||
<br/> | <center> | ||
<div class="toc" style="border-radius:5px;background-color:#ffffff;width:700px;padding-left:8px;padding-right:8px;padding-bottom:8px;"> | |||
[[File:2023-05-09 WBC census results.png|700px|link=https://help.biolovision.net/images/9/91/2023-05-09_WBC_census_results.png]] | |||
<div class="toc" style="border-radius:5px;width:685px;padding-left:15px;text-align:left; font-size:12px"> | |||
'''Protocol. Census results.''' | |||
</div> | |||
</div> | |||
</center> | |||
<br /> | |||
<br /> | |||
<!--T:264--> | |||
Click on '''Census results''' to see all available years with data for this site (see image below). Select the one to visualise. <br/> | |||
<br/> | <br/> | ||
<!--T:265--> | |||
<br/> | Sites with no records do not appear on the menu. You can only see your own records, unless you are a protocol administrator. To know more about administrators, see wiki section [[Main_Page#Administration|Administration]]. | ||
<br /> | |||
<br /> | |||
=== | <!--T:267--> | ||
<br/> | <center> | ||
<div class="toc" style="border-radius:5px;background-color:#ffffff;width:700px;padding-left:8px;padding-right:8px;padding-bottom:8px;"> | |||
[[File:2023-05-09 WBC census with data.png|700px|link=https://help.biolovision.net/images/e/e0/2023-05-09_WBC_census_with_data.png]] | |||
<div class="toc" style="border-radius:5px;width:685px;padding-left:15px;text-align:left; font-size:12px"> | |||
'''Protocol. Selecting year to visualise.''' | |||
</div> | |||
</div> | |||
</center> | |||
<br /> | |||
<br /> | |||
<!--T:269--> | |||
<br/> | <span id="Data visualization"></span> | ||
A new window will show all your records at the selected site. A grey section on top contains general information about this particular count, while the bottom part refers to the observations. | |||
<br /> | |||
<br /> | |||
<!--T:271--> | |||
<br/> | <center> | ||
<div class="toc" style="border-radius:5px;background-color:#ffffff;width:600px;padding-left:8px;padding-right:8px;padding-bottom:8px;"> | |||
[[File:Capture 2023-11-27 at 15.27.16.png|600px|link=https://help.biolovision.net/images/b/bd/Capture_2023-11-27_at_15.27.16.png]] | |||
<div class="toc" style="border-radius:5px;width:585px;padding-left:15px;text-align:left; font-size:12px"> | |||
'''Census results visualisation''' | |||
</div> | |||
<p style="color:black;font-size:12px;padding-left:30px;text-align:left;column-count:2;"> | |||
'''1.''' [[Protocols_web#Protocol_section|Protocol section]] <br/> | |||
'''2.''' [[Protocols_web#Observations section|Observations section]] <br/> | |||
'''3.''' [[Protocols_web#Map section|Map section]]<br/> | |||
</p> | |||
</div> | |||
</center> | |||
<br /> | |||
<br /> | |||
<!--T:273--> | |||
<span id="Protocol section"></span> | |||
====1. Protocol section==== | |||
<br/> | <br/> | ||
<!--T:274--> | |||
<br/> | General information about the selected visit at the selected site. | ||
<br /> | |||
<br /> | |||
[[File: | <!--T:276--> | ||
<br/> | <center> | ||
<div class="toc" style="border-radius:5px;background-color:#ffffff;width:700px;padding-left:8px;padding-right:8px;"> | |||
[[File:2023-03-23 Browsing WBC.png|700px|link=https://help.biolovision.net/images/6/6d/2023-03-23_Browsing_WBC.png]] | |||
<div class="toc" style="border-radius:5px;width:685px;padding-left:15px;text-align:left; font-size:12px;"> | |||
'''Browsing protocol results.''' | |||
</div> | |||
<p style="color:black;font-size:12px;padding-left:30px;text-align:left;column-count:2;"> | |||
<b>4.</b> [[Protocols web#Date map|Date]] <br /> | |||
<b>5.</b> [[Protocols web#Site map|Site]] <br/> | |||
<b>6.</b> [[Protocols web#Author|Author]] <br /> | |||
<b>7.</b> [[Protocols web#General comment|General comment]] <br/> | |||
<b>8.</b> [[Protocols web#Protocol|Protocol]] <br/> | |||
<b>9.</b> [[Protocols web#Export map|Export maps of all visits]] <br/> | |||
<b>10.</b> [[Protocols web#Export data|Export data]] <br/> | |||
</p> | |||
</div> | |||
</center> | |||
<br /> | |||
<br /> | |||
<!--T:277--> | |||
<span id="Date map"></span> | |||
:'''4. Date''' <br/> | |||
Date and time of selected survey. Notice the bar representing the extent of the day, and the yellow marking indicating time of day the survey took place (see image [[Media:2023-03-23 time of survey within the day.png|Time of survey]]).<br/> | |||
<br/> | <br/> | ||
<!--T:278--> | |||
<br/> | <span id="Site map"></span> | ||
:'''5. Site''' <br/> | |||
Site of selected survey. | |||
<br /> | |||
<br /> | |||
==== | <!--T:279--> | ||
<br/> | <center> | ||
<div class="toc" style="border-radius:5px;background-color:#ffffff;width:700px;padding-left:8px;padding-right:8px;"> | |||
[[File:2023-03-23 WBC site.png|700px|link=https://help.biolovision.net/images/2/22/2023-03-23_WBC_site.png]] | |||
<div class="toc" style="border-radius:5px;width:685px;padding-left:15px;text-align:left; font-size:12px;"> | |||
'''Browsing protocol results. Site.''' | |||
</div> | |||
<p style="color:black;font-size:12px;padding-left:5px;text-align:left;column-count:1;padding-right:5px;"> | |||
'''11.''' Click on site name to open a new window with more information about the site, and its map. <br/> | |||
'''12.''' Altitude. <br/> | |||
'''13.''' Click on icon to access all observations associated with the site as in the [[Browsing_records#Search_engine|Search engine]]. <br/> | |||
</p> | |||
</div> | |||
</center> | |||
<br /> | |||
<br /> | |||
<!--T:280--> | |||
<span id="Author"></span> | |||
:'''6. Author''' <br/> | |||
Name of observer. If you are an administrator, click on name to access their [[My_account_/_Changing_personal_data,_password_or_email#My_personal_card|personal card]]. A cell phone icon in front of the name indicates the data has been submitted from NaturaList.<br/> | |||
<br/> | <br/> | ||
<!--T:281--> | |||
<br | <span id="General comment"></span> | ||
:'''7. General comment''' <br/> | |||
Comment about the selected survey, when existing. <br/> | |||
<br> | |||
= | <!--T:282--> | ||
<br/> | <span id="Protocol"></span> | ||
:'''8. Protocol''' | |||
<br /> | |||
<br /> | |||
<!--T:283--> | |||
<br/> | <center> | ||
<div class="toc" style="border-radius:5px;background-color:#ffffff;width:700px;padding-left:8px;padding-right:8px;padding-bottom:8px;"> | |||
[[File:2023-03-23 Browsing WBC summary .png|700px|link=https://help.biolovision.net/images/a/a4/2023-03-23_Browsing_WBC_summary_.png]] | |||
<div class="toc" style="border-radius:5px;width:685px;padding-left:15px;text-align:left; font-size:12px"> | |||
'''Protocol summary.''' | |||
</div> | |||
<p style="color:black;font-size:12px;padding-left:5px;text-align:left;column-count:1;padding-right:5px;"> | |||
'''14. [[Media:2023-03-23 browsing WBC parameters summary.png|Protocol summary]]:''' Click on the '''+''' sign to expand the panel, and on the '''-''' sign to collapse when opened (encircled on image). <br/> | |||
'''15. [[Media:2023-03-23 Browsing WBC summary of visits.png|List of all visits:]]''' Click on the '''+''' sign to expand the panel, and on the '''-''' sign to collapse when opened (encircled on image).<br/> | |||
</p> | |||
</div> | |||
</center> | |||
<br /> | |||
<br /> | |||
= | <!--T:284--> | ||
<span id="Export map"></span> | |||
:'''9. Export maps of all visits'''<br/> | |||
Download maps as described in wiki section Web interface > Protocols > Preparation and data > [[Protocols_web#Download_map|Download map]] below. <br/> | |||
<br/> | <br/> | ||
[[ | <!--T:285--> | ||
<span id="Export data"></span> | |||
:'''10. Export data''' <br/> | |||
Export your data as described in wiki section Web interface > [[Exporting_your_data|Exporting your data]].<br/> | |||
<br/> | <br/> | ||
<!--T:286--> | |||
[[Protocols web#Census results|[Top to Census results]]] <br/> | |||
[[Protocols web#Preparation and data|[Back to Preparation and data]]] <br/> | |||
[[#top|[Back to Protocols]]] <br/> | |||
<br/> | <br/> | ||
= | <!--T:287--> | ||
< | <span id="Observations section"></span> | ||
====2. Observations section==== | |||
<br/> | <br /> | ||
<!--T:288--> | |||
List of all visits and their results. <br/> | |||
<br/> | <br/> | ||
<!--T:289--> | |||
<br/> | <center> | ||
<div class="toc" style="border-radius:5px;background-color:#ffffff;width:700px;padding-left:8px;padding-right:8px;padding-bottom:8px;"> | |||
[[File:2023-04-03 WBC browsing.png|700px|link=https://help.biolovision.net/images/f/f1/2023-04-03_WBC_browsing.png]] | |||
<div class="toc" style="border-radius:5px;width:685px;padding-left:15px;text-align:left; font-size:12px"> | |||
'''Browsing protocol. Visits and results.''' | |||
</div> | |||
<p style="color:black;font-size:12px;padding-left:30px;text-align:left;column-count:2;"> | |||
<b>16.</b> [[Protocols web#Visits|Visits]] <br /> | |||
<b>17.</b> [[Protocols web#Species map|Species]] <br/> | |||
</div> | |||
</center> | |||
<br /> | |||
<br /> | |||
= | <!--T:290--> | ||
<br/> | <span id="Visits></span> | ||
:'''16. Visits''' <br/> | |||
List of al visits to the site for the selected period. Use the bar on the right to see all visits if necessary. | |||
<br /> | |||
<br /> | |||
[[File: | <!--T:291--> | ||
<br/> | <center> | ||
<div class="toc" style="border-radius:5px;background-color:#ffffff;width:500px;padding-left:8px;padding-right:8px;"> | |||
[[File:2023-04-03 WBC browse visits.png|500px|link=https://help.biolovision.net/images/d/da/2023-04-03_WBC_browse_visits.png]] | |||
<div class="toc" style="border-radius:5px;width:485px;padding-left:15px;text-align:left; font-size:12px;"> | |||
'''Protocol. Browsing visits.''' | |||
</div> | |||
<p style="color:black;font-size:12px;padding-left:5px;text-align:left;column-count:1;padding-right:5px;"> | |||
'''18.''' Select from the expandable menu a different period if necessary.<br/> | |||
'''19.''' Select the visit you would like to visualise. The selected visit will be highlighted in grey. <br/> | |||
'''20.''' Click on notebook icon to [[Editing_records#Modify_a_record_from_a_list|modify]] / visualise the selected visit. <br/> | |||
</p> | |||
</div> | |||
</center> | |||
<br /> | |||
<br /> | |||
<br/> | <br/> | ||
<div class="contenewarning" style="width:700px"> <!-- ajustar la mida --> | |||
<div class="contenewarningima" style="min-width: 43px;max-width: 43px;"> <!-- no canviar les mides --> | |||
</div> | |||
<div class="contenewarningtext"> | |||
<hr class="contenewarninglinia"> | |||
<b>NOTE:</b><br/> | |||
a [[Media:2023-10-31 danger sign in census visits.png|danger sign besides the census date]] indicates census were entered in uncorrelated dates even when the date introduced is the correct one. <br/> | |||
Do enter census in chronological order to avoid this issue. | |||
</div> | |||
</div> | |||
<br /> | |||
<!--T:295--> | |||
<span id="Species map"></span> | |||
:'''17. Species''' <br/> | |||
List of species recorded on the selected visit to this site. If necessary, move the right hand bar to see the full list. See wiki section Various > [[Symbols_cheatsheet| Symbols cheatsheet]] to know correspondence of symbols next to species names.<br/> | |||
<br/> | <br/> | ||
<!--T:296--> | |||
If your observations were submitted through the website, records are associated to a protocol polygon but their precise location within the polygon is unknown. No observations will be displayed in the map (see [[Media:2023-04-03 WBC browse visits.png|image as an example]]).<br/> | |||
<br/> | <br/> | ||
<!--T:297--> | |||
If your observations were submitted through NaturaList, records are displayed on the map at their precise location within the polygon (see [[Media:2023-05-10 WBC records visualisation on map.png|image as an example]]).<br/> | |||
<br/> | <br/> | ||
<br/> | <br/> | ||
<div class="contenesummary" style="width:600px"> <!-- ajustar la mida --> | |||
<div class="contenesummaryima" style="min-width: 43px;max-width: 43px;"> <!-- no canviar les mides --> | |||
</div> | |||
<div class="contenesummarytext"> | |||
<hr class="contenesummarylinia"> | |||
<b>Entering observations through the local portal:</b> Observations will not be represented on the [[Protocols web#Map section|Map section]]. <br/> | |||
<b>Entering observations through NaturaList:</b> Observations will be represented on the [[Protocols web#Map section|Map section]] at their recorded position (see image [[Media:2023-05-10 WBC records visualisation on map.png|Protocol. Records visualisation on the map]] on next section). | |||
</div> | |||
</div> | |||
<br /> | |||
<!--T:301--> | |||
[[Protocols web#Census results|[Top to Census results]]] <br/> | |||
[[Protocols web#Preparation and data|[Back to Preparation and data]]] <br/> | |||
[[#top|[Back to Protocols]]] <br/> | |||
<br/> | <br/> | ||
< | <!--T:302--> | ||
<span id="Map section"></span> | |||
< | |||
====3. Map section==== | |||
<br/> | <br/> | ||
<!--T:304--> | |||
See the polygon of the surveyed site and all observations for the selected visit, if they were submitted through NaturaList. To know how to navigate the map, visit wiki section Web interface > [[Navigating the map|Navigating the map]].<br/> | |||
<br/> | <br/> | ||
<!--T:305--> | |||
To better visualise observations, select a species from the '''Observed species''' section left of the map (see sub-section 2. Species above). <br/> | |||
<span style="color: #000000; margin-left: 25px;"><b>· </b>All records of the selected species are displayed in red. <br/> | |||
<span style="color: #000000; margin-left: 25px;"><b>· </b>On the left hand column, the selected species is highlighted in grey. <br/> | |||
<span style="color: #000000; margin-left: 25px;"><b>· </b>[[Media: Summary and time.png|Summary of observation and time of observation]] is displayed next to the observation position. <br/> | |||
<span style="color: #000000; margin-left: 35px;">See Mobile interface > Navigating the map > [[Navigating_the_map_NaturaList#Summary_of_observations|Summary of observations]] for decoding summary of observations. <br/> | |||
<span style="color: #000000; margin-left: 25px;"><b>· </b>The selected record also has a [[Media:Blue circle.png|blue circle]] around it. <br/> | |||
<span style="color: #000000; margin-left: 25px;"><b>· </b>Not selected species continue being displayed in yellow. <br/> | |||
<br/> | <br/> | ||
<br /> | |||
<!--T:306--> | |||
<center> | |||
<br/> | <div class="toc" style="border-radius:5px;background-color:#ffffff;width:700px;padding-left:8px;padding-right:8px;padding-bottom:8px;"> | ||
</ | [[File:2023-05-10 WBC records visualisation on map.png|700px|link=https://help.biolovision.net/images/9/9d/2023-05-10_WBC_records_visualisation_on_map.png]] | ||
<div class="toc" style="border-radius:5px;width:685px;padding-left:15px;text-align:left; font-size:12px"> | |||
</ | '''Protocol. Records visualisation on the map.''' | ||
</div> | |||
<p style="color:black;font-size:12px;padding-left:30px;text-align:left;column-count:2;"> | |||
<b>21.</b> [[Protocols web#Summary|Summary of observations]] <br /> | |||
<b>22.</b> [[Protocols web#Additional functions|Additional functions]] <br/> | |||
<b>23.</b> [[Protocols web#Zoom|Zoom]] <br /> | |||
<b>24.</b> [[Protocols web#Add species|Add species to the form]] <br/> | |||
</p> | |||
</div> | |||
</center> | </center> | ||
<br /> | <br /> | ||
<br /> | <br /> | ||
[[ | <!--T:307--> | ||
<span id="Summary"></span> | |||
:::'''21. Summary of observations''' <br/> | |||
Details associated to the selected observation are summarised next to its position (represented by a red dot). To see how to interpret it, refer to wiki section Mobile interface > [[Navigating_the_map_NaturaList#Understanding_a_summary_of_observations| Understanding a summary of observations]]. <br/> | |||
<br/> | <br/> | ||
< | <!--T:308--> | ||
<span id="Additional functions"></span> | |||
:::'''22. Additional functions''' <br/> | |||
Click on any record to open a menu with additional functions. Red dots indicate observations where additional functions apply to. Note not all protocols allow all functions and therefore, some protocols may not display all icons.<br /> | |||
< | |||
<br /> | <br /> | ||
<br/> | |||
<!--T:309--> | |||
<center> | |||
<div class="toc" style="border-radius:5px;background-color:#ffffff;width:700px;padding-left:8px;padding-right:8px;"> | |||
[[File:Options icons.png|700px|link=https://help.biolovision.net/images/3/3d/Options_icons.png]] | |||
<div class="toc" style="border-radius:5px;width:685px;padding-left:15px;text-align:left; font-size:12px;"> | |||
'''Add or modify additional information in the local portal.''' | |||
</div> | |||
<p style="color:black;font-size:12px;padding-left:5px;text-align:left;column-count:1;padding-right:5px;"> | |||
<center> | |||
<table style="width:70%; border:1;"> | |||
== | <tr style="padding: 25px; text-align: left; font-family: sans-serif; color: black; background-color: white"> | ||
< | <td> | ||
[[File:Relationship icon.png|frameless|center|100px|link=https://help.biolovision.net/images/7/78/Relationship_icon.png]]</td> | |||
<td><b>25. Individuals of the same species:</b>: Select/deselect all individuals of the same species, and show their details. If a relationship between the sightings have been recorded, it will be shown/hidden here.</td> | |||
</tr> | |||
[[File: | <tr style="padding: 25px; text-align: left; font-family: sans-serif; color: black; background-color: white"> | ||
<br/> | <td> | ||
[[File:Flying direction icon.png|frameless|center|100px|link=https://help.biolovision.net/images/f/f5/Flying_direction_icon.png]] | |||
</td> | |||
<td><b>26. Flight direction:</b> Adds flight direction if necessary. To add flight direction,<br/> | |||
-click on the arrow icon, <br/> | |||
-select the individual you want to add flight direction to (it becomes red), <br/> | |||
-move the mouse to match the blue round (top) to the flight direction (bottom). See [[Media:Adding flight direction on the web.png|example]]. </td> | |||
</tr> | |||
<tr style="padding: 25px; text-align: left; font-family: sans-serif; color: black; background-color: white"> | |||
< | <td> | ||
[[File:Circle flight icon.png|frameless|center|100px|link=https://help.biolovision.net/images/a/a6/Circle_flight_icon.png]] | |||
</td> | |||
<td><b>27. Circle flight:</b> Individual flying in circles. </td> | |||
</tr> | |||
<tr style="padding: 25px; text-align: left; font-family: sans-serif; color: black; background-color: white"> | |||
<tr | <td> | ||
[[File:See details icon.png|frameless|center|100px|link=https://help.biolovision.net/images/1/1f/See_details_icon.png]] | |||
</td> | |||
<td><b>28. Access details and edit:</b> Access record details including information about the list and other species from the same list, as if from Home > Main menu (left column) > [[Browsing_records#All_my_observations|All my observations]]. The individual the function applies to is indicated by a | |||
[[Media:2023-09-20 ind selected to edit.png|blue circle around it]]. </td> | |||
</tr> | |||
< | <tr style="padding: 25px; text-align: left; font-family: sans-serif; color: black; background-color: white"> | ||
<td> | |||
[[File:Delete behaviour icon.png|frameless|center|100px|link=https://help.biolovision.net/images/0/0a/Delete_behaviour_icon.png]] | |||
</td> | |||
<td><b>29. Delete:</b> Delete the selected record. You will be prompted to confirm.</td> | |||
</tr> | |||
< | |||
< | |||
</ | </table> | ||
</center> | |||
</ | <br/> | ||
</p> | |||
</div> | |||
</center> | |||
<br /> | |||
<br /> | <br /> | ||
<!--T:314--> | |||
<span id="Zoom"></span> | |||
:::'''23. Zoom''' <br/> | |||
Select to zoom and center observations. Choose between <br/> | |||
<br/> | |||
<!--T:315--> | |||
'''Zoom on all records of the species''' to see and center all records of the selected species. <br/> | |||
'''Zoom on all records''' to see and center all records of this visit. When selected this option, all records will be displayed even when they were previously hidden. <br/> | |||
<br/> | <br/> | ||
[[ | <!--T:316--> | ||
<span id="Add species"></span> | |||
:::'''24. Add a species to the form''' <br/> | |||
Add a new entry to the selected visit. Enter information as for a list. See wiki section Web interface > Submitting records > Step 3/3: Submit my sighting > As if accessed from a list > [[Submitting_records#List_section|List section]]. <br/> | |||
</p><br/> | |||
<!--T:317--> | |||
[[Protocols web#Census results|[Top to Census results]]] <br/> | |||
[[Protocols web#Preparation and data|[Back to Preparation and data]]] <br/> | |||
[[#top|[Back to Protocols]]] <br/> | |||
<br/> | <br/> | ||
=== | ===Download map=== | ||
<br/> | <br/> | ||
<!--T:319--> | |||
It is possible to download the map, for example if you cannot record observations on your device while in the field, or to keep a second copy of your data for dataproof. You can choose the map layer (available layers depend on the local portal), the transparency of the map and the colour mode (colour vs. black and white), in any combination, and download as a pdf file. <br/> | |||
<br/> | <br/> | ||
<i>Note final design depends on the protocol and the local portal. </i><br/> | |||
<br/> | <br/> | ||
<!--T:320--> | |||
The PDF file displays: <br/> | |||
<!--T:321--> | |||
- the map of your protocol area with the polygon, points and/or transects to survey <br/> | |||
<!--T:322--> | |||
- a QR code that, when scanned, drives you directly to the place on the map while entering data on the web <br/> | |||
<!--T:323--> | |||
- the name of the local portal the map comes from <br/> | |||
<!--T:324--> | |||
<br/> | - the GPS coordinates, Atitude, Reference place name for the polygon, points or transect, and Reference name <br /> | ||
<br /> | |||
:''' | <!--T:325--> | ||
<center> | |||
< | <div class="toc" style="border-radius:5px;background-color:#ffffff;width:700px;padding-left:8px;padding-right:8px;padding-bottom:8px;"> | ||
[[File:2023-05-09 WBC Donwload map.png|700px|link=https://help.biolovision.net/images/6/6f/2023-05-09_WBC_Donwload_map.png]] | |||
<div class="toc" style="border-radius:5px;width:685px;padding-left:15px;text-align:left; font-size:12px"> | |||
'''Protocol. Download map.''' | |||
</div> | |||
<p style="color:black;font-size:12px;padding-left:5px;text-align:left;column-count:1;padding-right:5px;"> | |||
:''' | <!--T:326--> | ||
'''50% transparency:''' Check to print the map with 50% of transparency (see image [[Media:Transparency.jpg|Example 50% transparency]], default map on top, transparent map below). <br/> | |||
<br/> | <br/> | ||
:''' | <!--T:327--> | ||
'''Map:''' Check to print the map in black and white (see image [[Media:Black and white.jpg|Example black and white]], default map on top, black and white below). It may help to reduce ink and is compatible to back and white printers.<br/> | |||
<br/> | <br/> | ||
:''' | <!--T:328--> | ||
'''Lines/points:''' Check to delimit the polygon to survey with dots instead of lines (see image [[Media:Lines and points.jpg|Example lines and points]], map with lines on top (defalut option), with points below). <br/> | |||
</p> | |||
</div> | |||
</center> | |||
<br/> | <br/> | ||
: | <!--T:329--> | ||
Choose | '''1.''' Choose from the expandable menu the map layer you would like to print. <br/> | ||
<br/> | <br/> | ||
: | <!--T:330--> | ||
'''2.''' Click on pdf icon to download the map as a pdf.<br/> | |||
<br/> | <br/> | ||
[[ | <!--T:331--> | ||
[[Protocols web#Download map|[Top to Download map]]] <br/> | |||
[[Protocols web#Preparation and data|[Back to Preparation and data]]] <br/> | |||
[[#top|[Back to Protocols]]] <br/> | |||
<br/> | <br/> | ||
==Check data== | |||
<br/> | <br/> | ||
:''' | <!--T:333--> | ||
<center> | |||
< | <div class="toc" style="border-radius:5px;background-color:#ffffff;width:400px;padding-left:8px;padding-right:8px;padding-bottom:8px;"> | ||
[[File:2023-05-10 WBC Check data.png|400px|link=https://help.biolovision.net/images/3/37/2023-05-10_WBC_Check_data.png]] | |||
<div class="toc" style="border-radius:5px;width:385px;padding-left:15px;text-align:left; font-size:12px"> | |||
'''Protocol. Check data.''' | |||
</div> | |||
</div> | |||
</center> | |||
<br/> | <br/> | ||
<!--T:334--> | |||
Calendar showing visits to different sites and number of species detected. <br/> | |||
<br/> | <br/> | ||
==== | <!--T:335--> | ||
<center> | |||
<div class="toc" style="border-radius:5px;background-color:#ffffff;width:700px;padding-left:8px;padding-right:8px;padding-bottom:8px;"> | |||
[[File:2023-05-13 BWC Check data.png|700px|link=https://help.biolovision.net/images/c/cb/2023-05-13_BWC_Check_data.png]] | |||
<div class="toc" style="border-radius:5px;width:685px;padding-left:15px;text-align:left; font-size:12px"> | |||
'''Protocol. Check data.''' | |||
</div> | |||
</div> | |||
</center> | |||
<br/> | <br/> | ||
<!--T:336--> | |||
:'''1. Select site''' <br/> | |||
Select a site by typing the name, or part of the name, in the left field (1a) and/or selecting from the expandable menu on the right (1b). Click 'Select a site' from the expandable menu to revert the selection and visualise all site again.<br/> | |||
<br/> | <br/> | ||
<!--T:337--> | |||
:'''2. SHOW''' <br/> | |||
Click to apply selection. <br/> | |||
<br/> | <br/> | ||
<!--T:338--> | |||
:'''3. Graphic area''' <br/> | |||
See a calendar with dates in which surveys took place (colored cells). Move pointer on any colored cell to see the date the census took place and the number of species recorded. The darker the colour, the larger number of species. <br/> | |||
<br/> | <br/> | ||
[[ | <!--T:339--> | ||
Click on any coloured cell to see on a new window a [[Media:Capture 2023-03-30 WBC display sp.png|list of species recorded]] on that date. Refer to wiki section Web interface > [[Codes_and_symbols| Codes and symbols]] to understand the meaning of the different symbols associated to each observation. <br/> | |||
<br/> | <br/> | ||
[[Protocols web#Check data|[Top to Check data]]] <br/> | |||
[[#top|[Back to Protocols]]] <br/> | |||
<br/> | <br/> | ||
==Map== | |||
<br/> | <br/> | ||
==== | <!--T:341--> | ||
<center> | |||
<div class="toc" style="border-radius:5px;background-color:#ffffff;width:400px;padding-left:8px;padding-right:8px;padding-bottom:8px;"> | |||
[[File:2023-05-10 WBC Map.png|400px|link=https://help.biolovision.net/images/b/b3/2023-05-10_WBC_Map.png]] | |||
<div class="toc" style="border-radius:5px;width:385px;padding-left:15px;text-align:left; font-size:12px"> | |||
'''Map.''' | |||
</div> | |||
</div> | |||
</center> | |||
<br/> | <br/> | ||
<!--T:342--> | |||
Map and statistics for the site. You can only see your own site/s unless you are a user with special rights or an [[Glossary#Administrator|administrator]].<br/> | |||
<br/> | <br/> | ||
==== | <!--T:343--> | ||
<center> | |||
<div class="toc" style="border-radius:5px;background-color:#ffffff;width:600px;padding-left:8px;padding-right:8px;padding-bottom:8px;"> | |||
[[File:2023-05-13 WBC Users map.png|600px|link=https://help.biolovision.net/images/8/80/2023-05-13_WBC_Users_map.png]] | |||
<div class="toc" style="border-radius:5px;width:585px;padding-left:15px;text-align:left; font-size:12px"> | |||
'''User's map.''' | |||
</div> | |||
<p style="color:black;font-size:12px;padding-left:30px;text-align:left;column-count:2;"> | |||
<b>1.</b> [[Protocols web#Select site|Select site]]<br /> | |||
<b>2.</b> [[Protocols web#Statistics map|Statistics]] <br/> | |||
<b>3.</b> [[Protocols web#map area|Map area]] <br /> | |||
</p> | |||
</div> | |||
</center> | |||
<br/> | <br/> | ||
<!--T:344--> | |||
<span id="Select site"></span> | |||
:'''1. Select site''' <br/> | |||
Select area on the left hand expandable menu (1a) and/or study site on the right hand menu (1b). <br/> | |||
<span style="color: #000000; margin-left: 25px;"><b>· </b>'Country' on the area menu refers to the whole area covered by the local portal you are in. <br/> | |||
<span style="color: #000000; margin-left: 25px;"><b>· </b>Check [[Media:My census.png|'My census areas']] to automatically select only all your census areas. <br/> | |||
<br/> | <br/> | ||
= | <!--T:345--> | ||
<span id="Statistics map"></span> | |||
:'''2. Statistics''' <br/> | |||
Basic statistics about the selected area or site/sites.<br/> | |||
<br/> | <br/> | ||
<!--T:346--> | |||
:::*'''Statistics for the displayed region''' <br/> | |||
Statistics when more than one site is included in the selected area. Data from all sites are pooled in the results. <br/> | |||
<br/> | <br/> | ||
<!--T:347--> | |||
<br/> | :::*'''Statistics for square''' <br/> | ||
Statistics when only one site is included in the search. It includes names of all users involved, and it is possible to contact them (icon 4) and/see all records associated by the user (icon 5). <br/> | |||
<!--T:348--> | |||
< | <center> | ||
{| style="text-align:left; border:0px solid black; vertical-align:top;"| | |||
|- | |||
|style="padding: 60px"| | |||
<div class="toc" style="border-radius:5px;background-color:#ffffff;width:317px;padding-left:8px;padding-right:8px;padding-bottom:8px;"> | |||
[[File:2023-05-13 WBC Statistics per map area.png|317px|link=https://help.biolovision.net/images/c/c1/2023-05-13_WBC_Statistics_per_map_area.png]] | |||
<div class="toc" style="border-radius:5px;width:295px;padding-left:15px;text-align:left; font-size:12px"> | |||
'''Statistics per area.''' | |||
</div> | |||
</div> | |||
=== | <!--T:349--> | ||
<br/> | |style="padding: 60px"| | ||
<div class="toc" style="border-radius:5px;background-color:#ffffff;width:300px;padding-left:8px;padding-right:8px;"> | |||
[[File:2023-05-13 WBC stats per site.png|300px|link=https://help.biolovision.net/images/e/e5/2023-05-13_WBC_stats_per_site.png]] | |||
<div class="toc" style="border-radius:5px;width:285px;padding-left:15px;text-align:left; font-size:12px;"> | |||
'''Statistics per site.''' | |||
</div> | |||
<p style="color:black;font-size:12px;padding-left:5px;text-align:left;column-count:1;padding-right:5px;"> | |||
'''4.''' Email user. It will open the default e-mail client.<br/> | |||
'''5.''' See all observations reported by this user. <br/> | |||
</p> | |||
</div> | |||
<!--T:350--> | |||
< | |} | ||
</center> | |||
<!--T:351--> | |||
<span id="map area"></span> | |||
:'''3. Map area''' <br/> | |||
Map with the polygons/transects/points to survey highlighted in pink. Visit wiki section Web interface > [[Navigating the map]] to know how to navigate the map. <br/> | |||
Select a site on the right hand expandable menu (see 1b) when there is more than one site per area. <br/> | |||
<br/> | <br/> | ||
<!--T:352--> | |||
Click on the desired polygon to see details (see image below). <br/> | |||
<br/> | <br/> | ||
=== | <!--T:353--> | ||
<center> | |||
<div class="toc" style="border-radius:5px;background-color:#ffffff;width:500px;padding-left:8px;padding-right:8px;padding-bottom:8px;"> | |||
[[File:2023-03-29 WBC Maps.png|500px|link=https://help.biolovision.net/images/3/33/2023-03-29_WBC_Maps.png]] | |||
<div class="toc" style="border-radius:5px;width:485px;padding-left:15px;text-align:left; font-size:12px"> | |||
'''Maps.''' | |||
</div> | |||
<p style="color:black;font-size:12px;padding-left:30px;text-align:left;column-count:2;"> | |||
<b>6.</b> [[Protocols web#Quick links|Quick links]]<br /> | |||
<b>7.</b> [[Protocols web#Export|Export and download]] <br/> | |||
</p> | |||
</div> | |||
</center> | |||
<br/> | <br/> | ||
<!--T:354--> | |||
<span id="Quick links"></span> | |||
:'''6. Quick links''' <br/> | |||
Get quick access to other functions of the protocol. Icon may be grouped per polygon/transect/point/square and are protocol dependent. You may not encounter all of them in each protocol. <br/> | |||
<br/> | <br/> | ||
<!--T:355--> | |||
< | <center> | ||
<table style="border: 0px solid black; width= 1100px;" align="center"> | |||
<!-- <tr style="padding: 25px; text-align: center; font-size: 16px; font-family: sans serif; "> --> | |||
<!--T:356--> | |||
< | <tr style="padding: 25px; text-align: left; font-family: sans-serif; color: black; background-color: white; padding-bottom: 5px;"> | ||
<td style="background-color: #f6dda7;"> | |||
[[File:llibreta.png|frameless|center|100px|link=https://help.biolovision.net/images/c/c0/Llibreta.png]] | |||
</td> | |||
<td style="text-align:left; padding-left: 15px;">'''Add observations''' <br/> Add further observations to this site or any other as described in wiki section Web interface > Protocols > Preparation and data > [[Protocols_web#Add_observations|Add observations]]. </td> | |||
</tr> | |||
==== | <!--T:357--> | ||
< | <tr style="padding: 25px; text-align: left; font-family: sans-serif; color: black; background-color: white;"> | ||
<td style="background-color: #f6dda7;"> | |||
[[File:Mon.png|frameless|center|100px|link=https://help.biolovision.net/images/4/43/Mon.png]] | |||
</td> | |||
<td style="text-align:left; padding-left: 15px;">'''All site data''' <br/> See all records associated to the site. From this screen (see image below) you can access other data as in the [[Media:Search engine example.png|Search engine tool]]. </td> | |||
</tr> | |||
<!--T:358--> | |||
< | <tr style="padding: 25px; text-align: left; font-family: sans-serif; color: black; background-color: white"> | ||
<td></td> | |||
<td style="text-align:center; padding-left: 15px;"> | |||
<!--T:359--> | |||
<br/> | <br/> | ||
<center> | |||
==== | <div class="toc" style="border-radius:5px;background-color:#ffffff;width:600px;padding-left:8px;padding-right:8px;padding-bottom:8px;"> | ||
[[File:2023-03-29 WBC map add observations.png|600px|link=https://help.biolovision.net/images/5/5c/2023-03-29_WBC_map_add_observations.png]] | |||
<div class="toc" style="border-radius:5px;width:585px;padding-left:15px;text-align:left; font-size:12px"> | |||
'''Adding observations to a polygon.''' | |||
</div> | |||
</div> | |||
</center> | |||
<br/> | <br/> | ||
</td></tr> | |||
<!--T:360--> | |||
< | <tr style="padding: 25px; text-align: left; font-family: sans-serif; color: black; background-color: white"> | ||
<td style="background-color: #f6dda7;"> | |||
[[File:fulls.png|frameless|center|100px|link=https://help.biolovision.net/images/f/fb/Fulls.png]] | |||
</td> | |||
<td style="text-align:left; padding-left: 15px;"> '''Data visualisation''' <br/> See all protocols associated to this site, as described in Protocols > Preparation and data > [[Protocols_web#Data visualization|Census results]].</td> | |||
</tr> | |||
=== | <!--T:361--> | ||
< | <tr style="padding: 25px; text-align: left; font-family: sans-serif; color: black; background-color: white"> | ||
<td style="background-color: #f6dda7;"> | |||
[[File:pregunta.png|frameless|center|100px|link=https://help.biolovision.net/images/e/ea/Pregunta.png]] | |||
</td> | |||
<td style="text-align:left; padding-left: 15px;"> '''List of records to be checked''' <br/> See all records associated to the site needing verification. This icon is only available to [[Glossary#Administrator|administrators]]. </td> | |||
</tr> | |||
[[File: | <!--T:362--> | ||
< | <tr style="padding: 25px; text-align: left; font-family: sans-serif; color: black; background-color: white"> | ||
<td style="background-color: #f6dda7;"> | |||
[[File:llapis.png|frameless|center|100px|link=https://help.biolovision.net/images/6/63/Llapis.png]] | |||
</td> | |||
<td style="text-align:left; padding-left: 15px;"> '''Modify the protocol''' <br/> Modify the protocol as described in wiki section Web > Protocols > Preparation and data > [[Protocols_web#Modify_the_protocol|Modify the protocol]].</td> | |||
</tr> | |||
<!--T:363--> | |||
< | <tr style="padding: 25px; text-align: left; font-family: sans-serif; color: black; background-color: white"> | ||
<td style="background-color: #f6dda7;"> | |||
[[File:grafic.png|frameless|center|100px|link=https://help.biolovision.net/images/d/d6/Grafic.png]] | |||
</td> | |||
<td style="text-align:left; padding-left: 15px;">'''Results''' <br/> See results as described in wiki section Web interface > Protocols > Preparation and data > [[Protocols_web#Results|Results]]'''. </td> | |||
</tr> | |||
<!--T:364--> | |||
</table> | |||
</center> | |||
</div> | |||
</center> | |||
<br/> | <br/> | ||
<br/> | <br/> | ||
<!--T:365--> | |||
<span id="Export"></span> | |||
:'''7. Export and download''' <br/> | |||
Export your data and/or download protocol maps. Place the pointer on icons to see the meaning of each of them.<br/> | |||
<br/> | <br/> | ||
<!--T:366--> | |||
<center> | |||
<div class="toc" style="border-radius:5px;background-color:#ffffff;padding-left:8px;padding-right:8px; padding-bottom:8px;width:400px;"> | |||
[[File:Export and download.png|400px|link=https://help.biolovision.net/images/0/03/Export_and_download.png]] | |||
<div class="toc" style="border-radius:5px;padding-left:15px;text-align:left; font-size:12px;width:385px;"> | |||
'''Export and download.''' | |||
</div> | |||
<p style="color:black;font-size:12px;padding-left:30px;text-align:left;column-count:2;"> | |||
<b>7a.</b> [[Exporting_your_data|Export your data]] <br /> | |||
<b>7b.</b> [[Protocols_web#Download_map|Download protocol maps]] <br/> | |||
</p> | |||
</div> | |||
</center> | |||
<br/> | <br/> | ||
<br/> | <br/> | ||
[[ | <!--T:367--> | ||
Visit wiki section Web interface > [[Exporting_your_data|Exporting your data]] for more information on exporting, or wiki section Web interface > Protocols > Preparation and data > [[Protocols_web#Download_map|Download map]] for more information on downloading maps.<br/> | |||
<br/> | <br/> | ||
Map | <!--T:368--> | ||
[[Protocols_web#Map|[Top to Map]]]<br/> | |||
[[#top|[Back to Protocols]]] <br/> | |||
<br/> | <br/> | ||
</translate> | |||
Latest revision as of 12:03, 27 August 2026
Protocols are standardised ways of collecting data linked to a geometry (points, transects or polygons), taxonomic group and observation pressure.
The methodology to follow depends on the study's goal (see summary on Protocols' summary table).
A country administrator will grant you access if you meet certain criteria.
Not all protocols are available in all countries.
Contents
-
1 Accessing protocols
2 Selection of study site
3 Preparation and data
- 3.1 Add observations
- 3.1.1 Starting the protocol
3.1.2 Entering observations
3.1.3 Ending the protocol
-
3.2 Results
- 3.2.1 Graph
3.2.2 Statistics and results of recorded species
-
3.3 Display on map
3.4 Modify the protocol
3.5 Census results
- 3.5.1 Protocol section
3.5.2 Observations section
3.5.3 Map section
-
3.6 Download map
-
4 Check data
5 Map
Protocols
-
· Acoustic data
· Bee-eater
· Bewick's Swan
· Birds of prey
· Black Grouse protocol
· CBBS in Protected areas
· Cirl Bunting
· CoBiMo
· Corncrake
· Grey Partridge
· Jackdaw
· Meadow birds
· MF (Monitoring of breeding birds in wetlands)
· MHB & BDM (Monitoring of common breeding birds Monitoring of biodiversity in Switzerland)*
· Other territory mapping
· Point count
· Private territory mapping
· Protocoled census
· Rock Ptarmigans protocol
· Rook
· Sand Martin
· SHOC
· Single nesting species (SNSP)
· SOCC
· STOC EPS
· STOC Montagne
· STOC ONF
· STOC Sites RNF
· STOC Sites
· VBS (Monitoring of breeding birds on military training areas)
· Waterbird census protocol
· Woodcock monitoring
· Woodpeckers
· Woodpecker territory
Accessing protocols
Access protocols from
Menu > Take part > All my protocols for an easy access to all functions you are allowed access to.
The easier way to access all functions of a protocol is through the protocol panel. Go to Menu > Take part > All my protocols. It lists all protocols you have access to in this local portal (see image below). Depending on your rights you could also access the protocol panel through the Administration section: Menu > Administration > Protocol administration > Protocol administration. Options vary depending on your rights (administrators have access to more functions).
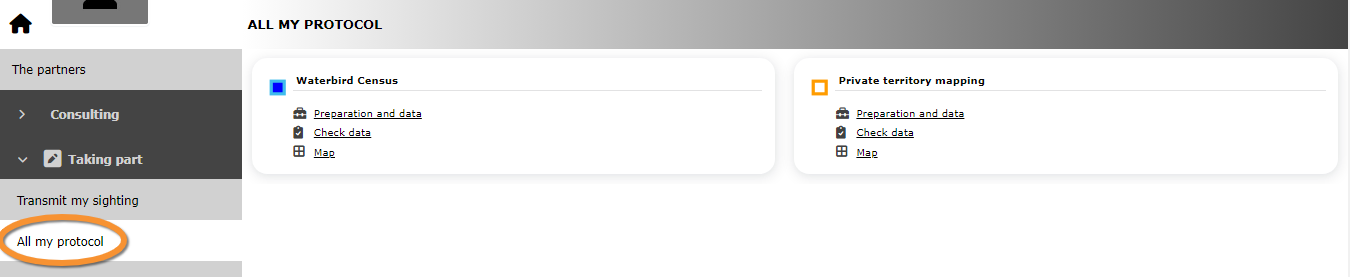
Accessing protocols.
However, there are other ways that in certain conditions may give access to some of the functions (see following sections).
Entering data
Enter data to a protocol from the protocol panel (see above) or as if submitting records.
To enter data as if submitting records,
1. access the page STEP 1/3 : Approximate choice of a site either from main menu or from Submit button.

Entering data on a protocol as if submitting records.
2. Choose between:
· choosing from
- Only available if you have already entered data on this protocol and study site.
- Select a protocol, and a site (if there is more than one option for this protocol).
- Only available if you have already entered data on this protocol and study site.

Entering data on a protocol choosing from.
1. Select a protocol from those you already entered data before into.
2. Select a study site from those available to you at the selected protocol.
· by clicking on the map.
- click anywhere within the polygon if you want to enter data on a protocol using polygons, or
- click on the protocol dot if you want to enter data on a protocol using dots.
- click anywhere within the polygon if you want to enter data on a protocol using polygons, or
NOTE: Show / hide polygons clicking on the layers icon on the top left corner of the map, and check the cell polygons (see image below). Polygons will be shown in yellow.
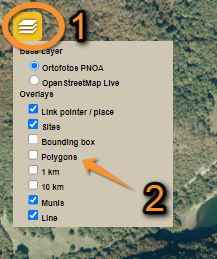
Showing polygons on the map.
1. Open layers menu.
2. Check Polygons cell to show polygons.
· Other options (by typing text, by choosing a municipality).
- Access to Step 2/3: Precise site choice. Scroll to your study site.
- Access to Step 2/3: Precise site choice. Scroll to your study site.
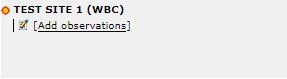
Step 2/3: Adding observations to a protocol.
3. Select Add observations on the new window (see image below).
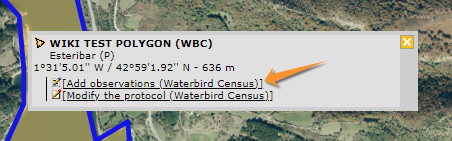
Adding observations to a protocol.

Pathway to enter data to protocols as if Submitting records.
[Top to Accessing protocols]
[Back to Protocols]
Modify protocol
Modify protocols from
· the protocol panel. Go to Menu > Taking part > All my protocols > "Name of the protocol" > Preparation and data > Modify the protocol. See wiki section above, Local portal > Protocols > Accessing protocols.
· submitting records.
- 1. Access the page STEP 1/3 : Approximate choice of a site either from Main menu > Taking part or from Submit button (see image as an example).
- 1. Access the page STEP 1/3 : Approximate choice of a site either from Main menu > Taking part or from Submit button (see image as an example).
- 2. Scroll down to choosing from if you have already entered data at the site you want to modify; or by clicking on the map to select the site from the map.
- 2. Scroll down to choosing from if you have already entered data at the site you want to modify; or by clicking on the map to select the site from the map.
- 3. Click on the site to modify and select Modification of a protocoled census if you accessed from choosing from; or Modify the protocol if accessed from the map.
- 3. Click on the site to modify and select Modification of a protocoled census if you accessed from choosing from; or Modify the protocol if accessed from the map.
- NOTE: If the protocol you want to modify works with polygons, activate polygons from the layers icon at the top left corner (see image Showing polygons on the map) before clicking on the study site.
- NOTE: If the protocol you want to modify works with polygons, activate polygons from the layers icon at the top left corner (see image Showing polygons on the map) before clicking on the study site.
[Top to Accessing protocols]
[Back to Protocols]
Create protocol
Create a new area to survey.
Not all users have access to this function. It depends on the protocol, your local portal and your rights. If you do, access the map as if entering observations and click anywhere on the map (except on a dot or polygon). Click on Create a protocoled census. If you are allowed to create a new study site in more than one protocol, all options will be listed (see image below).
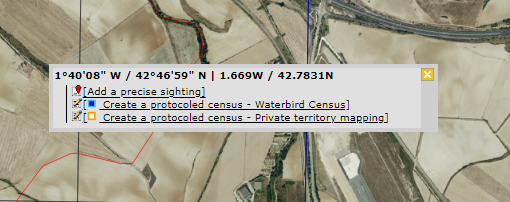
Create a protocoled census.
Enter data
· Menu > Taking part > All my protocol > Preparation and data > Add observations.
· Menu > Administration > Protocol administration > Protocol administration.
· Dashboard > Submit > Choosing from > "Name of the protocol" > "Site" > Add observations.
· Dashboard > Submit > By clicking on the map > Add observations.
· Menu > Taking part > Transmit my sighting > Choosing from > "Name of the protocol" > "Site" > Add observations.
· Menu > Taking part > Transmit my sighting > By clicking on the map > Add observations.
Modify protocol
· Menu > Taking part > All my protocol > Preparation and data > Modify the protocol.
· Dashboard > Submit > Choosing from > "Name of the protocol" > "Site" > Modification of a protocoled census .
· Dashboard > Submit > By clicking on the map > Modify the protocol.
· Menu > Taking part > Transmit my sighting > Choosing from > "Name of the protocol" > "Site" > Modification of a protocoled census.
· Menu > Taking part > Transmit my sighting > By clicking on the map > Modify the protocol.
Create a new protocol
· Dashboard > Submit > By clicking on the map > Create a protocoled census.
· Menu > Taking part > Transmit my sighting > By clicking on the map > Create a protocoled census.
[Top to Accessing protocols]
[Back to Protocols]
Selection of study site
Some protocols create two random squares within a selected area. Users and/or administrators can then select one of the squares to survey on.
Observers can be assigned a study site by the administrator or can be allowed to select one by themselves.
To select your study site:
1. Go to Menu > Take part > Transmit my sighting, or
- Press Submit button on home page.
2. Scroll down to "by clicking on the map" and zoom in until you see the locations.
3. Select a place to create the protocol at and click on "Create a protocoled census -'name of protocol'", as explained in wiki section Administration > Protocol management > Site.
4. Select one of the two squares created randomly by the system within an radius of 10 km from the selected point (see image below). You will receive an email with instructions. Either:
- Accept square, or
- Reject square.
- Accept square, or

Randomly created survey squares.
1. Limit of a 10 km radius
2. Randomly created survey squares
NOTE
. Random squares are created only once. It is not possible to close and enter again to change the random selection.
. The observer should select one of the squares. If both squares are rejected, an explanation is required and needs to be validated by an administrator. Meanwhile, it is possible to create another study site at a different place.
Once a square is accepted,
3. Name the new survey site as explained in wiki section Administration > Protocol management > Site.
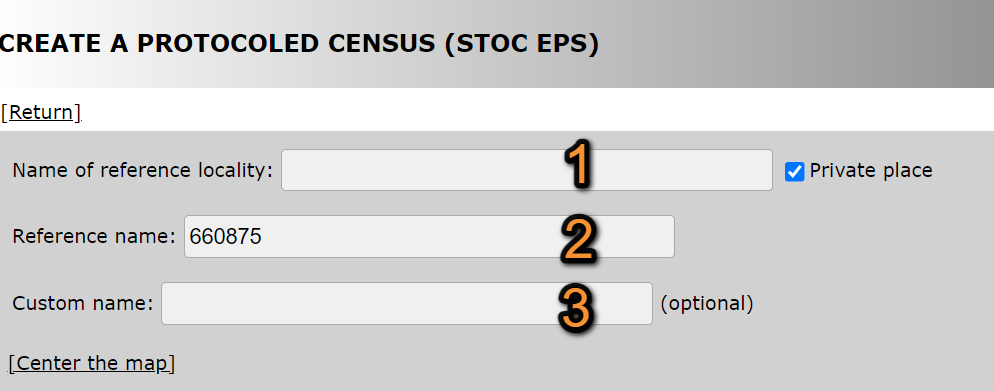
Name the new study area.
1. Name of reference locality: Location name under which all observations of the protocol will be associated to.
2. Reference name: Name/Code automatically assigned to the square.
3. Custom name: Additional name to the site if known. This name can be changed afterwards.
4. Start drawing your site. Visit wiki section Web interface > Geometry editor for more information on using the drawing tools. Remember you can also import a shapefile.
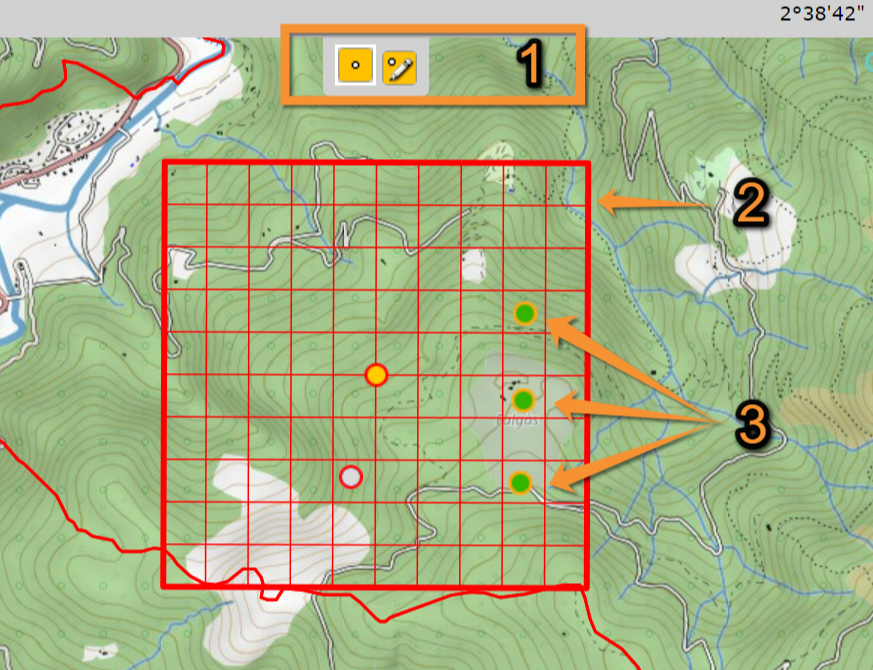
Drawing geometry.
1. Drawing tools
2. Study area
3. Survey points
5. When done, choose between:
- SAVE AND STAY: Save the site and remain on the page.
- SAVE AND CREATE A NEW: Save the site and create another.
- SAVE AND ADD A RECORD: Save the site and start entering data.
- SAVE AND STAY: Save the site and remain on the page.
[Top to selection of study site]
[Back to STOC EPS protocol]
Preparation and data
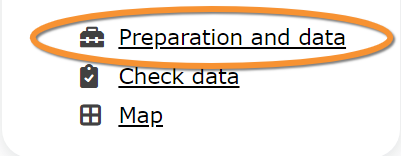
Protocol. Preparation and data.
Click on Preparation and data lists all sites available to the current profile and allows access to the functions listed hereafter for each place:

Protocol. Select site.
1. Change protocol by clicking on the active protocol name and selecting from the expandable menu.
2. Move to other sections within the protocol by selecting from the tabs above.
3. List of all sites you have access to under the selected protocol (number 1). When you do not have access to any site under the selected protocol, you will see a message "no count available".
2 Preparation and data
-
2.1 Add observations
- 2.1.1 Starting the protocol
2.1.2 Entering observations
2.1.3 Ending the protocol
-
2.2 Results
- 2.2.1 Graph
2.2.2 Statistics and results of recorded species
-
2.3 Display on map
2.4 Modify the protocol
2.5 Census results
- 2.5.1 Protocol section
2.5.2 Observations section
-
2.6 Download map
Add observations
Click on Add observations (see image below) in the site you need to enter data to.

Protocol. Add observations.
Starting the protocol
Before entering observations, it is required to enter general parameters regarding the protocol.

Starting the protocol.
1. Site
2. Date
3. Starting time
4. Ending time
5. Comments
6. Hide records from the public
7. Location and visits
8. Parameters
1. Select site
If necessary, change site by selecting from the tabs. The active site is highlighted in yellow (see image above).
Choose date

Choose date.
- 2. Enter date
Choose from the expandable menu the date the survey took place.
- 3. Enter starting time
Type the time the census started.
- 4. Ending time
Type the time the census ended.
- 5. Enter comments
Choose one option from the tabs on top (5a) and type a comment (5b). Note the number of tabs and the information required may differ from country to country:
· Comment: if the comment will refer to a general observation,
· Additional observer: if you name other observer/s participating in the census,
· Important changes: to note important changes from your previous visit, like noise, pollution or construction work,
· Impacts: record any impact taking place during the survey,
· Incidents: report any incident that may have happened during the count.
- 6. Hide all records from the public
Check if you do not want other users to see your records.
Location and visits

Location and visits.
- 7. Count number
Some protocols have certain restrictions regarding the number or dates to conduct surveys. If the protocol requires it, select from the expandable menu which visit your data corresponds to. If the protocol does not require this field, you will only see Reference name and Reference locality.
8. Parameters
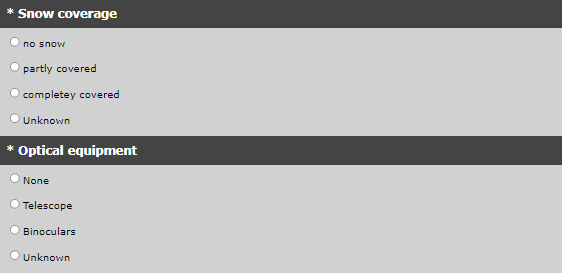
Parameters. Example.
Enter parameters required for your polygon. Note fields and the order in which they appear may differ from country to country. You may not encounter all possible fields described underneath. Expand the table below to see all possibilities.
Fields marked with an asterisk are mandatory.
| Parameters | ||||||||||
|---|---|---|---|---|---|---|---|---|---|---|
| Name | Description | |||||||||
| Acoustic number | Indicate the acoustic number. This information will be asked when entering data. | |||||||||
| Acoustic number detail | Provide details about the acoustic number. This information will be asked when entering data. | |||||||||
| Activity of the individual | Indicate the activity of the individual. This information will be asked when entering data. | |||||||||
| Additional observer | Indicate if you are accompanied by someone whose observations are also recorded. | |||||||||
| Appearance of udders | Indicate the appearance of udders. | |||||||||
| Calcar | Enter information about the calcar. | |||||||||
| Capture method | Indicate how the animal was caught. | |||||||||
| Census not done | Press at the end of the page if the census did not take place. Leave a reason in Comments. | |||||||||
| Chin pad (Plecotus) | Indicate the hair colour. | |||||||||
| Cloud cover | Indicate if there were clouds. | |||||||||
| Cm3 (mm) | Indicate the length of cm3. | |||||||||
| Color of oral glands | Indicate the colour of oral glands. | |||||||||
| Comment | You may enter a comment if you find it appropriate. | |||||||||
| Conditions in general | Choose how are surveying conditions overall regarding weather and disturbances, and may be asked to indicate on next section the reason if surveying conditions are not good. | |||||||||
| Conditions (notes) | Leave a note regarding conditions if necessary. | |||||||||
| Count method | Indicate if you are surveying from the ground, the air, the water, a different way, or if it is unknown. | |||||||||
| Count paid | Indicate if the count is paid for or not. | |||||||||
| Count type | Tick roost count if you are counting roosting birds, or during day otherwise. | |||||||||
| Counting mammals? | Indicate if besides the compulsory taxonomic group, you also counted mammals. | |||||||||
| Coverage | Indicate how much of the designated survey area is covered in the survey. | |||||||||
| Coverage (notes) | Leave any comment regarding the coverage. | |||||||||
| Determination methods | Indicate the determination method used. This information will be asked when entering data. | |||||||||
| Drone used | Indicate if drones were used during the survey. | |||||||||
| Ear | Enter information about the ear. | |||||||||
| Ear width (mm) | Type the width of the ear in millimeters. | |||||||||
| Foot | Enter information about the foot. | |||||||||
| Foot hair (Plecotus) | Indicate the presence of hairs on the foot. | |||||||||
| Forearm (mm) | Type the length of the forearm in millimeters. | |||||||||
| Fused wing cells (Pipistrellus) | Merge the information from wing cells. | |||||||||
| Habitat | Choose the most accurate habitat from the expandable menu. | |||||||||
| Hair color | Indicate the hair colour. | |||||||||
| Ice | Indicate the percentage of water surface that is frozen. | |||||||||
| Important changes | Indicate if there have been major changes since your last visit. | |||||||||
| Intact nests | Type number of intact nests. This information will be asked when entering data. |
|||||||||
| Means of transport | ||||||||||
| Mowing/Harvest | Indicate the surface that has been harvested or mown. | |||||||||
| Nasal leaf length | Indicate the length of the nasal leaf. | |||||||||
| Nest location | Select from the expandable menu the location of the nest. | |||||||||
| Net / harp-trap detail | Add details on certain types of traps: Nets and harp-traps. | |||||||||
| Neutralised time | Time to be removed from the official census time (like a pause) | |||||||||
| Number of canoes/kayaks | Enter number. | |||||||||
| Number of fishing boats | Enter number. | |||||||||
| Number of motor boats | Enter number. | |||||||||
| Number of nests occupied by other species | Type number of nests occupied by species other than the ones counted in the current protocol. This information will be asked when entering data. |
|||||||||
| Number of persons on shore | Enter number. | |||||||||
| Number of rowing boats | Enter number. | |||||||||
| Number of sailing boats | Enter number. | |||||||||
| Number of sports divers | Enter number. | |||||||||
| Number of stand up paddlers | Enter number. | |||||||||
| Number of surfers | Enter number. | |||||||||
| Occupied nests | Type number of occupied nests. This information will be asked when entering data. |
|||||||||
| Optical equipment | Indicate which equipment you are using for the survey, if any. Note you can only choose one option. | |||||||||
| Ossification level of the epiphyses at the joint of the phalanges | Indicate the level of ossification of the epiphyses at the joint of the phalanges. | |||||||||
| Playback | Check the species names for which playback will be played during the survey. | |||||||||
| Potential breeding pairs | Type the number of breeding pairs. This information will be asked when entering data. |
|||||||||
| Rain | Indicate if there was any rain. | |||||||||
| Reason(s) for moderate / bad conditions | If general conditions indicated above are not good, open the expandable menu and choose the reason (see image below). Only one option is possible: choose the one that is closest to the reality. | |||||||||
| Size of the epididymis | Indicate the size of the epididymis. | |||||||||
| Size of oral glands | Indicate the size of the oral glands. | |||||||||
| Social vocalisation type | Indicate the type of vocalisation. This information will be asked when entering data. | |||||||||
| Snow/Snow coverage | Indicate the proportion of snow cover. | |||||||||
| Sound played | Indicate if you used playback to detect the species by sliding the mark on/off. | |||||||||
| Suspected nests | Type number of suspected nests. This information will be asked when entering data. |
|||||||||
| Tail | Enter information about the tail. | |||||||||
| Temperature | Indicate approximate temperature. | |||||||||
| Temporary shallow water bodies | Indicate the frequency of water bodies. | |||||||||
| Testicles size | Indicate the size of the testicles. | |||||||||
| Thumb | Enter information about the thumb. | |||||||||
| Tibia | Enter information about the tibia. | |||||||||
| Tragus | Enter information about the tragus. | |||||||||
| Tragus widht (mm) | Indicate the width of the tragus. | |||||||||
| Vaginal tunic color | Indicate the colour of the vaginal tunic. | |||||||||
| Visibility | Indicate the approximate distance within which it is possible to identify species, or an overall description. | |||||||||
| Water level | Indicate the water level. | |||||||||
| Waves | Indicate how the waves are. | |||||||||
| Weight (g) | Enter the weight of the animal. | |||||||||
| Wind | Indicate if there was any wind. | |||||||||
| 1P3D | Enter information about 1P3D. | |||||||||
| 1P4D | Enter information about 1P4D. | |||||||||
| 1P5D | Enter information about 1P5D. | |||||||||
| 2nd finger | Enter information about the second finger. | |||||||||
| 2nd metacarpus | Enter information about the second metacarpus. | |||||||||
| 2P3D | Enter information about 2P3D. | |||||||||
| 2P4D | Enter information about 2P4D. | |||||||||
| 2P5D | Enter information about 2P5D. | |||||||||
| 3rd finger | Enter information about the third finger. | |||||||||
| 3rd metacarpus | Enter information about the third metacarpus. | |||||||||
| 4th finger | Enter information about the fourth finger. | |||||||||
| 4th metacarpus | Enter information about the fourth metacarpus. | |||||||||
| 5th finger | Enter information about the fifth finger. | |||||||||
| 5th metacarpus | Enter information about the fifth metacarpus. | |||||||||
9. Start entering data
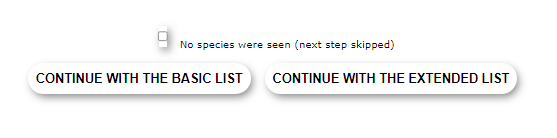
Choosing list. Example..
Options may differ from protocol to protocol but can be summarised as:
- NEXT: Continue entering data normally.
- NEXT: Continue entering data normally.
- CHOOSE A LIST TO ENTER DATA: Some protocols make a distinction between a Basic and an Extended list (see image Continue to enter data as an example).
- CHOOSE A LIST TO ENTER DATA: Some protocols make a distinction between a Basic and an Extended list (see image Continue to enter data as an example).
- BASIC LIST: Select to load a pre configured species list strictly related to the protocol (ie. waterbirds). It will facilitate entering data. See an example of how it may look like in image Example of a basic list compared to an Example of extended list. Which species belong to a basic list is determined by each local portal and may differ from one to another.
- BASIC LIST: Select to load a pre configured species list strictly related to the protocol (ie. waterbirds). It will facilitate entering data. See an example of how it may look like in image Example of a basic list compared to an Example of extended list. Which species belong to a basic list is determined by each local portal and may differ from one to another.
- EXTENDED LIST: Select to load a pre configured species list strictly related to the protocol (ie. waterbirds) along with other related ones (ie. reed-living species). It will facilitate entering data. See an example of how it may look like in image Example of extended list. Species included in a basic list and an extended list are determined by each local portal and may differ from country to country.
- EXTENDED LIST: Select to load a pre configured species list strictly related to the protocol (ie. waterbirds) along with other related ones (ie. reed-living species). It will facilitate entering data. See an example of how it may look like in image Example of extended list. Species included in a basic list and an extended list are determined by each local portal and may differ from country to country.
- If the administrator of the protocol did not prepare any pre configured list for this protocol, you will not be given any list of species to enter from; but you will still have to choose a list option in this section.
- If the administrator of the protocol did not prepare any pre configured list for this protocol, you will not be given any list of species to enter from; but you will still have to choose a list option in this section.
- NO SPECIES / INDIVIDUALS WERE SEEN: Indicate if your survey did not provide any data. You will be taken to directly to end the protocol. Surveys with no species are also important results! It means you followed the established methodology, and therefore your survey is valid, but no birds were present. They can indicate major population changes and are of extreme importance for conservation purposes.
- NO SPECIES / INDIVIDUALS WERE SEEN: Indicate if your survey did not provide any data. You will be taken to directly to end the protocol. Surveys with no species are also important results! It means you followed the established methodology, and therefore your survey is valid, but no birds were present. They can indicate major population changes and are of extreme importance for conservation purposes.
- ENTRY WITH LIST OF SPECIES ALREADY SEEN: Select to load a list with species previously recorded for this protocol at this study site.
- ENTRY WITH LIST OF SPECIES ALREADY SEEN: Select to load a list with species previously recorded for this protocol at this study site.
- ENTRY WITH LIST OF THE MOST FREQUENT SPECIES: Select to load a list with species recorded frequently for this protocol at this study site.
- ENTRY WITH LIST OF THE MOST FREQUENT SPECIES: Select to load a list with species recorded frequently for this protocol at this study site.
- CENSUS NOT DONE: Indicate if you did not survey a certain point, transect or polygon for the protocol, but you did survey another points of the same protocol.
- CENSUS NOT DONE: Indicate if you did not survey a certain point, transect or polygon for the protocol, but you did survey another points of the same protocol.
"My survey did not provide any data"
Surveys with no species are also important results! Please submit them.
It means you followed the established methodology but no birds were present. It can be due to methodology, disturbance, pollution or other major population changes and may be of extreme importance for conservation purposes.
[Top to Add observations]
[Top to Preparation and data]
[Back to Protocols]
Entering observations
According to the protocol, there are different ways to enter observations to the protocol.
Click on the protocol that most resemble your protocol to see details.
All existing models can be grouped in:
·Number of individuals: those requiring to enter only the number of individuals of each species observed.
·Distance of individuals: those which besides the number of individuals, need to be grouped according to the distance to the observer.
·Position of individuals: those that require positioning the individual on a map.
·Acoustic data: it is special and only available for Acoustic data protocol.
·Number of passages: those that group the observations according to the census.
·Count per sections: those in which the study area (transect) is separated in sections.
Additional information can always be entered besides the minimum requirements:
·Use  to open additional information panel.
·See Web interface > Local portal > Step 3: Transmit my sighting > If accessed from add sightings on this locality or add precise location > Additional information for more information.
| Type of protocol | Description | Protocol |
|---|---|---|
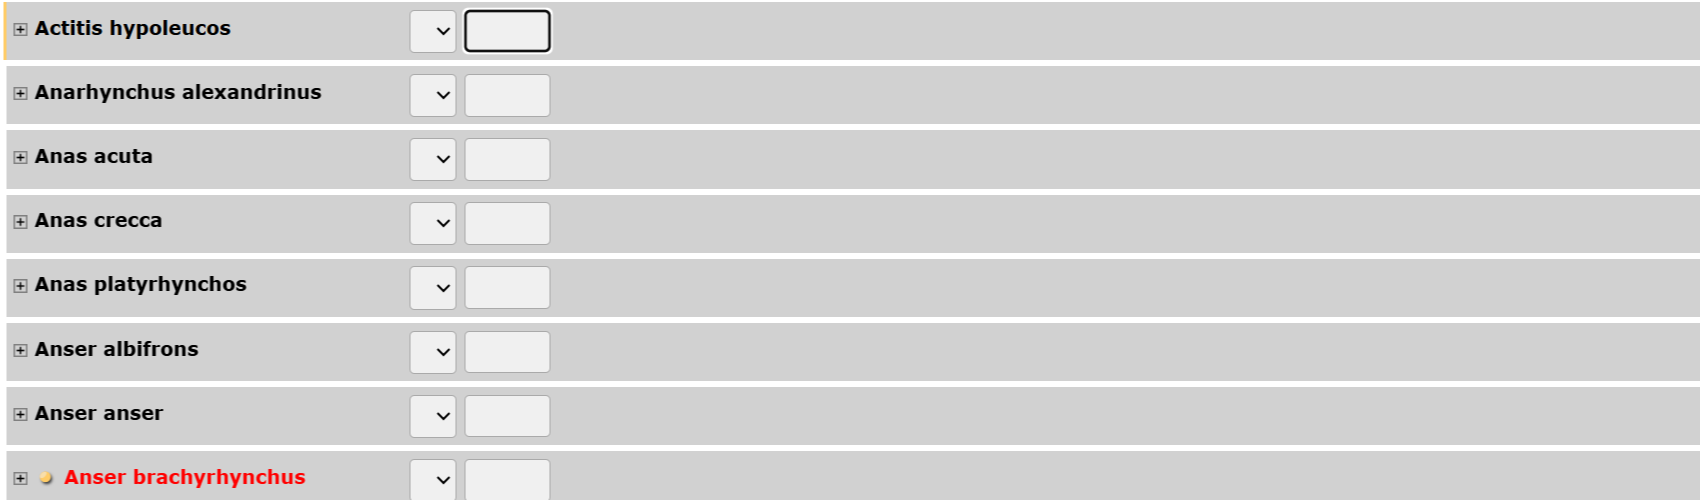 |
Number of individuals | Point count, Protocoled census, Waterbird census |
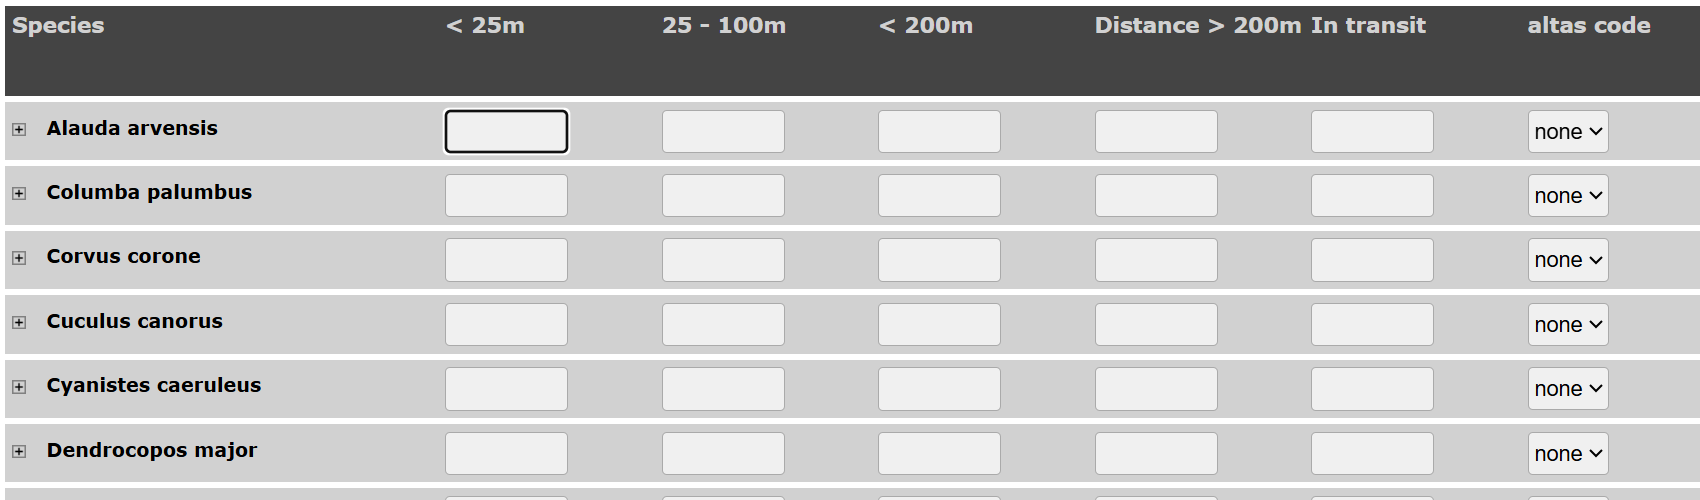 |
Distance of individuals | SHOC, SHOC Sites, SHOC Sites RNF, STOC EPS, STOC Montagne, STOC ONF, STOC Sites, STOC Sites RNF |
 |
Position of individuals | Bee-eater, Black Grouse, Cirl Bunting, Corncrake, Jackdaw, Meadow birds, Rock Ptarmigans, Rook, Sand Martin, Woodpeckers, Woodpecker territory |
 |
Acoustic data | Acoustic data |
 |
Number of passages | Woodcock |
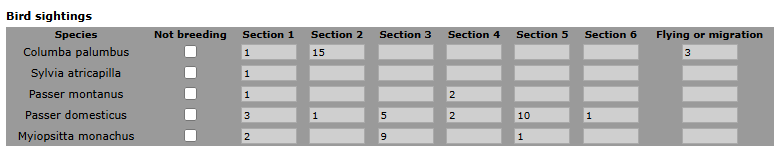 |
Count per sections | SOCC |
If the protocol you are looking for is not on the table, it may not allow entering observation via local portal. Use NaturaList instead.
Number of individuals
· Requires entering species and number of individuals.
· It may also require Count precision, depending on the protocol.
· It may also require Atlas code, depending on local portal, species and time of year.
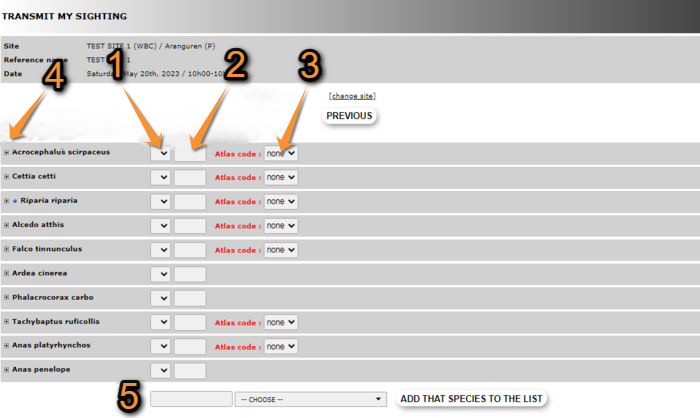
Number of individuals model.
1. Select precision count from the expandable menu.
2. Type number of individuals of the selected species.
3. Select Atlas code from the expandable menu.
4. Open the additional information panel.
5. Report a new species not on the list: Type the species name or part of it on the left, and select species name on the expandable menu on the right.
· A list may be already given or the observer needs to indicate the species, depending on the protocol and the local portal. Select the option on previous screen:
· CONTINUE WITH THE BASIC LIST: Contains only species relevant to the protocol.
· CONTINUE WITH THE EXTENDED LIST: Contains species relevant to the protocol and other related ones.
· Open the additional information panel to provide more information.
Distance of individuals
· Requires indicating number of individuals of each species at its distance (in range) from observer.
· It may also require Atlas code depending on the local portal, the species and the time of year.

SHOC. Entering observations.
1. Select species if not on a list.
2. Type number of individuals in the corresponding distance class.
3. Enter atlas code.
· A list may be already given or the observer needs to indicate the species, depending on the protocol and the local portal. Select the option on previous screen:
· NEXT: Empty list. The observer types all species names.
· ENTRY WITH LIST OF SPECIES ALREADY OBSERVED: The list given contains all species the observer has reported in previous visits of this protocol.
· ENTRY WITH LIST OF THE MOST FREQUENT SPECIES: The list given contains only the most frequent species reported by the observer on this protocol.
· BLANK DAILY FORM: No list is given. The observer types all species names.
· Open the additional information panel to provide more information.
Position of individuals
· Requires positioning the individual on a map before entering any other data.
1. Select the species from the tabs above, when more than one species is given.
2. Select behaviour of the individual/s. Its corresponding Atlas code will automatically load.
See Mobile interface > Additional information panel > Entering records > Entering additional information on mapping protocols for more information.
3. Place observation on the map.
See Web interface > Local portals > Navigating the map if necessary for more on navigating the map.
· Depending on the protocol, the map can include a radius around the observer.
See Mobile interface > Navigating the map > Radius to know more about radius.

Position of individuals model.
1. Select species.
2. Select behaviour.
3. Place observation.
4. Fill in information under the map.
Note the dot colour on the top right corner matches the colour of observation on the map.
Use  to delete observation.

Filling information. Position of individuals model. Example.
1. Open extended panel.
2. Delete age/sex class.
3. Delete observation.
4. Additional information panel.
Design differs from protocol to protocol but can include:
· number of individuals at the selected position
· age and sex classes of observation
· atlas code
· altitude
· Nest information
| Intact nests | Type number of intact nests. |
| Nest location | Select next position from the expandable menu. |
| Occupied nests | Type number of occupied nests. |
| Potential breeding pairs | Type number of breeding pairs. |

Short additional information panel. Details.
1. Enter number of individuals: Type number on the left and select count precision from the expandable menu on the right.
2. Altitude: Type new altitud if necessary.
3. Atlas code: Select a new atlas code from the expandable menu. Meaning of the selected code is indicated by the field side.
4. Age/sex classes: Type number of individuals on the left hand field and select from the expandable menus age and sex of typed individuals. Select circumstances (behaviour) from the expandable menu, when asked (not available in all protocols).
· Open the additional information panel to provide more information.
Acoustic data
· Specific for Acoustic data protocol.
· No other protocol follows this model.
· See Acoustic data protocol for details.
Number of passages
· Requires entering information about individuals flying over.
Use  to delete observation.

Number of passages model. Example.
1. Add a new passage.
2. Select time of passage.
3. Number of individuals flying over.
4. Delete entry.
Count per sections
· Requires separating the observations by transect section.
1. Enter species name, or part of it, on the let, and select name from the expandable menu on the right.
2. Type number of individuals of the selected species on the section of protocol that corresponds.

Count per sections. Example.
1. Enter species name.
2. Type number of individuals per section.
[Top to Add observations]
[Top to Preparation and data]
[Back to Protocols]
Ending the protocol

Ending list. Example.
When all species are recorded, indicate
- 1. I recorded all species of the program if you identified and recorded all species seen or heard that are of interest to the protocol, or
- 2. I recorded all species (=full observation list) if besides all species of interest to the protocol, you also identified and recorded all other species seen or heard. Note you can only record in this list species identified within the designated study area. Any species recorded outside of the study area should be submitted as an individual record.
Then, you will be taken to set parameters to start a new protocol.
[Top to Add observations]
[Top to Preparation and data]
[Back to Protocols]
Results

Protocol. Results.
See some general statistics about your surveys results on a page by graphs, list and list plus percent of frequency occurrence .
To see specific counts results go to Census results or Display on map.
Graphs Number of species and Total number :

Protocol. Graphs.
Number of species
Represents the number of species recorded during each visit.
In the example in the image above, the user recorded 7 species during the first visit of 2021, 4 on the second visit, and 5 on each of the last two. Equally, no species were recorded in any of the 4 visits of 2023.
Click on the download icon (encircled in picture) to download the data as a .CVS file, that can be uploaded into R software.
Total number
Represents the number of individuals recorded in each visit, pulling all species together.
From the example in the image above, the user recorded 53 individuals on the first visit of 2021, 14 on the second and so on, and none in any of the visits in 2023.
Click on the download icon (encircled in picture) to download the data as a .CVS file, that can be uploaded into R software.
Statistics and results of recorded species:
- Last visit
List of species recorded at the selected site during the last visit. Use arrows under titles to alternate between ascending and descending order (see image as an example). Orange arrow in image indicates the date of last visit.

Protocol. Results last visit.
Total numbers: Total number of individuals of the selected species recorded on the last visit only.
- Species only reported during the last visit
List of species recorded only during the last visit and no other visit. Use arrows under titles to alternate between ascending and descending order (see image as an example). Orange arrow in image indicates the date of the last visit.
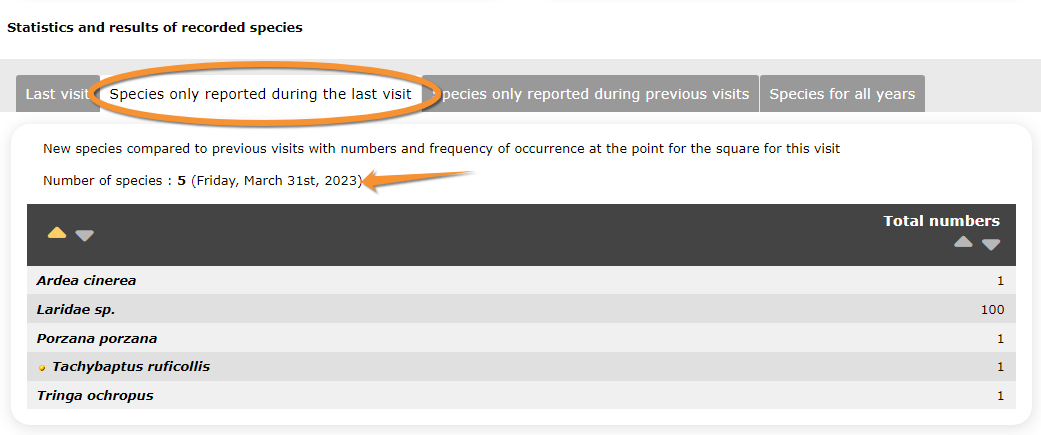
Protocol. Species only of last visit.
Total numbers: Number of individuals of the selected species recorded during the last visit.
- Species only reported during previous visits
List of species that were not reported during the last visit but were seen in one of the previous ones. Use arrows under titles to alternate between ascending and descending order (see image as an example). Orange arrow in image indicates the date of last visit.

Protocol. Species only of previous visit.
Last date: Last date the selected species was recorded.
Total numbers: Number of individuals recorded on the last date the species was seen.
- Species for all years
List of all species reported by the user at this site, and the frequency of occurence. Use arrows under titles to alternate between ascending and descending order (see image as an example). Orange arrow in image indicates the date of last visit.

Protocol. Results for all species.
Average frequence of occurrence: Proportion of visits in which the species was recorded.
For example, Anas platyrhynchos has been recorded in all visits at this site, Anas clypeata has only been recorded in half of them, and Anas acuta only in a 12.5% of them.
Total numbers: Total number of recordings for the species across all visits and years for the site.
[Top to Results]
[Top to Preparation and data]
[Back to Protocols]
Display on map
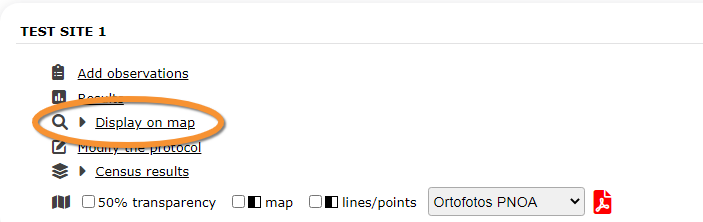
Protocol. Display on map.
For the selected site, see the polygon, line or point to survey on a map. To know how to navigate the map, refer to wiki section Web interface > Navigating the map.
Here you can:
- Visualize your polygon/transect/point to count
- Generate a printable map version of your census area

Protocol. Display polygon on a map.
[Top to Display on map]
[Top to Preparation and data]
[Back to Protocols]
Modify the protocol

Protocol. Modify the protocol.
Modify the site to survey. Only users that have been granted this right will have access to the section.
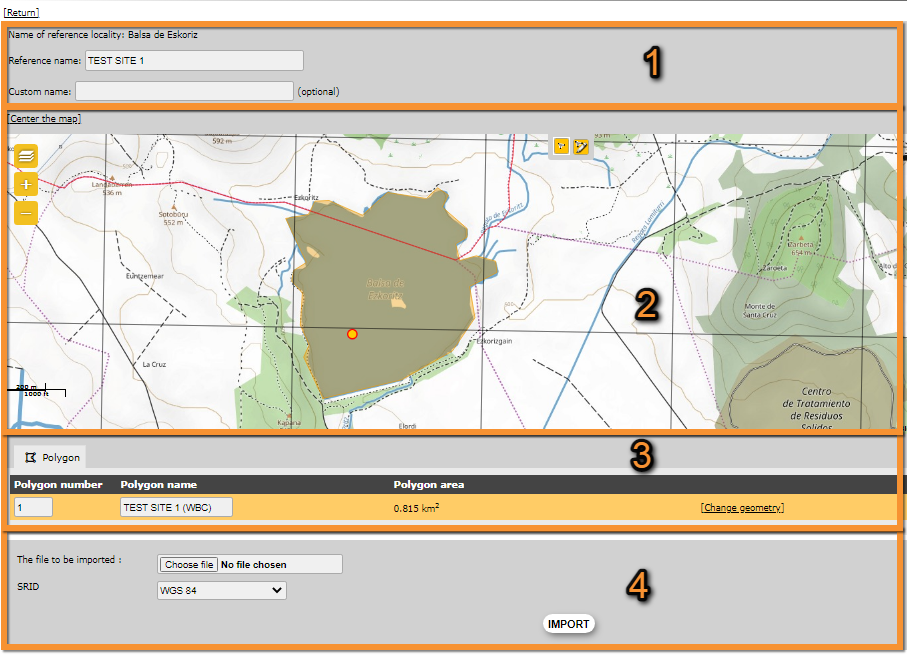
Protocol. Modify protocol.
Return: Go to previous screen without saving.
Centre the map: Centre the map on the polygon, line or point.
- 1. Modify name
Add or amend site custom name. Site reference name can only be changed by administrators.

Protocol. Modify site name.
Name of reference locality: Location under which all objects from the protocol are attached to. It is determined by administrators when creating the site and cannot be changed afterwards.
Reference name: Site name officially defined for the protocol, can be a number, name or any other code.
Custom name: Name under which the site is also known or name the observer wants to give to the site.
- 2. Modify polygon, line or point
Change the shape of the polygon, line or position of the point. See Web interface > Navigating the map to know how to move around the map, and Web interface > Geometry editor to know how to draw or modify a polygon, line or point.

Protocol. Modify site polygon/transect/point.
Centre the map: Centres the map to the site to survey.
- 3. Download polygon, line or point
Download the polygon, line or point as a shapefile, to use in the future or to modify it with an external GIS program.

Protocol. Download polygon/transect/point.
Polygon/transect/point number: indicates the site the entry represents in locations with more than one study site. It can be a polygon, a line or a point.
Polygon/transect/point name: site name. It can be a polygon, a line or a point.
Polygon area: area of the polygon.
5. Change geometry: Click to upload a new shapefile. It will open a menu identical to next subsection (see image).
6. Export: Click on the icon to download the corresponding polygon, line or point as a shapefile. Modify it on a GIS and upload (see next subsection to upload).
- 4. Upload site
Import an existing polygon, line or point.

Protocol. Upload polygon.
The file to be imported: Click on Choose file to select the site from your computer. The file name will be displayed next to the button.
SRID: Choose from the expandable menu the Datum the imported shapefile is on.
IMPORT: Click to upload the site.
[Top to Modify the protocol]
[Top to Preparation and data]
[Back to Protocols]
Census results

Protocol. Census results.
Click on Census results to see all available years with data for this site (see image below). Select the one to visualise.
Sites with no records do not appear on the menu. You can only see your own records, unless you are a protocol administrator. To know more about administrators, see wiki section Administration.

Protocol. Selecting year to visualise.
A new window will show all your records at the selected site. A grey section on top contains general information about this particular count, while the bottom part refers to the observations.
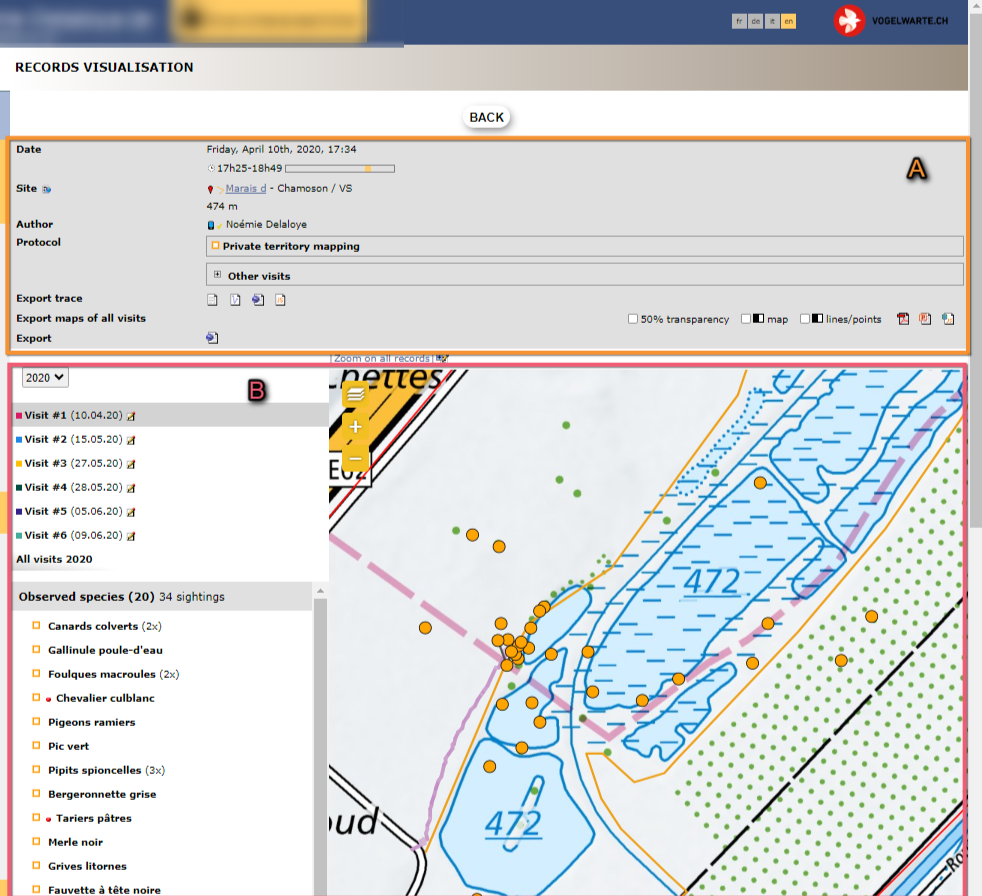
1. Protocol section
General information about the selected visit at the selected site.

Browsing protocol results.
4. Date
5. Site
6. Author
7. General comment
8. Protocol
9. Export maps of all visits
10. Export data
- 4. Date
Date and time of selected survey. Notice the bar representing the extent of the day, and the yellow marking indicating time of day the survey took place (see image Time of survey).
- 5. Site
Site of selected survey.

Browsing protocol results. Site.
11. Click on site name to open a new window with more information about the site, and its map.
12. Altitude.
13. Click on icon to access all observations associated with the site as in the Search engine.
- 6. Author
Name of observer. If you are an administrator, click on name to access their personal card. A cell phone icon in front of the name indicates the data has been submitted from NaturaList.
- 7. General comment
Comment about the selected survey, when existing.
- 8. Protocol
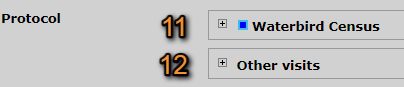
Protocol summary.
14. Protocol summary: Click on the + sign to expand the panel, and on the - sign to collapse when opened (encircled on image).
15. List of all visits: Click on the + sign to expand the panel, and on the - sign to collapse when opened (encircled on image).
- 9. Export maps of all visits
Download maps as described in wiki section Web interface > Protocols > Preparation and data > Download map below.
- 10. Export data
Export your data as described in wiki section Web interface > Exporting your data.
[Top to Census results]
[Back to Preparation and data]
[Back to Protocols]
2. Observations section
List of all visits and their results.

- 16. Visits
List of al visits to the site for the selected period. Use the bar on the right to see all visits if necessary.

Protocol. Browsing visits.
18. Select from the expandable menu a different period if necessary.
19. Select the visit you would like to visualise. The selected visit will be highlighted in grey.
20. Click on notebook icon to modify / visualise the selected visit.
NOTE:
a danger sign besides the census date indicates census were entered in uncorrelated dates even when the date introduced is the correct one.
Do enter census in chronological order to avoid this issue.
- 17. Species
List of species recorded on the selected visit to this site. If necessary, move the right hand bar to see the full list. See wiki section Various > Symbols cheatsheet to know correspondence of symbols next to species names.
If your observations were submitted through the website, records are associated to a protocol polygon but their precise location within the polygon is unknown. No observations will be displayed in the map (see image as an example).
If your observations were submitted through NaturaList, records are displayed on the map at their precise location within the polygon (see image as an example).
Entering observations through the local portal: Observations will not be represented on the Map section.
Entering observations through NaturaList: Observations will be represented on the Map section at their recorded position (see image Protocol. Records visualisation on the map on next section).
[Top to Census results]
[Back to Preparation and data]
[Back to Protocols]
3. Map section
See the polygon of the surveyed site and all observations for the selected visit, if they were submitted through NaturaList. To know how to navigate the map, visit wiki section Web interface > Navigating the map.
To better visualise observations, select a species from the Observed species section left of the map (see sub-section 2. Species above).
· All records of the selected species are displayed in red.
· On the left hand column, the selected species is highlighted in grey.
· Summary of observation and time of observation is displayed next to the observation position.
See Mobile interface > Navigating the map > Summary of observations for decoding summary of observations.
· The selected record also has a blue circle around it.
· Not selected species continue being displayed in yellow.
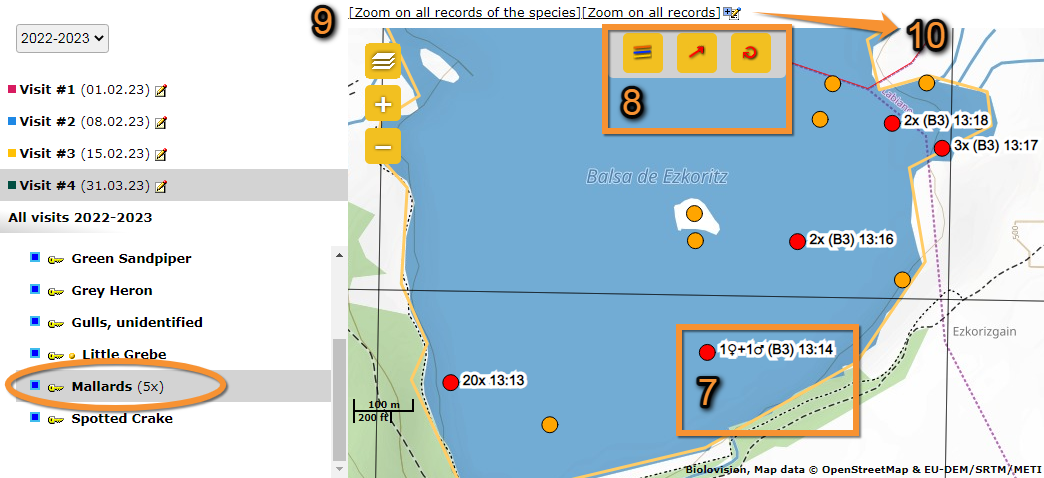
Protocol. Records visualisation on the map.
21. Summary of observations
22. Additional functions
23. Zoom
24. Add species to the form
- 21. Summary of observations
- 21. Summary of observations
Details associated to the selected observation are summarised next to its position (represented by a red dot). To see how to interpret it, refer to wiki section Mobile interface > Understanding a summary of observations.
- 22. Additional functions
- 22. Additional functions
Click on any record to open a menu with additional functions. Red dots indicate observations where additional functions apply to. Note not all protocols allow all functions and therefore, some protocols may not display all icons.

Add or modify additional information in the local portal.
 |
25. Individuals of the same species:: Select/deselect all individuals of the same species, and show their details. If a relationship between the sightings have been recorded, it will be shown/hidden here. |
 |
26. Flight direction: Adds flight direction if necessary. To add flight direction, -click on the arrow icon, |
 |
27. Circle flight: Individual flying in circles. |
 |
28. Access details and edit: Access record details including information about the list and other species from the same list, as if from Home > Main menu (left column) > All my observations. The individual the function applies to is indicated by a blue circle around it. |
 |
29. Delete: Delete the selected record. You will be prompted to confirm. |
- 23. Zoom
- 23. Zoom
Select to zoom and center observations. Choose between
Zoom on all records of the species to see and center all records of the selected species.
Zoom on all records to see and center all records of this visit. When selected this option, all records will be displayed even when they were previously hidden.
- 24. Add a species to the form
- 24. Add a species to the form
Add a new entry to the selected visit. Enter information as for a list. See wiki section Web interface > Submitting records > Step 3/3: Submit my sighting > As if accessed from a list > List section.
[Top to Census results]
[Back to Preparation and data]
[Back to Protocols]
Download map
It is possible to download the map, for example if you cannot record observations on your device while in the field, or to keep a second copy of your data for dataproof. You can choose the map layer (available layers depend on the local portal), the transparency of the map and the colour mode (colour vs. black and white), in any combination, and download as a pdf file.
Note final design depends on the protocol and the local portal.
The PDF file displays:
- the map of your protocol area with the polygon, points and/or transects to survey
- a QR code that, when scanned, drives you directly to the place on the map while entering data on the web
- the name of the local portal the map comes from
- the GPS coordinates, Atitude, Reference place name for the polygon, points or transect, and Reference name

Protocol. Download map.
50% transparency: Check to print the map with 50% of transparency (see image Example 50% transparency, default map on top, transparent map below).
Map: Check to print the map in black and white (see image Example black and white, default map on top, black and white below). It may help to reduce ink and is compatible to back and white printers.
Lines/points: Check to delimit the polygon to survey with dots instead of lines (see image Example lines and points, map with lines on top (defalut option), with points below).
1. Choose from the expandable menu the map layer you would like to print.
2. Click on pdf icon to download the map as a pdf.
[Top to Download map]
[Back to Preparation and data]
[Back to Protocols]
Check data
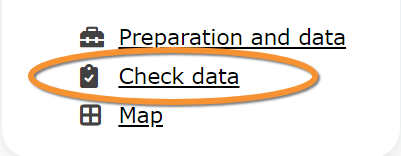
Protocol. Check data.
Calendar showing visits to different sites and number of species detected.
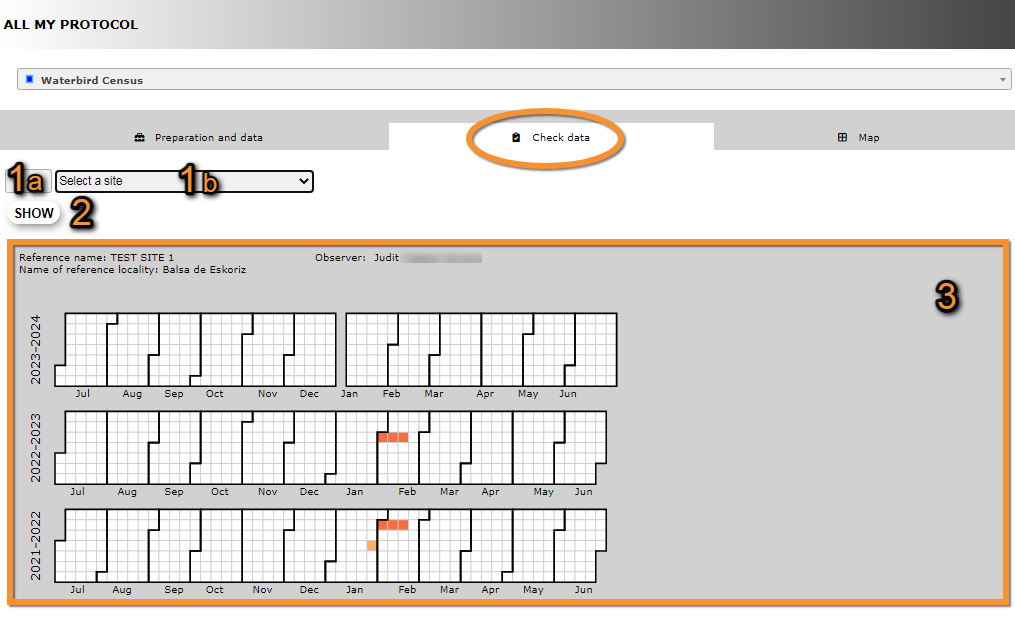
Protocol. Check data.
- 1. Select site
Select a site by typing the name, or part of the name, in the left field (1a) and/or selecting from the expandable menu on the right (1b). Click 'Select a site' from the expandable menu to revert the selection and visualise all site again.
- 2. SHOW
Click to apply selection.
- 3. Graphic area
See a calendar with dates in which surveys took place (colored cells). Move pointer on any colored cell to see the date the census took place and the number of species recorded. The darker the colour, the larger number of species.
Click on any coloured cell to see on a new window a list of species recorded on that date. Refer to wiki section Web interface > Codes and symbols to understand the meaning of the different symbols associated to each observation.
[Top to Check data]
[Back to Protocols]
Map

Map.
Map and statistics for the site. You can only see your own site/s unless you are a user with special rights or an administrator.
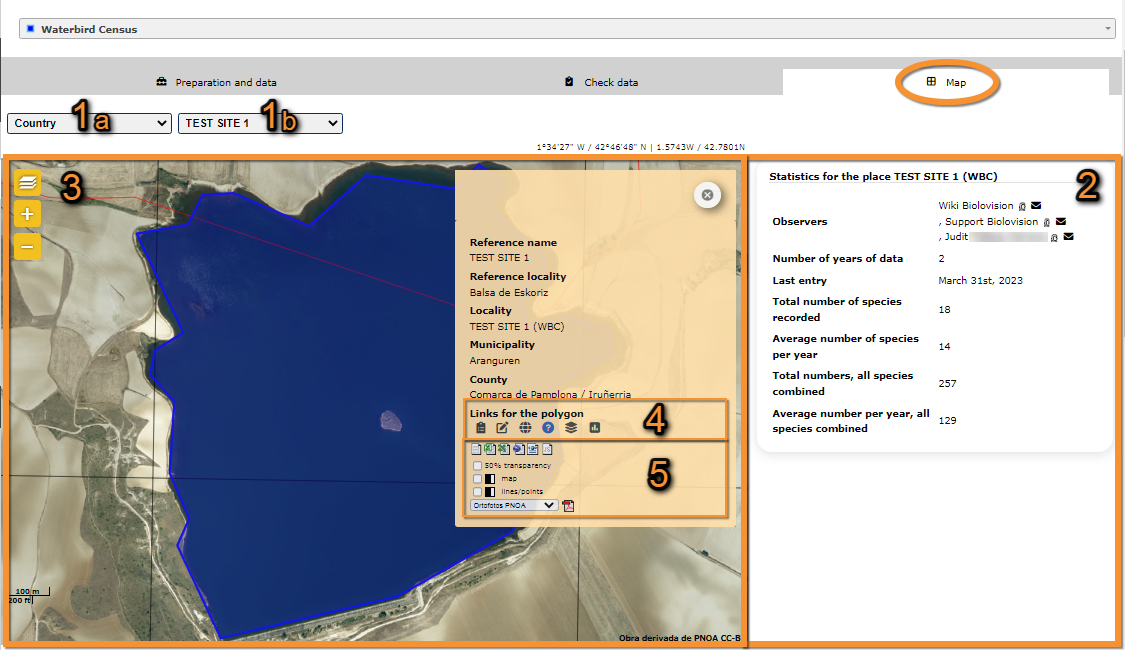
- 1. Select site
Select area on the left hand expandable menu (1a) and/or study site on the right hand menu (1b).
· 'Country' on the area menu refers to the whole area covered by the local portal you are in.
· Check 'My census areas' to automatically select only all your census areas.
- 2. Statistics
Basic statistics about the selected area or site/sites.
- Statistics for the displayed region
- Statistics for the displayed region
Statistics when more than one site is included in the selected area. Data from all sites are pooled in the results.
- Statistics for square
- Statistics for square
Statistics when only one site is included in the search. It includes names of all users involved, and it is possible to contact them (icon 4) and/see all records associated by the user (icon 5).
|
Statistics per area. |
Statistics per site.
4. Email user. It will open the default e-mail client. |
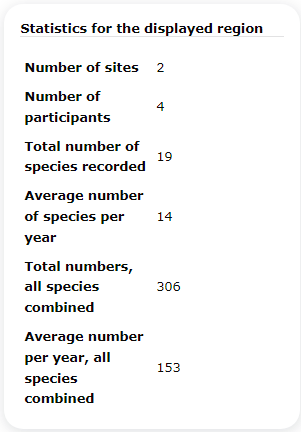
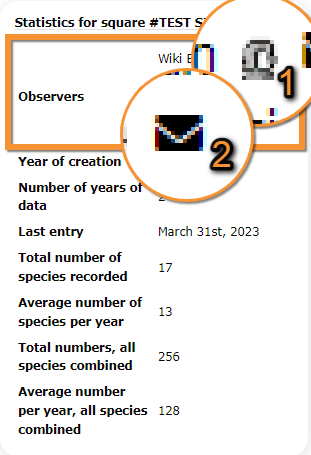
- 3. Map area
Map with the polygons/transects/points to survey highlighted in pink. Visit wiki section Web interface > Navigating the map to know how to navigate the map.
Select a site on the right hand expandable menu (see 1b) when there is more than one site per area.
Click on the desired polygon to see details (see image below).

- 6. Quick links
Get quick access to other functions of the protocol. Icon may be grouped per polygon/transect/point/square and are protocol dependent. You may not encounter all of them in each protocol.
 |
Add observations Add further observations to this site or any other as described in wiki section Web interface > Protocols > Preparation and data > Add observations. |
 |
All site data See all records associated to the site. From this screen (see image below) you can access other data as in the Search engine tool. |
|
Adding observations to a polygon.
| |
 |
Data visualisation See all protocols associated to this site, as described in Protocols > Preparation and data > Census results. |
 |
List of records to be checked See all records associated to the site needing verification. This icon is only available to administrators. |
 |
Modify the protocol Modify the protocol as described in wiki section Web > Protocols > Preparation and data > Modify the protocol. |
 |
Results See results as described in wiki section Web interface > Protocols > Preparation and data > Results. |

- 7. Export and download
Export your data and/or download protocol maps. Place the pointer on icons to see the meaning of each of them.
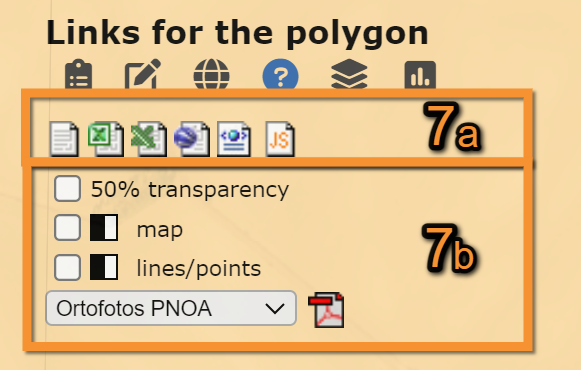



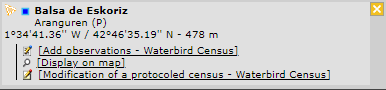



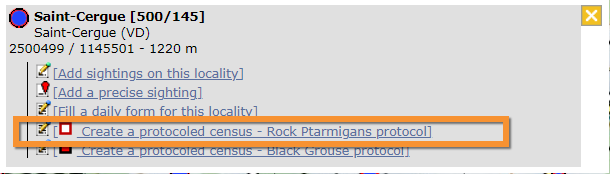


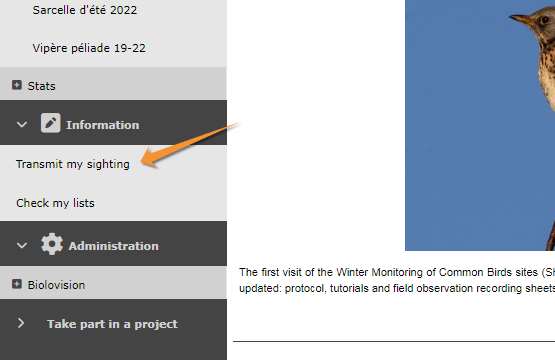


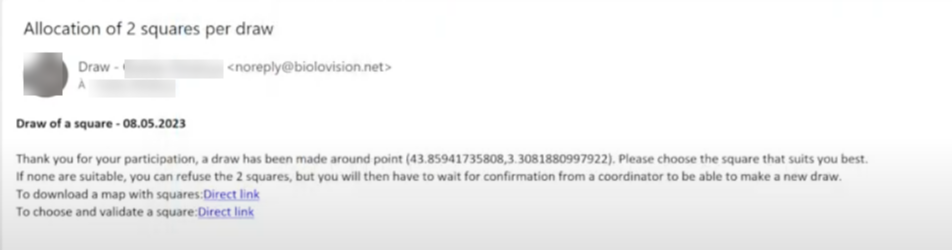

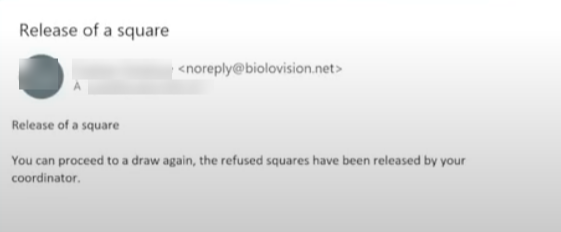


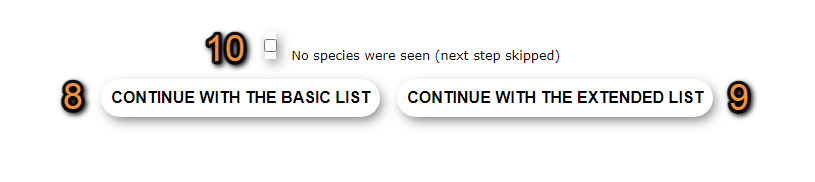


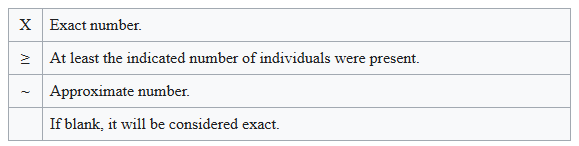



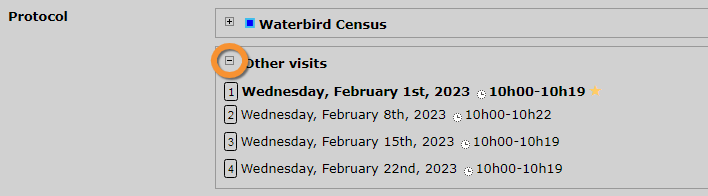



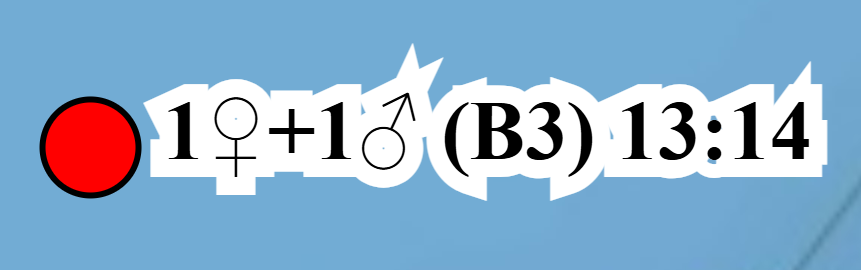
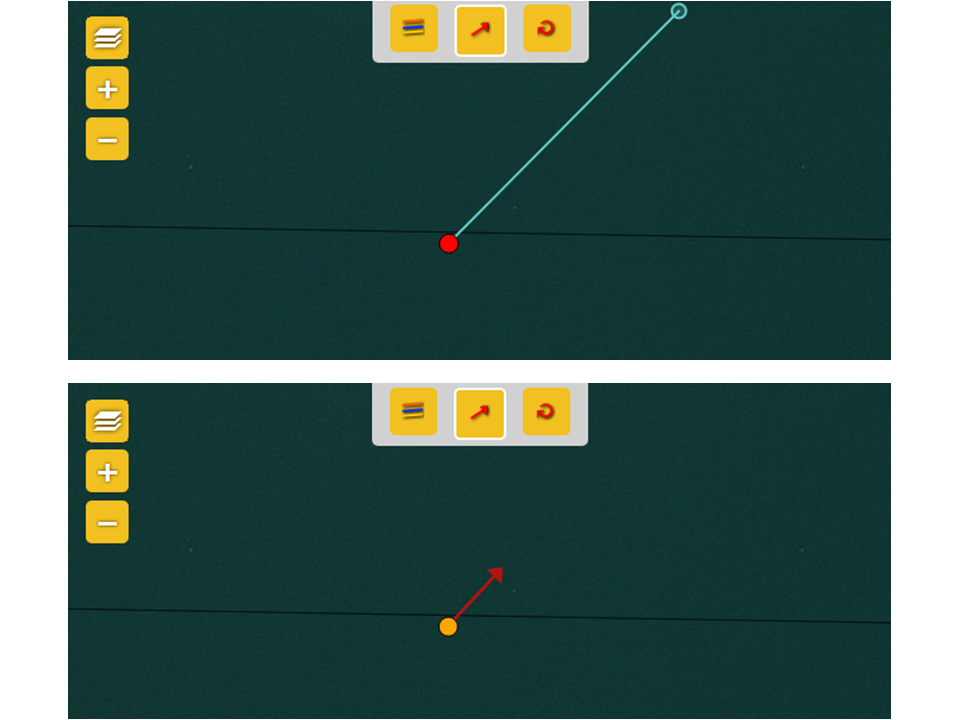


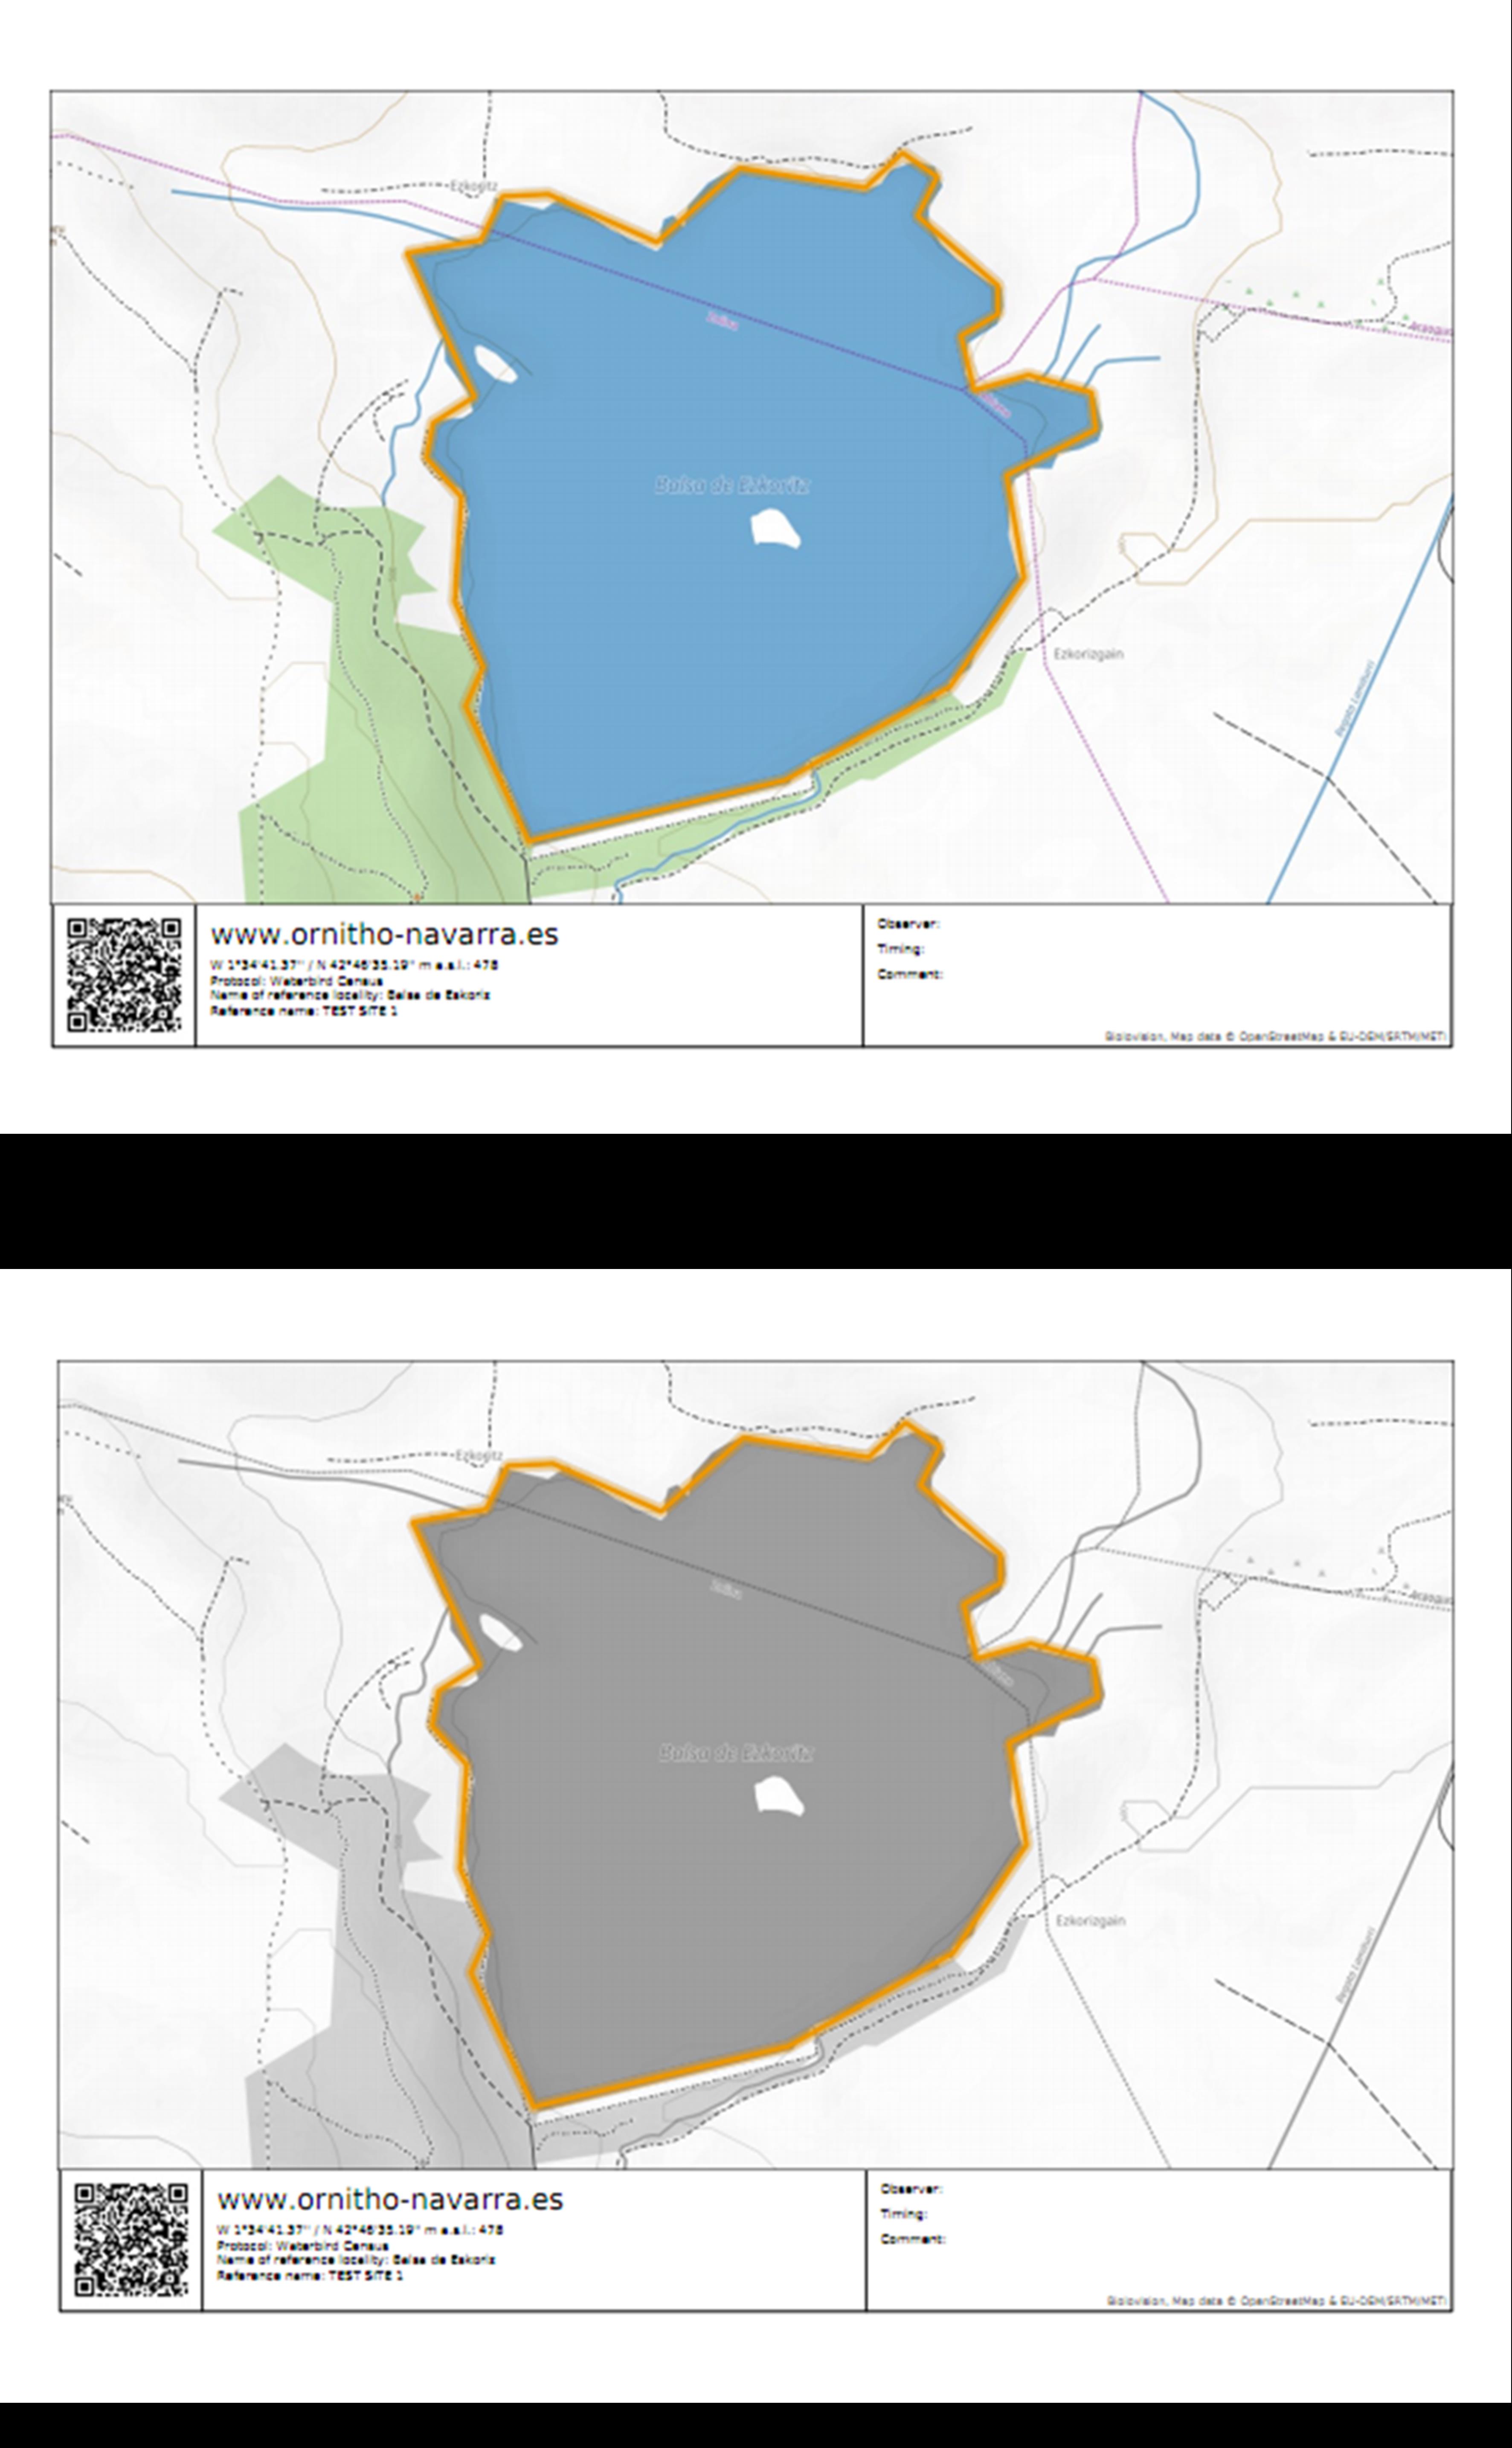
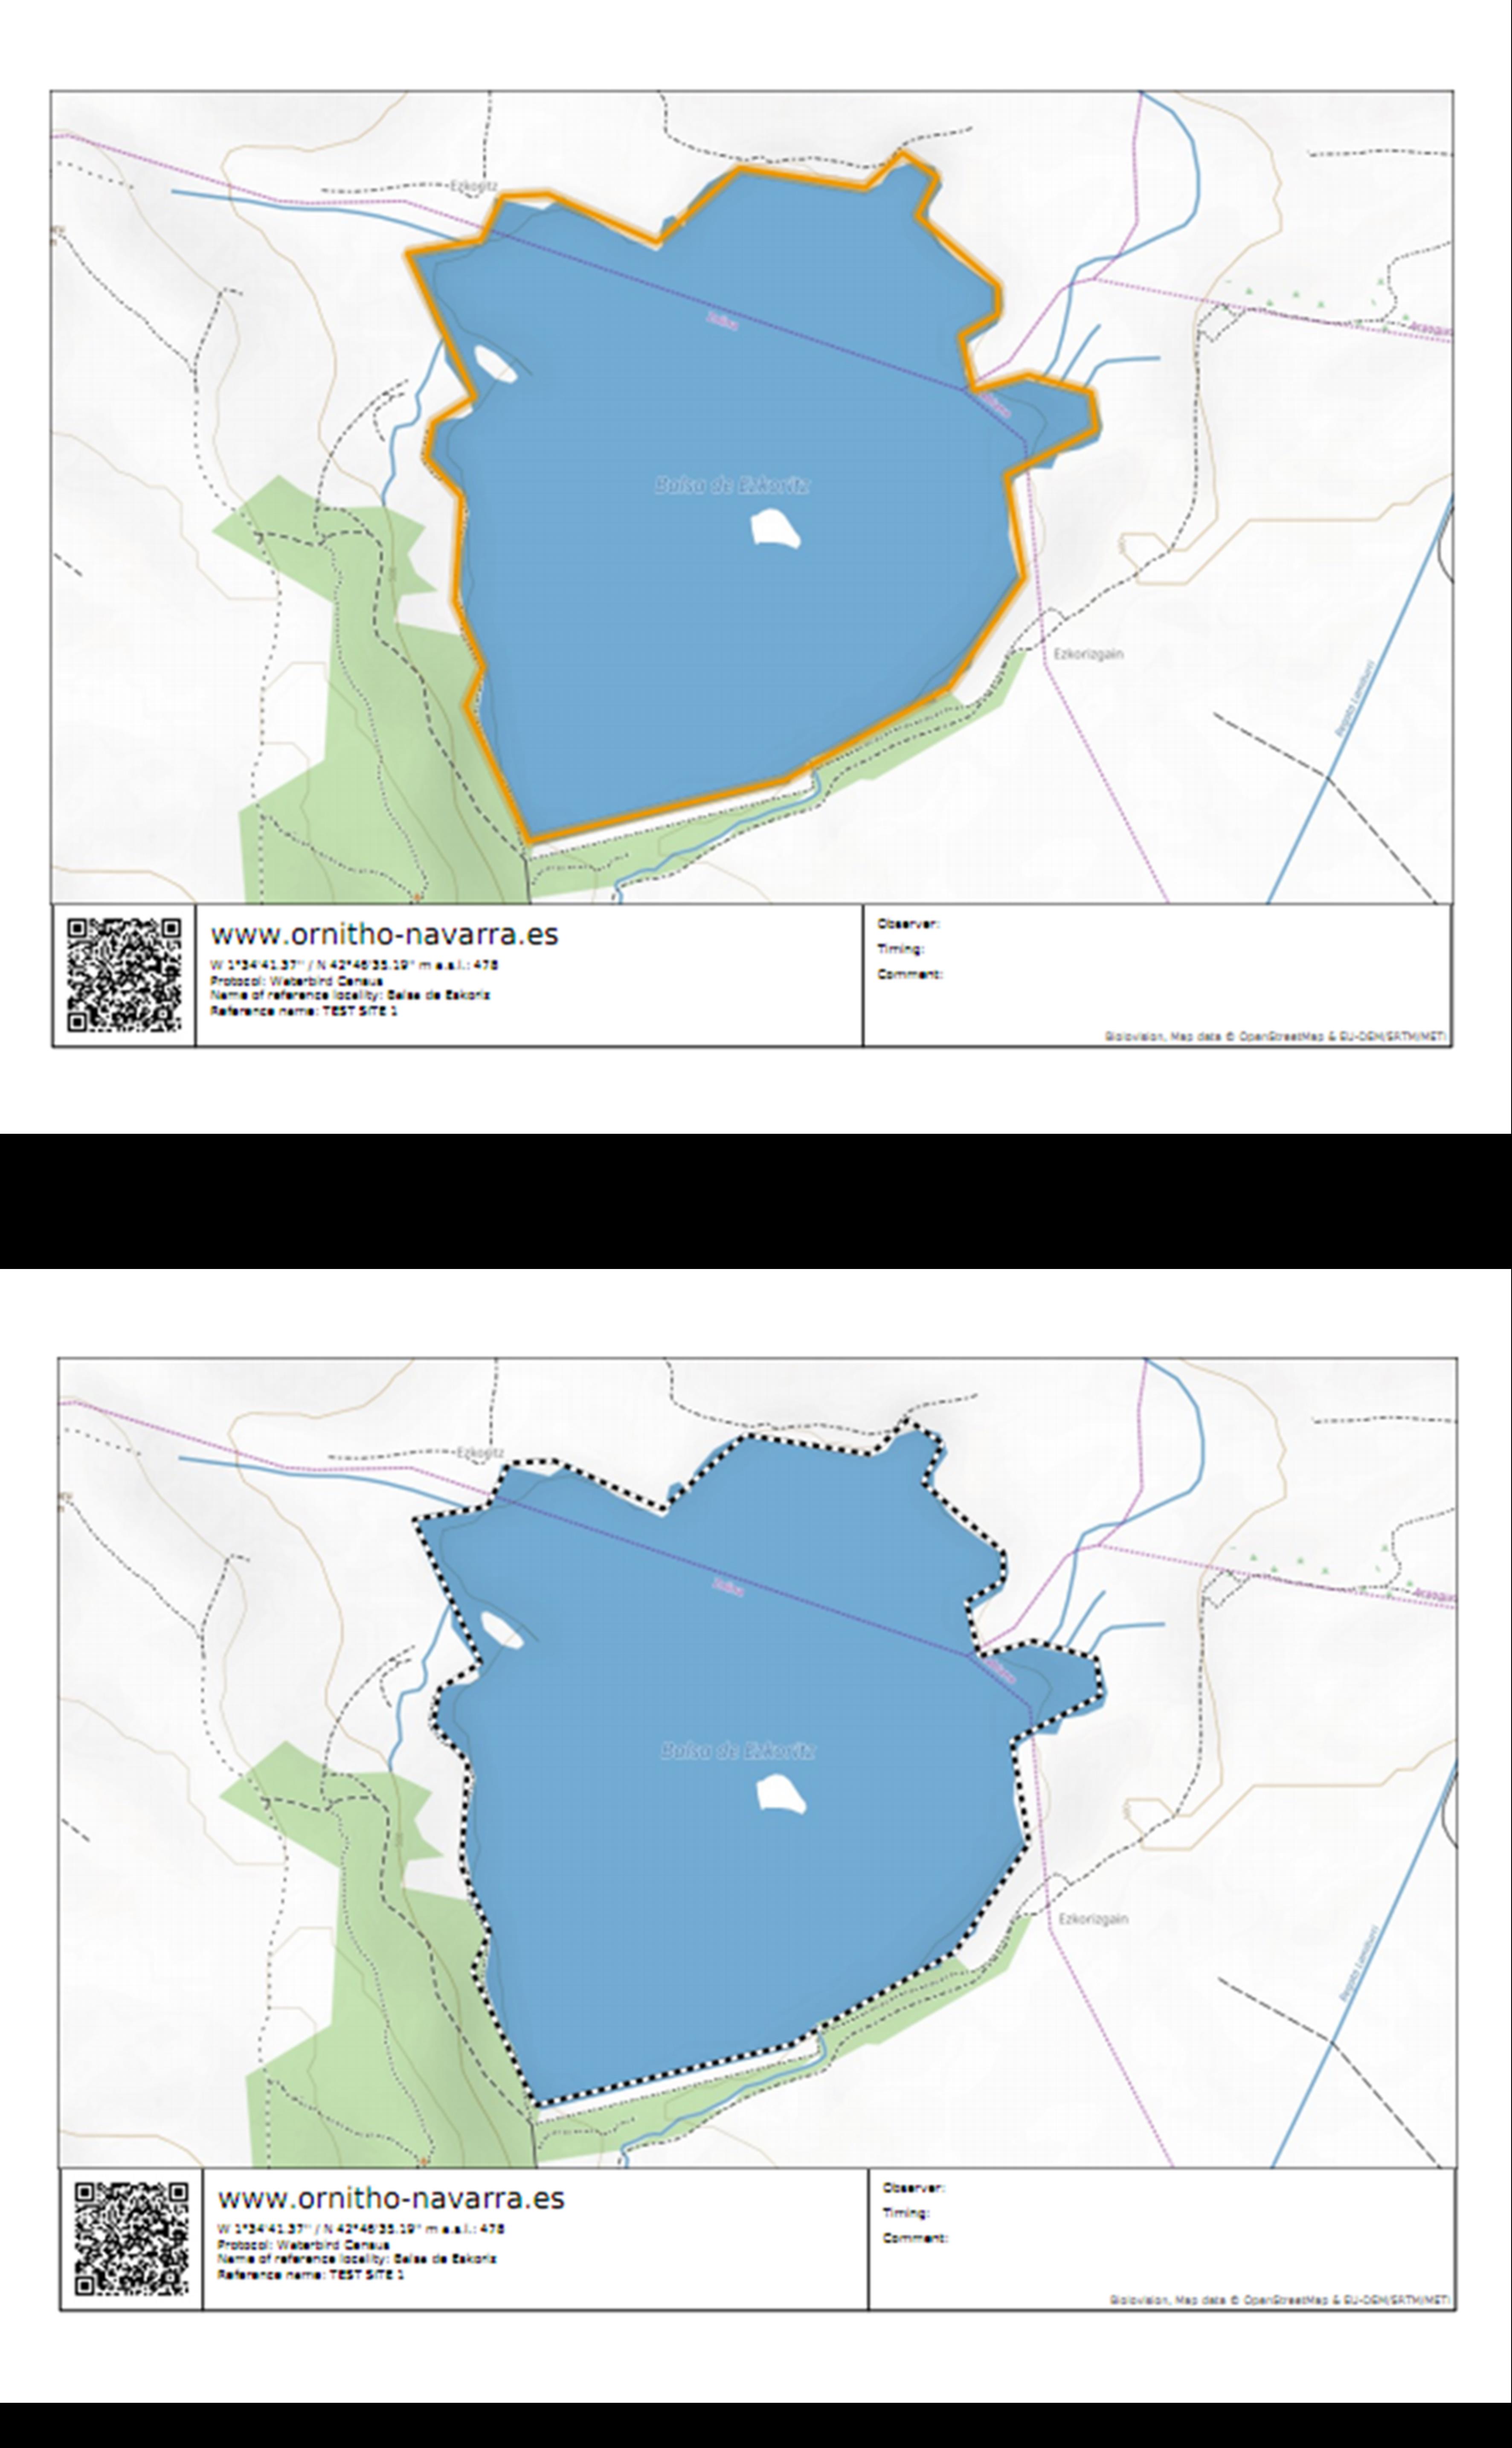


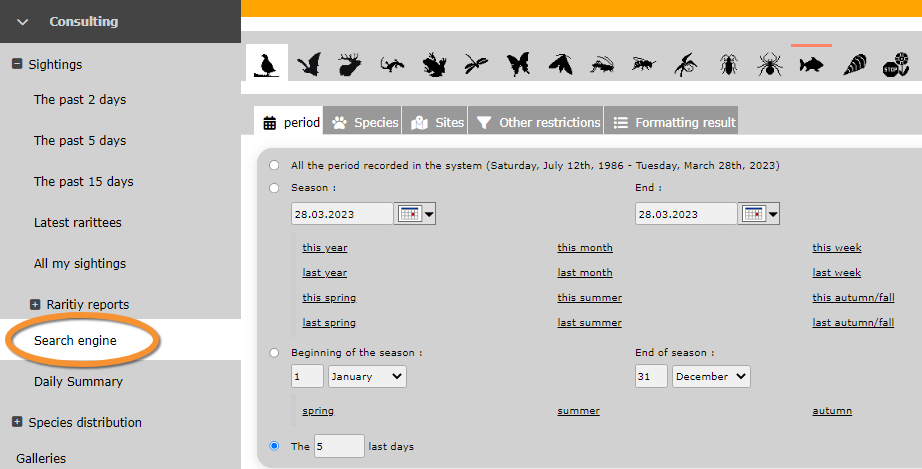
Visit wiki section Web interface > Exporting your data for more information on exporting, or wiki section Web interface > Protocols > Preparation and data > Download map for more information on downloading maps.